Just before Christmas, I posted a playmat/bag that I made for my kids’ Legos, and it became one of my most liked posts this year with 85+ people saving it! I was so surprised, but it is a very clever idea.
I’ve seen a few bags like this that you can buy online, and there are a few tutorials on Pinterest, too. But I thought that since I was making another one for my kids’ Duplo Legos, I would take a few pictures of the process and share it here.
It’s super easy and fairly quick to make, although sewing in a circle multiple times can be a little mind numbing, depending on the size of the circle. You can make it any size you want and use it for lots of different things like toys, makeup, or anything you need to layout and clean up quickly. If you make smaller ones, you may want to adjust the binding to be thinner.
Here is what you will need before you get started:
Iron
Scissors
Pins
Safety Pin
Rope or string
Cotton Fabric to make 3″ wide bias binding
Cotton Fabric for the circles
Here is how much I needed for my large playmat:
– 5 yards of Rope or String
– 1/2 yard ~60″ wide fabric to make bias binding, makes about 5 yards
– 3 yards ~60″ wide fabric for the two circles OR 1.5 yards each if you’re using different fabrics
1 – If you are using the same fabric for both circles, cut the fabric in half so that you have 2 pieces that are 1.5 yards long.
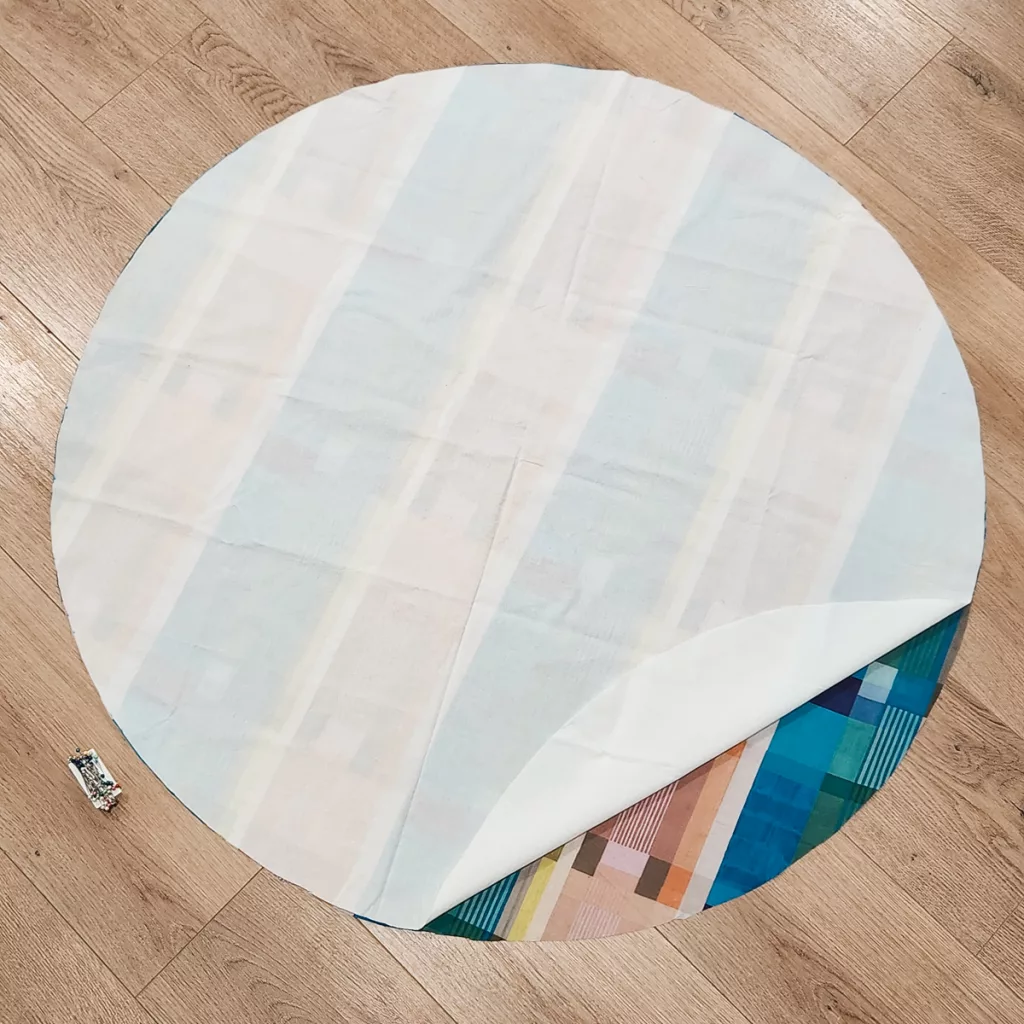
Next, cut the fabric into 2 circles that are the exact same size and lay them right sides together. Here is a video tutorial of how I cut my circles. (Note: After folding the fabric, I measured out as much as I could to make the circles as large as the fabric allowed.)
Then pin both circles together all the way around about 5″ in from the outer edge. This is just to secure the fabric circles together, and it gives enough room to add the bias tape in the next step.
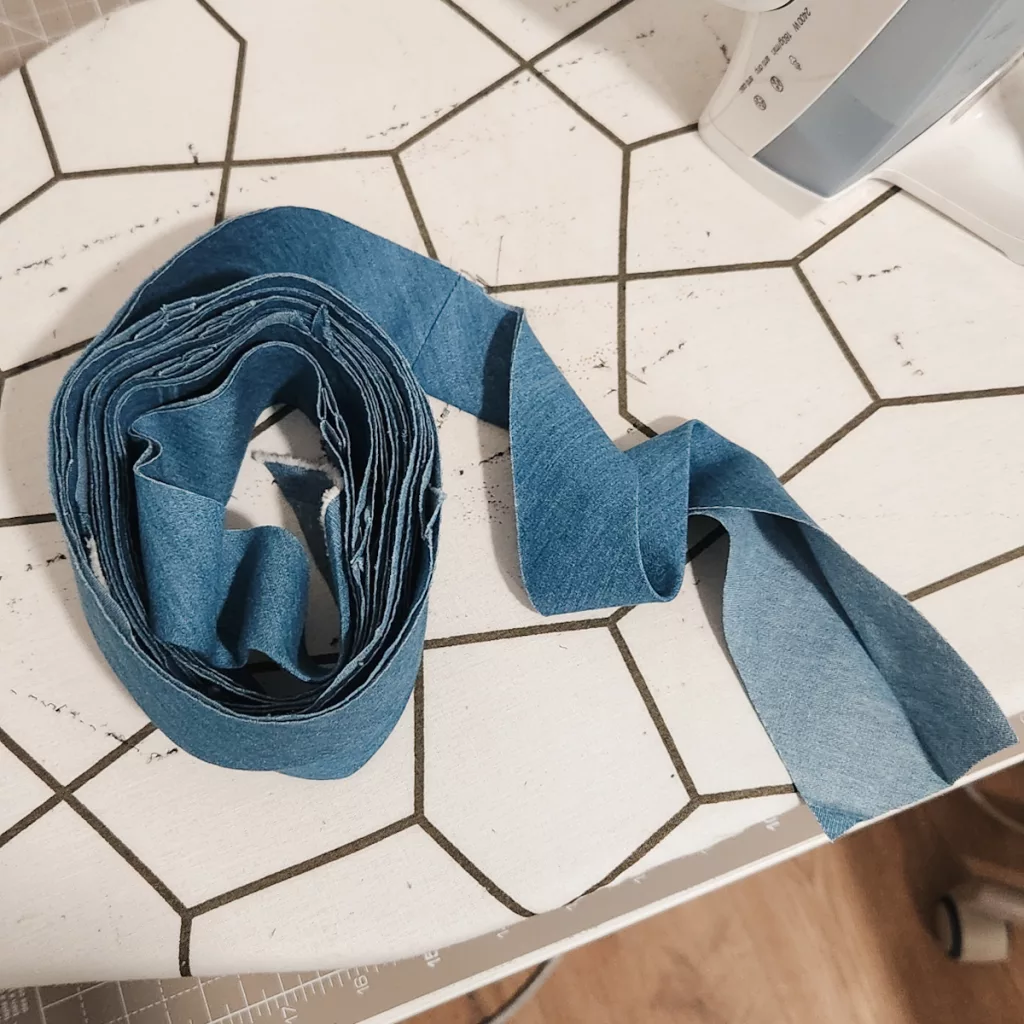
2 – Make 3″ wide bias binding. Here is a video tutorial of how I made continuous bias tape. Once the bias tape is finished, iron it in half with the wrong sides facing. Alternatively, you can buy 3″ bias binding from the store already made.
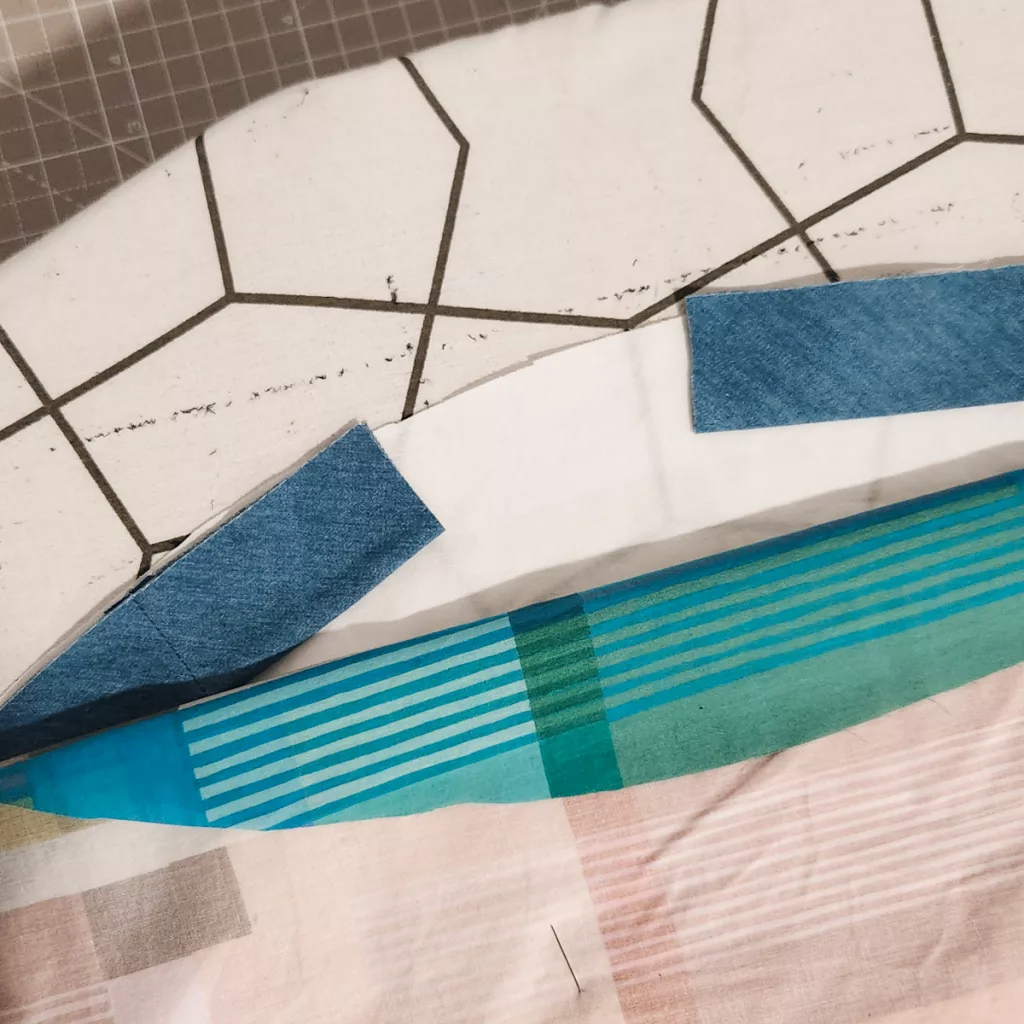
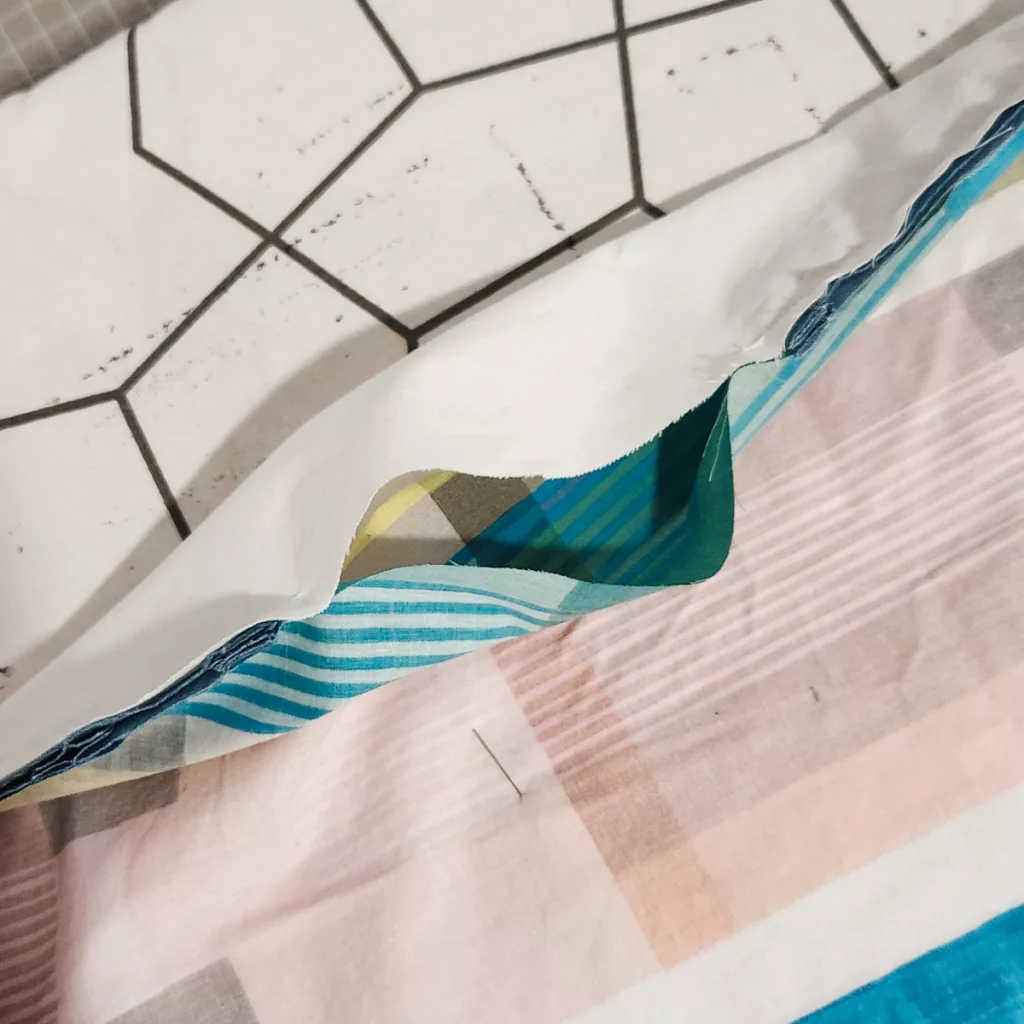
3 – Insert the folded bias binding in-between the two circles with the raw edge of the binding toward the outside, and the folded edge toward the inside of the circles. Pin all the way around, and leave a few inches of space between the start and end of the bias binding. I left about 4-5″ of space for my larger playmats.
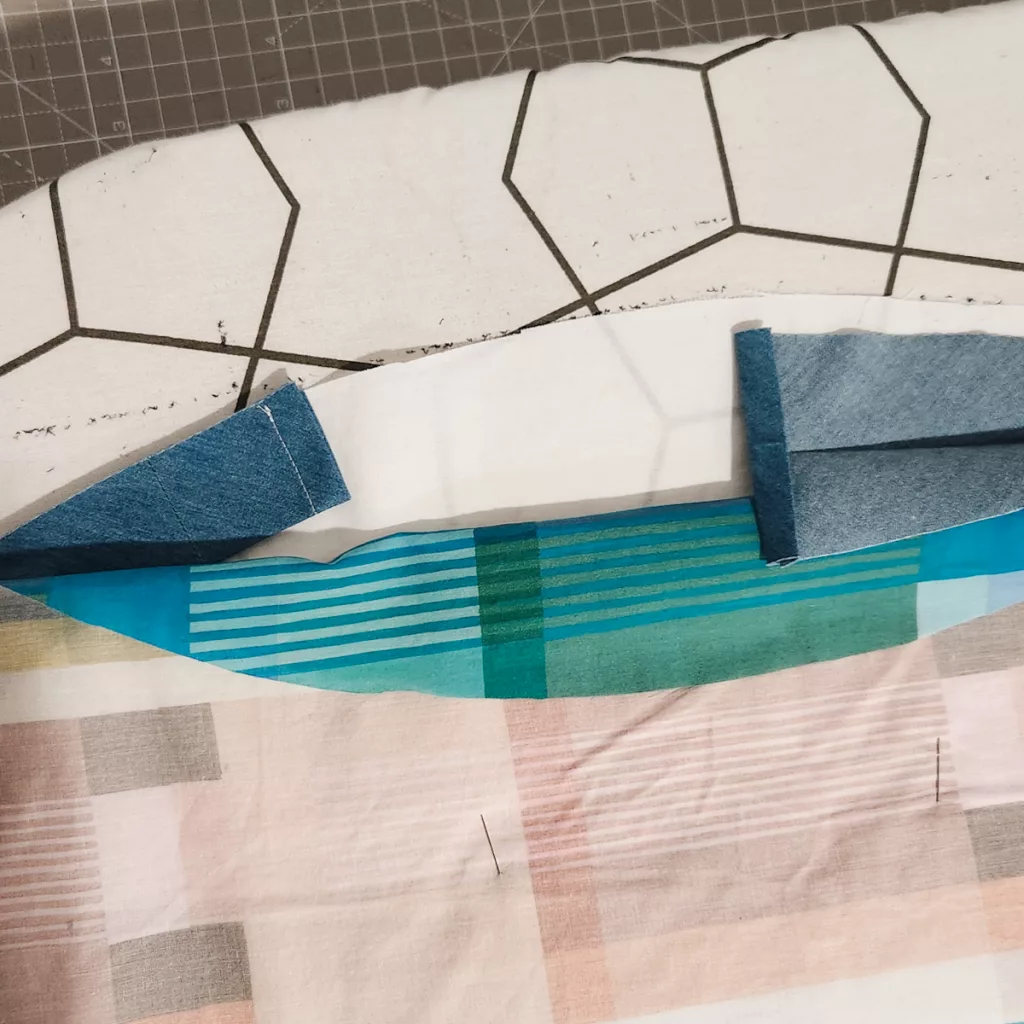
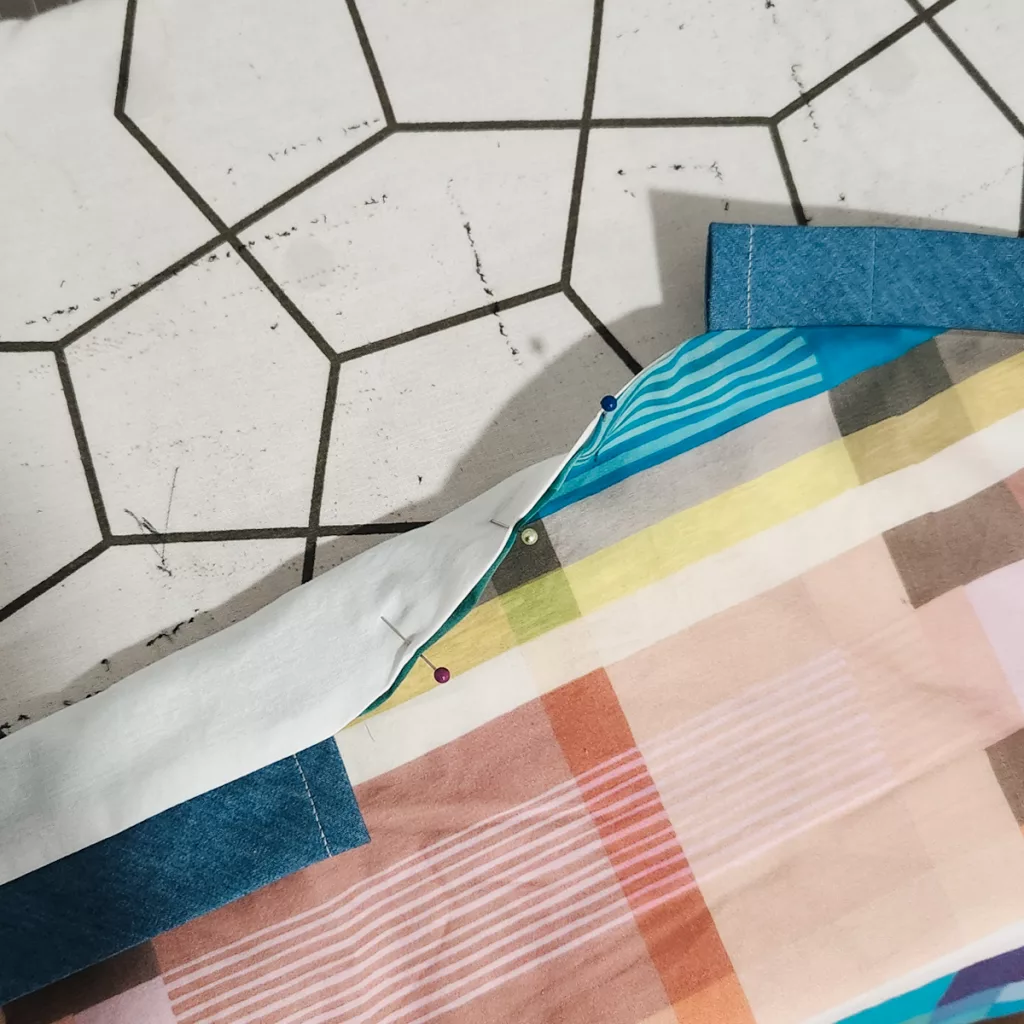
4 – Finish the ends of the bias tape. Do this by unfolding one end of the bias binding and folding the end over by 1/4″ two times and press.
Sewing only the binding, sew close to the edge to secure the folded edge. Fold the binding back in half and press. The binding should still be separate from the circles. Repeat for the other end of the binding.
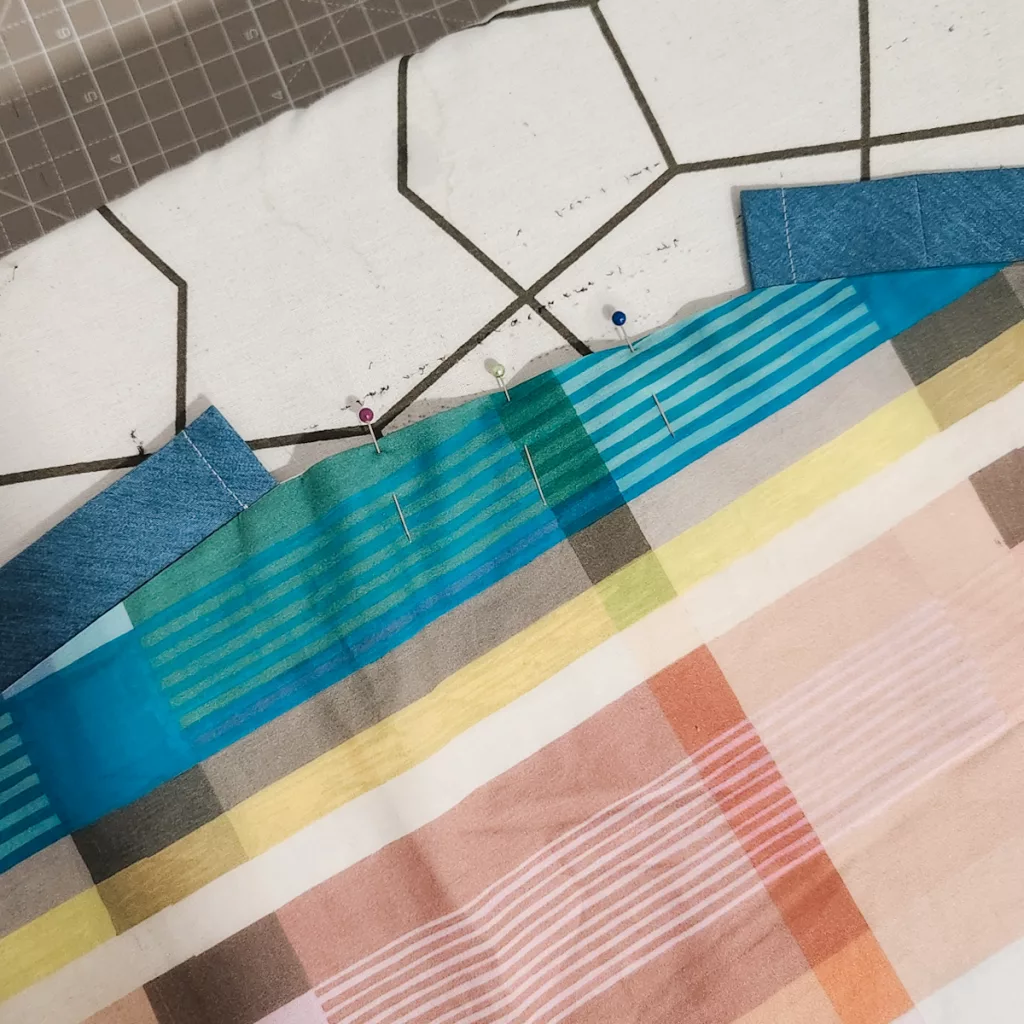
5 – Pin all of the layers together. With a 1/2″ seam allowance, start at one end of the binding and backstitch, then sew all the way around the circle and stop at the other end of the binding and backstitch. This will leave a hole so you can turn all of the layers to the right side.
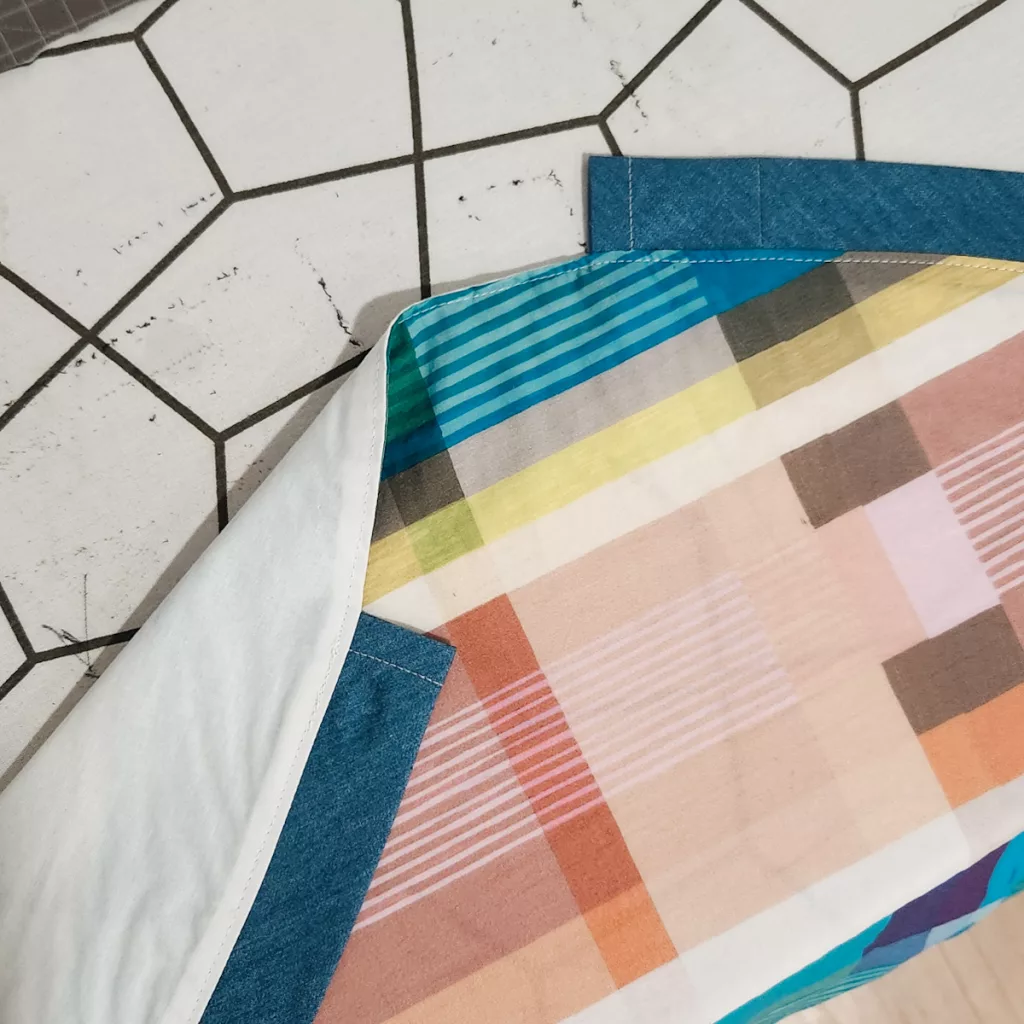
Turn the fabric to the outside by pulling all of the fabric through the hole.
6 – Press the binding all the way around. Turn the fabric at the hole in by 1/2″ and pin the layers together to close up the hole.

7 -Stitching close to the edge (1/8″ SA) start sewing at one end of the bias binding and backstitch. Then sew across where the hole was and all the way around the circle to secure all of the layers.
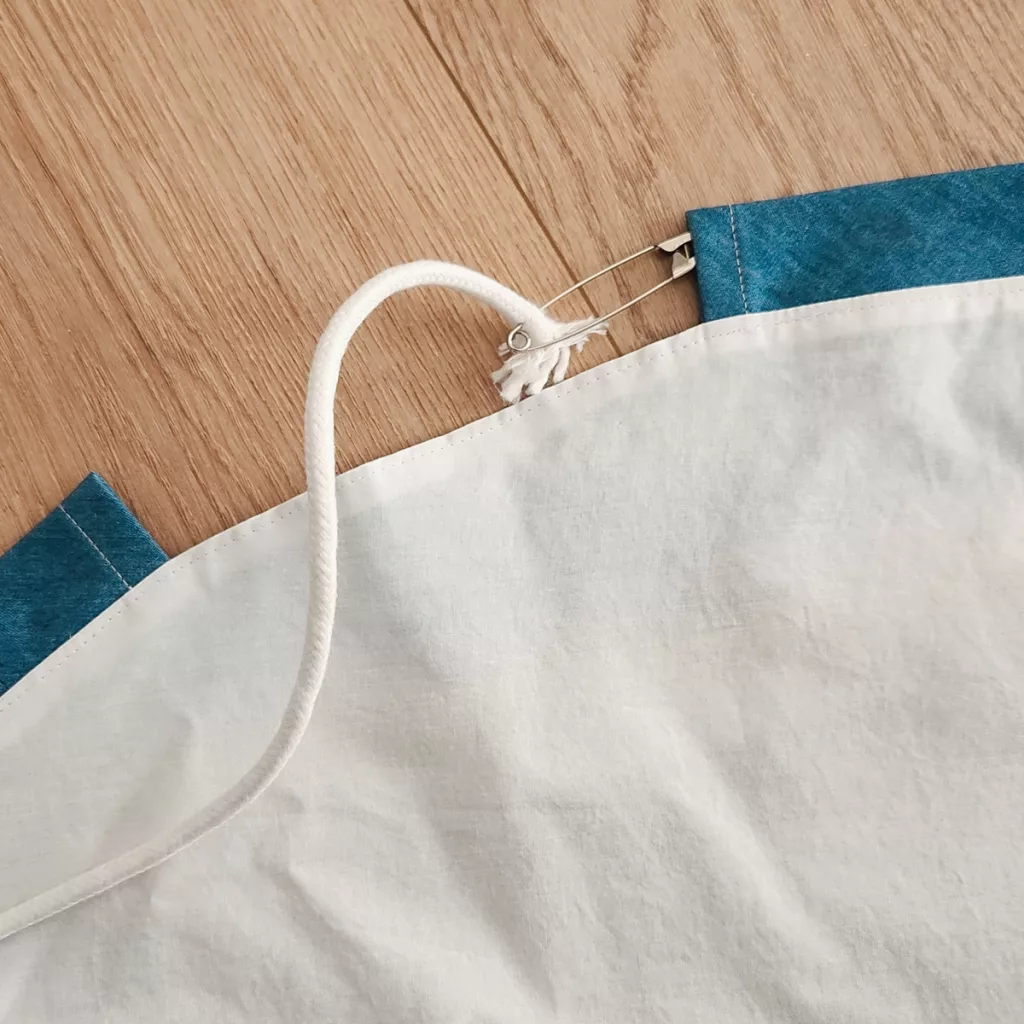
8 – Attach a safety pin to the end of your rope or string. Sometimes I wrap tape around the safety pin so that it doesn’t open while I’m threading the rope through. Thread the rope all the way around to the other side.
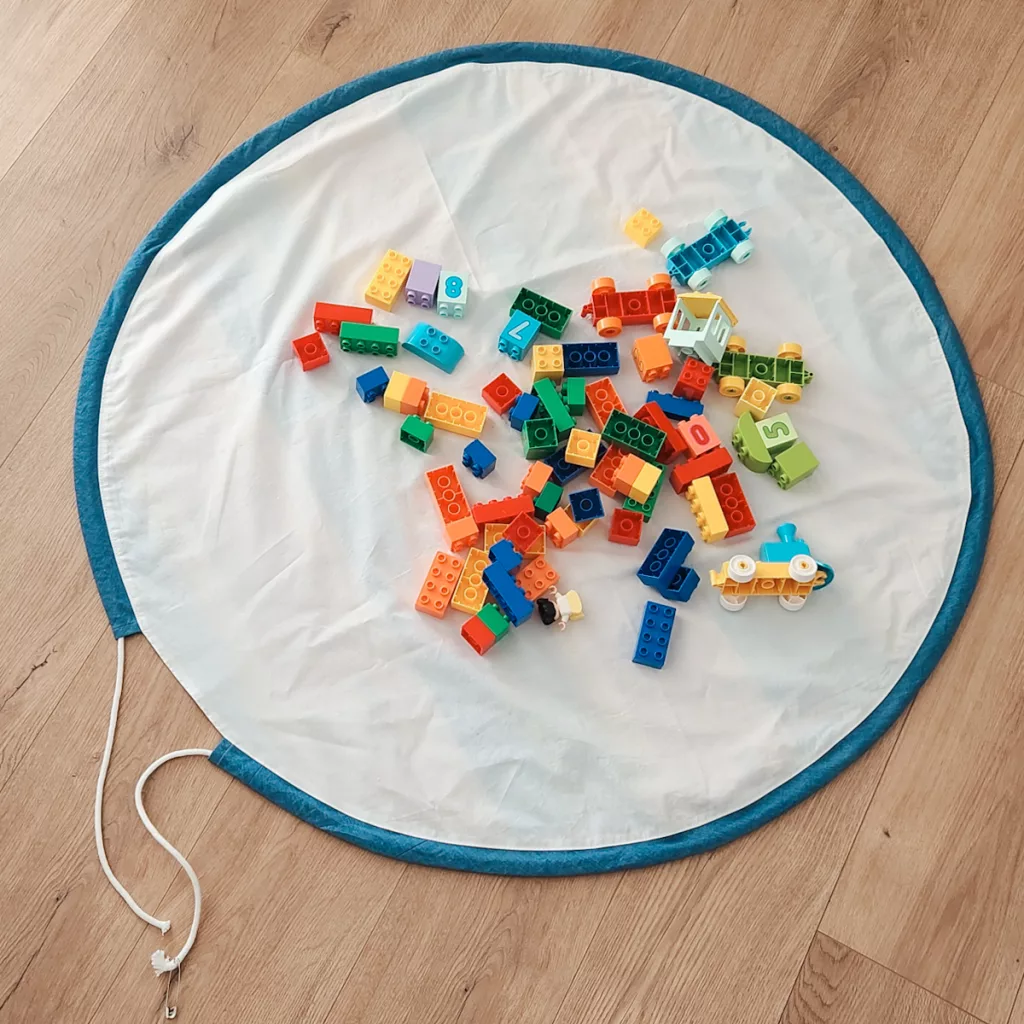
9 – Flatten the playmat so that you know how long you need to keep the rope. Leave plenty of extra on either side.

10 – Tie the two ends of the rope together with a knot and trim off any extra.
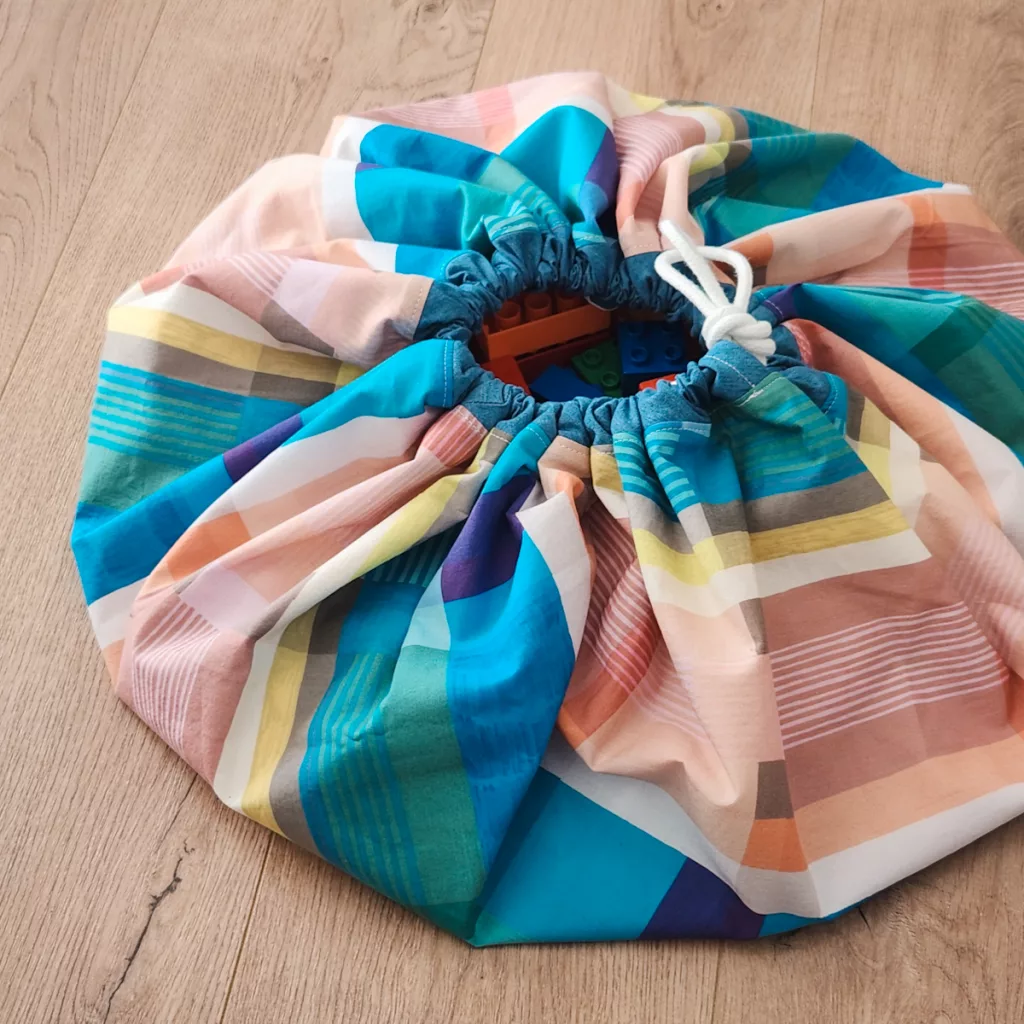
Tada! You did it! Now you can cinch the bag closed for easy cleanup or storage. I usually make a little loop knot and then shove the extra rope through the hole so it’s not hanging out.
This colorful geometric printed fabric is a cotton from Divazus. I used white cotton fabric for the other side and leftover chambray fabric from another project.
Please let me know if any of the steps aren’t clear enough or if you have any questions. Thank you so much for reading my blog today and happy sewing!

If you would like to be notified of new blog posts feel free to subscribe, or you can also find me on Instagram and Pinterest.
This page contains affiliate links. For more information see our Affiliate Links disclosure.
This fabric is soooo cool & pretty! (Internal monologue – I don’t need more fabric. I don’t need more fabric. I don’t need more fabric…)
Haha! It’s pretty cool! I thought the geometric print fit well with the Legos since I only had a small piece of it.
This is great! Can you tell me the approximate size of the bag when it’s fully closed?
Thanks Ash! ???? Sorry it took some time to respond, but here are the measurements of the two that I’ve made:
Large – 48″ diameter open, 28″ diameter closed
Medium (in this tutorial) – 38″ diameter open, 18″ diameter closed
I hope that helps!
This is just genius! Thanks so much for sharing it. I made a small one – my prototype!- 19″ diameter and just finished a larger 39″ diameter.
My question is, how do these hold up after washing? Is is wise to sew some “spokes” so to say in finished larger mat in order to hold the layers together for laundering?
Again, these are just genius.
Mari
Hi Mari! I haven’t washed either of mine yet, but I think when I do, I’ll use a large laundry bag to make sure the rope doesn’t get thrown around or stuck anywhere in the washing machine. I probably would just let it lay out to dry and then you can iron it flat again once it’s dried completely. You could sew some spokes or kind of quilt it together, but I don’t think it’s necessary.
I’m so glad you found the tutorial helpful! ❤️