After getting used to using translating apps and beginning to learn a new language, sewing a pattern entirely in French sounded like a challenge I was ready for (even if that is not the language I’m learning).
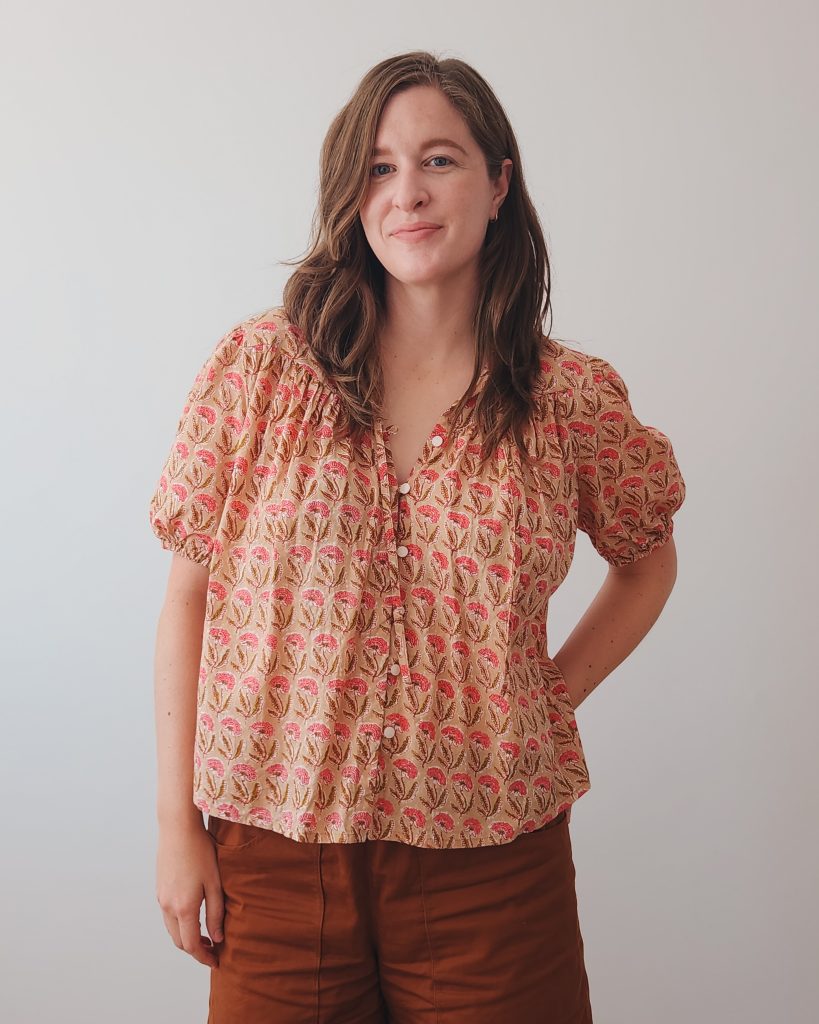
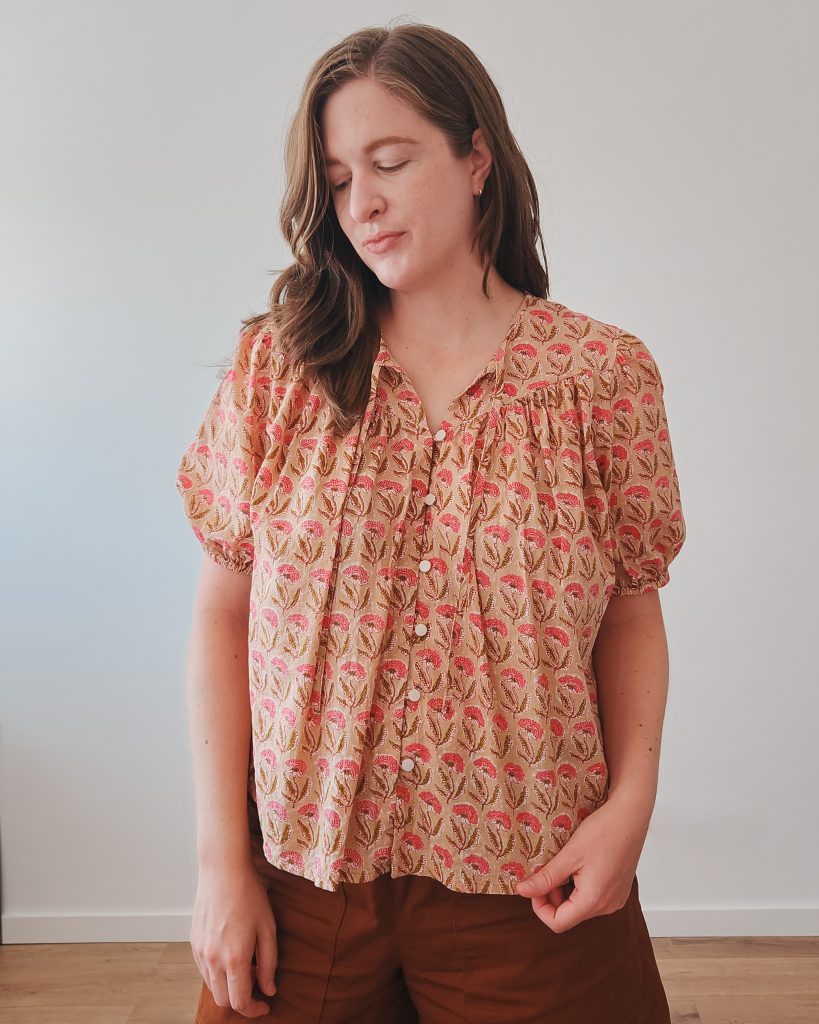
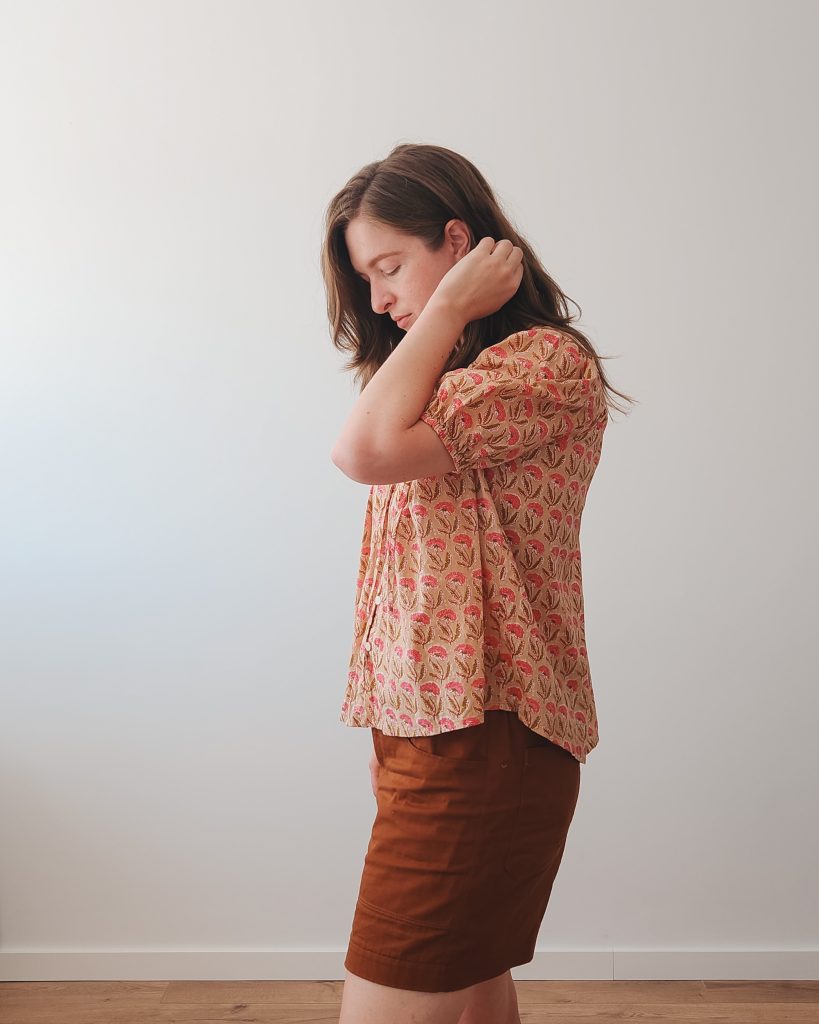
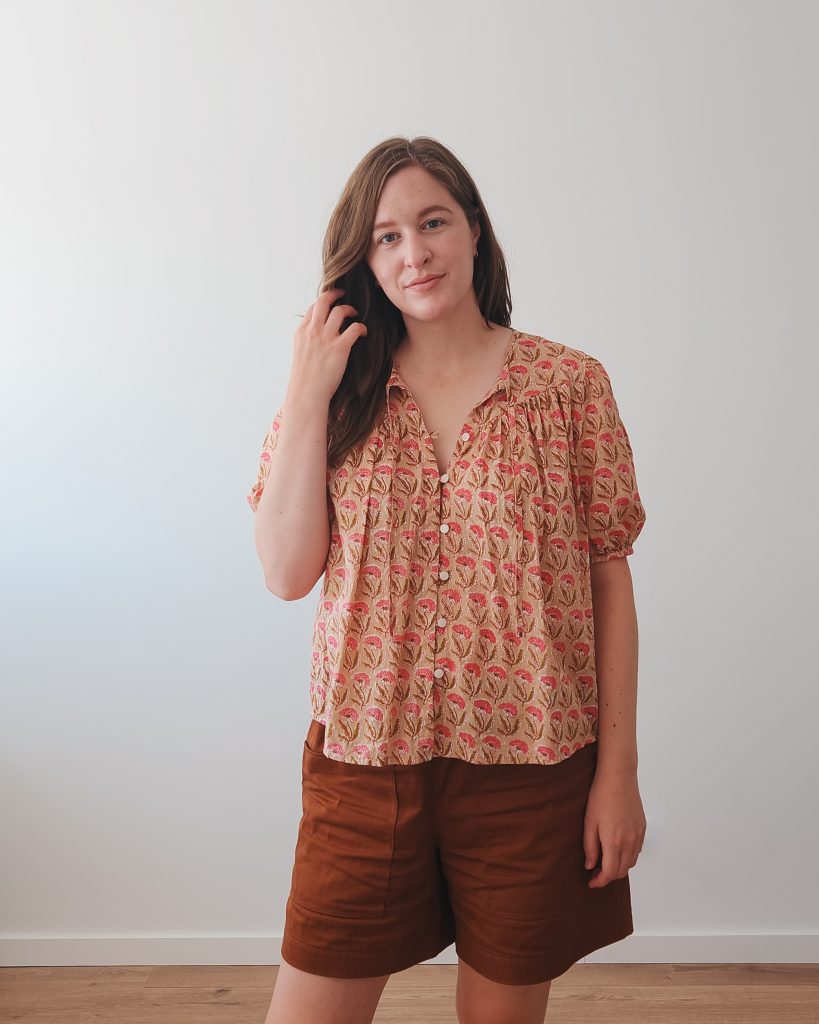
This is the Nusch Blouse (sizes from 86-100cm hip) by Bertina Paris. It’s an absolutely gorgeous pattern, but the sizing isn’t inclusive. I made the size 44, and the next size (46) is the largest size. I bought this pattern after seeing Lauren’s gorgeous version on Instagram, and then falling in love with all of the other ones on the hashtag #blousenusch. I love this type of silhouette and couldn’t resist making another blouse inspired by Emerson Fry. They make the most beautiful blouses, and I can’t help myself when I know I can recreate something similar. This blouse was inspired by a combination of this shirt and this top.
To be honest, sewing this wasn’t a huge challenge, it just took a little bit more time to translate the instructions and figure out which pattern pieces I needed. I used DeepL to translate all of the instructions one section at a time and copied it all into a google doc. The instructions have photos (in place of illustrations), but they aren’t very helpful. So I found the tutorial on Youtube and followed that all the way through. The video is completely in French, but you can go to the settings, select subtitles/cc, and auto-translate to the language you want to watch in. The English subtitles were pretty spot-on, so it was easy to follow along.
I’ve never made a Bertina Paris pattern before, and I forgot to check to see if seam allowances were included before I bought it… Thankfully they are! I lengthened the front, back, and placket facing pieces by 1″. In the future, I will probably lengthen by another 1″ and try to even out the hem. It isn’t quite long enough to tuck in, and I really like that look sometimes. I also don’t mind the curved/high-low hem, but I prefer when it’s even.
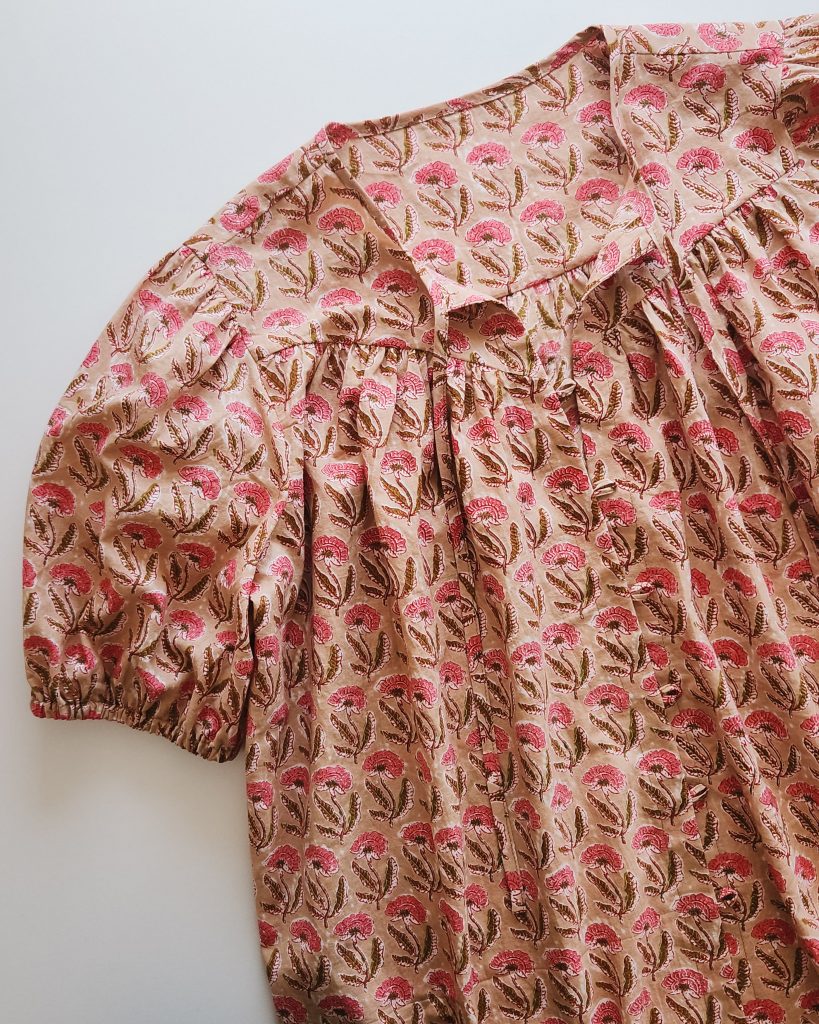
I learned a couple new things while making this pattern, and that’s always a plus. I learned that these button loops are an alternative way to avoid buttonholes, but ironing and sewing the VERY thin piece of bias tape is more work and gives me anxiety, haha. But I did it! It is a gorgeous detail, and I would do it again in the future, just on a day where I have extra patience.

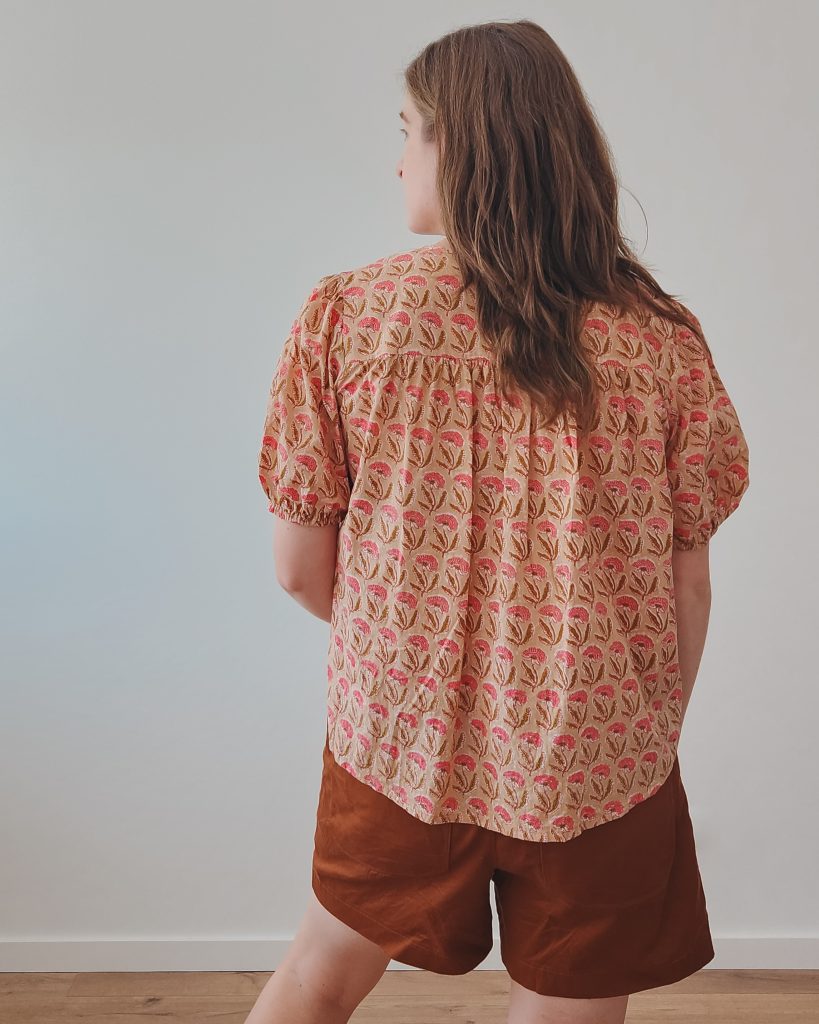
I also learned how to pin the neckline so that I caught the ENTIRE neckline on the inside while stitching in the ditch from the outside! My mind was completely blown when I didn’t miss a single bit on the inside. The person in the tutorial shows it at 1:22:10 of the Youtube tutorial. But basically, she pins from the outside through the seam and makes sure to catch the facing on the other side, and then pins it down. I did that and pinned every 2-3″. I wasn’t expecting it to work as well as it did, but I was impressed! I feel like I should have learned this method a long time ago. Did you know to pin the neckline that way?
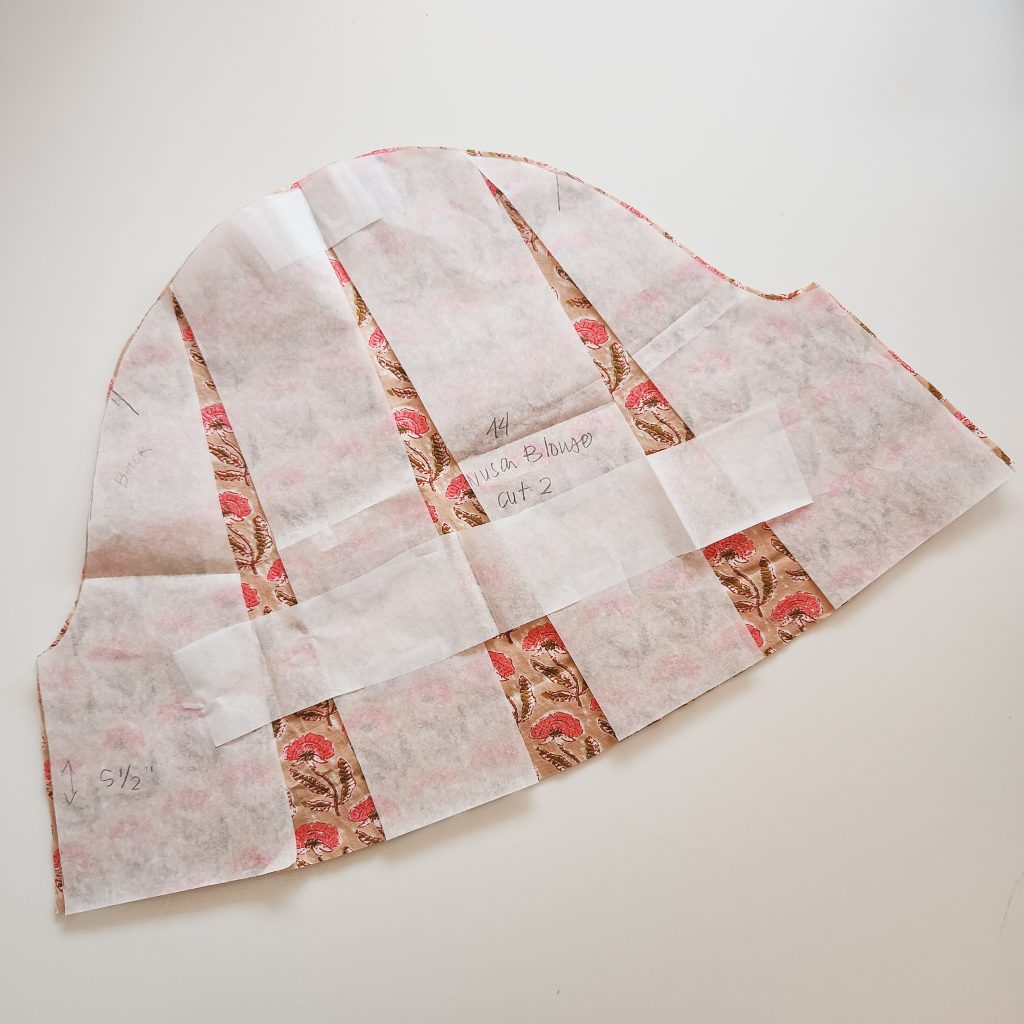
I also shortened the sleeves and took a risk in learning how to make them more full at the hem so that it gathers more. I watched Andrea Jones’ Youtube video and followed the way she did the Romy Top at 7:50 of the video. I made 3 cuts and then added 2″ at the base of each cut. Then I taped a piece of paper between the pieces to hold it all together (picture below). It worked really well, as you can see! To make a channel for the 3/8″ elastic I folded up the bias by 1/4″ and then again by 1/2″. Then I edge stitched like normal and left a 2-3″ opening to insert the elastic.
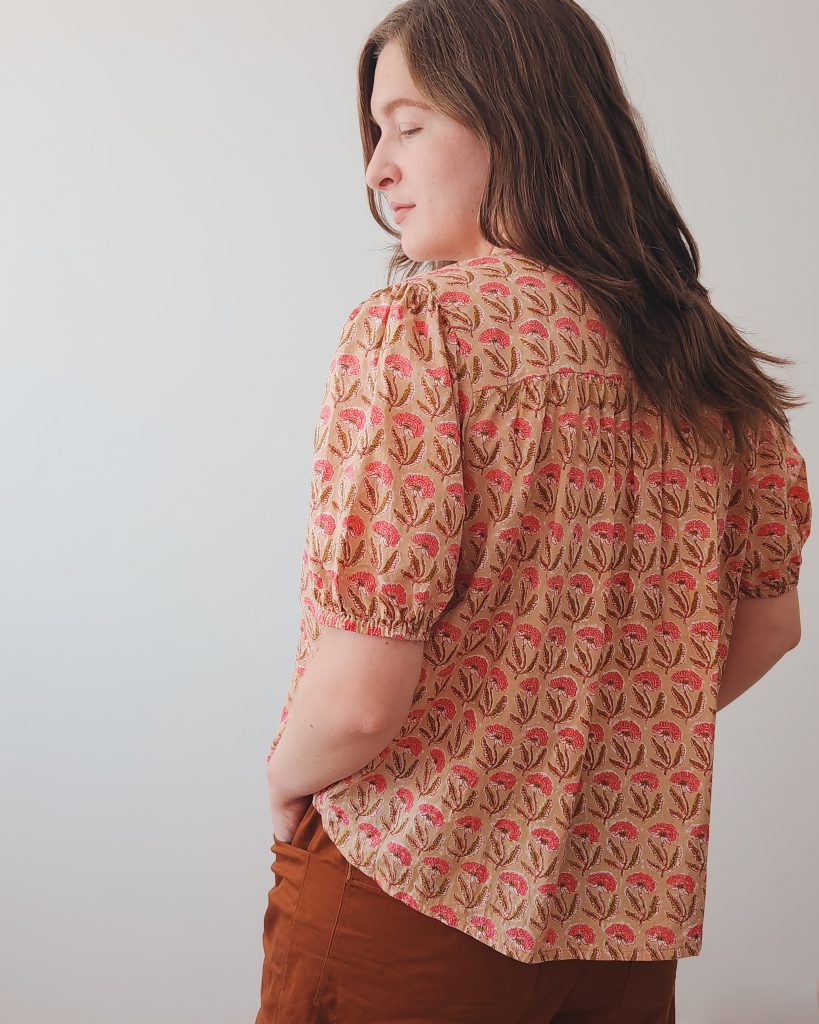
This absolutely amazing cotton block printed fabric is from Fibers to Fabric on Etsy. I’ve ordered from them multiple times now and they have such beautiful fabrics. This fabric is sold out, but they are always adding new fabrics, so keep an eye out for them.
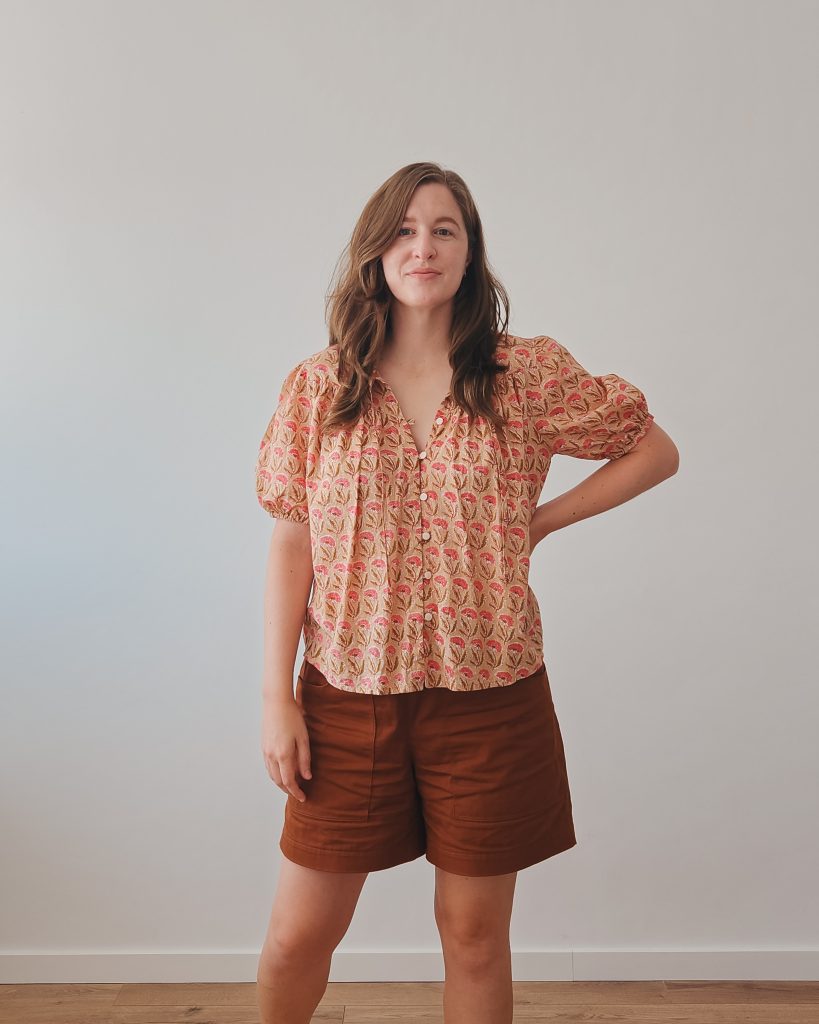
I’m so happy with how this top turned out and was so excited about how well it pairs with my last sewing project, the EA Saturday Shorts. If you have any questions or comments, feel free to leave them below. Happy blouse sewing! xoxo
I love how this new blouse looks on you! I love your detail in describing how you changed the sleeve pattern to fit. It was easy for me to think through doing it. (a skill I had many years ago). Good job explaining the stitch in the ditch hint. Love you tons! Grandma Frame ????
Thank you, Grandma! ???? I’m so glad all of that made sense. Love you tons!
Gorgeous blouse Tori! I’m totally impressed with your rouleau button loops! I had trouble with the ONE on my Remy Raglan. Were these folded/ironed/stitched, or turned? (I’m thinking that your beautiful fabric is a lightweight cotton?)
I’m looking forward to hearing more about your family’s move to Portugal, and your adventures there!
Thank you, Lodi! ???? These were just bias tape turned inward, ironed together, and then stitched. I can’t imagine trying to turn something this narrow! This is a lightweight cotton, so it was fairly easy to iron and stitch. I would be afraid to do it on something like rayon.
We haven’t had very many adventures yet since we’re waiting on one more of our residency cards and getting other things in order with the kids. But we’re hoping to plan more adventures soon! I have a meet-up in Lisbon with some other sewists tomorrow and I’m really looking forward to it. I might share a little bit about it here next week. ????