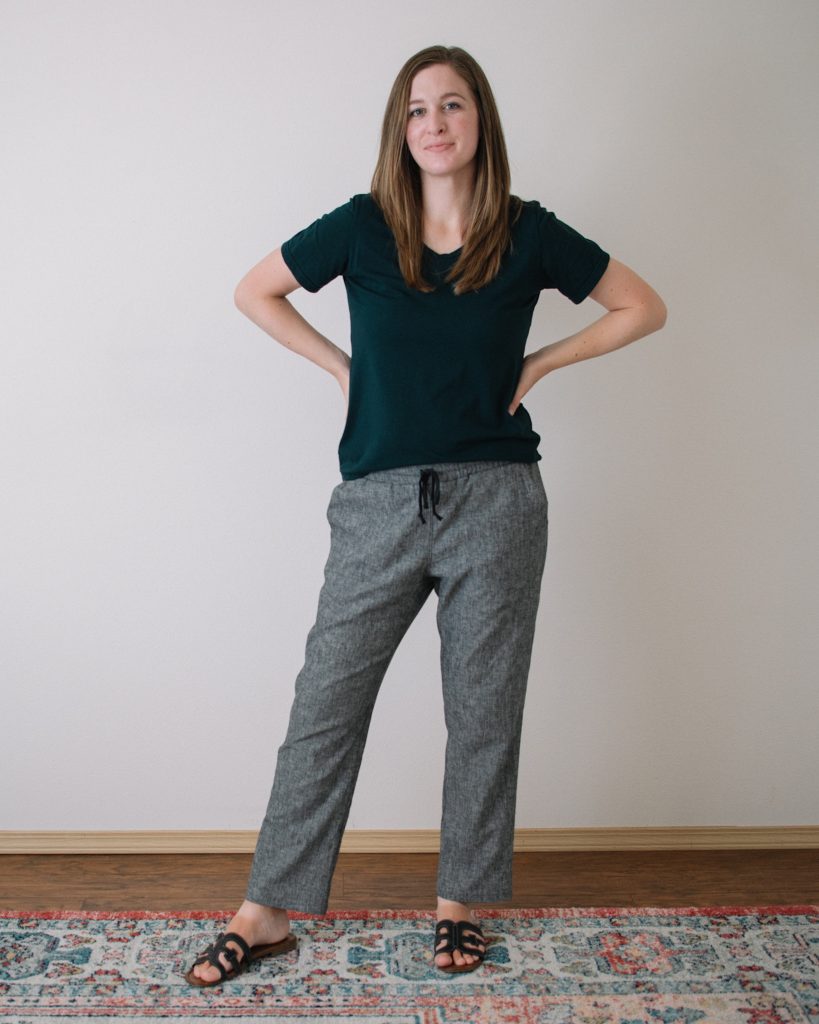
I’ve gone down the elastic waistband rabbit hole, and since I wanted pants that I didn’t have to fix the rise on, I decided to try out the Seaforth Pants by Hey June. These are true mid-rise, right where I like them! I was actually a little nervous about making them, but then I got together with Karen (@intostitches) a few weeks ago and tried on a pair that she made, and I loved them! So, after our get-together, I drove home and immediately finished taping the pattern together, which had been sitting unfinished in my dining room for a few weeks. Haha.
This patterns has two views – a slim version with elastic at the ankle, and a wide leg version. It also has a really cool front zipper pocket, and a waist drawstring! Thank goodness because all of the woven pants and shorts I make fall down when I put my phone in the pockets! What else are pockets for besides hands?
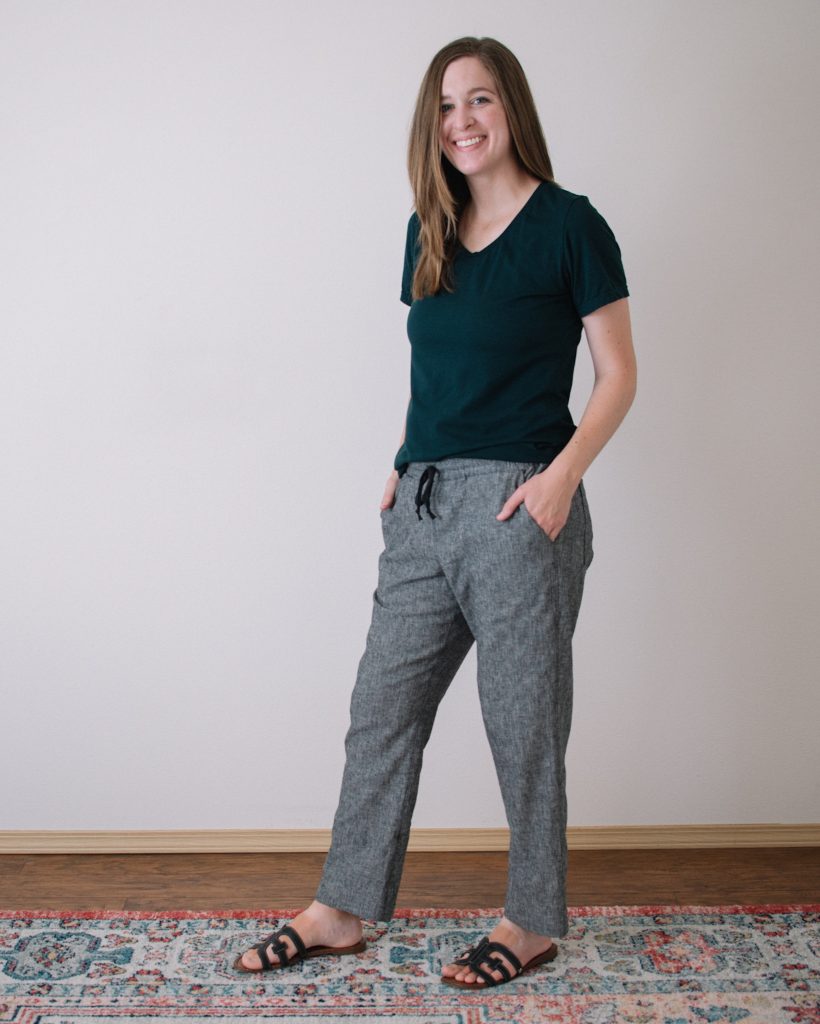
I decided to really go to town hacking these pants, so I’m very glad they turned out good. I wanted these pants to have regular front pockets and for the pants to be more tapered. I used view B of the pattern (elastic ankle view), and here is a little rundown of the alterations I made to the pattern:
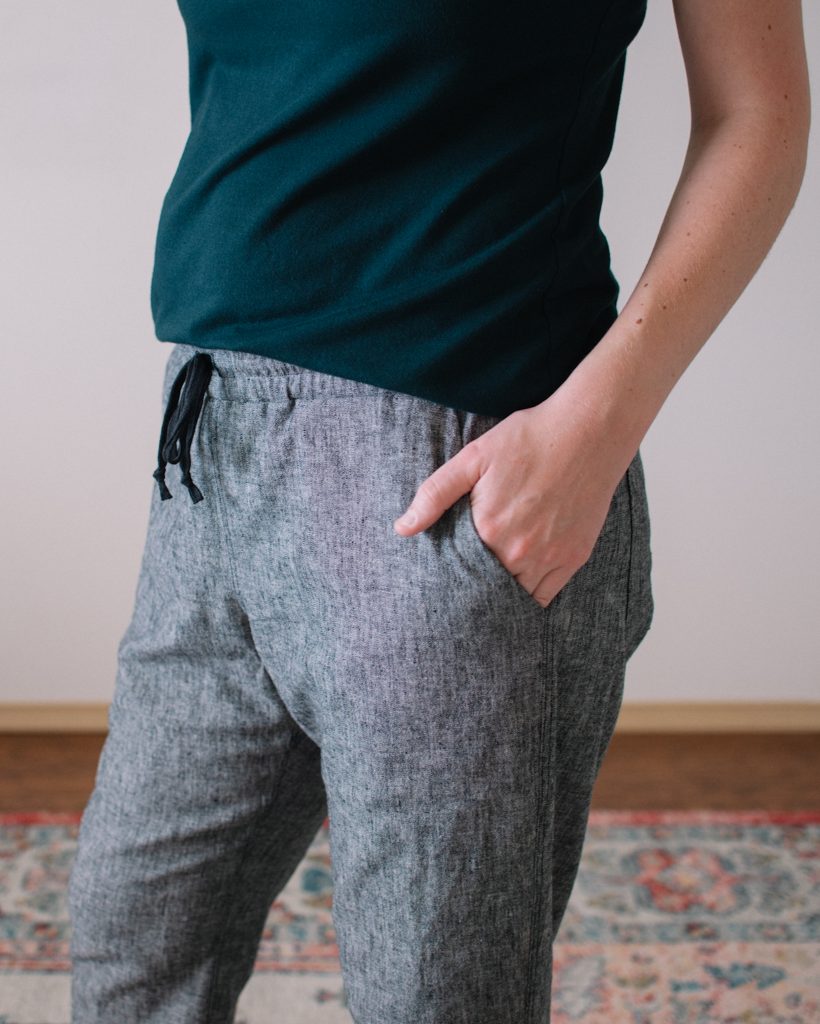
- Changed the shape of the front pocket (photo below)
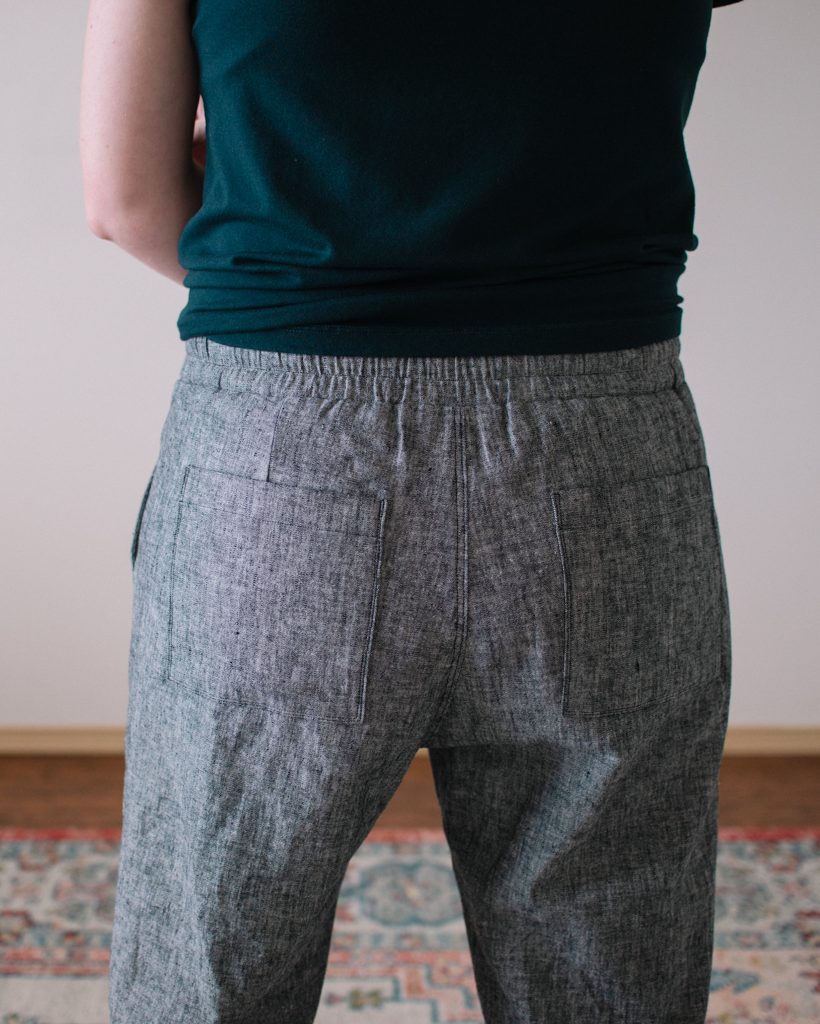
- Lowered the back pockets by 1/2″
- Added 2″ in length, but I probably should have added more. I think view B is shorter than view A, but I’m not sure.
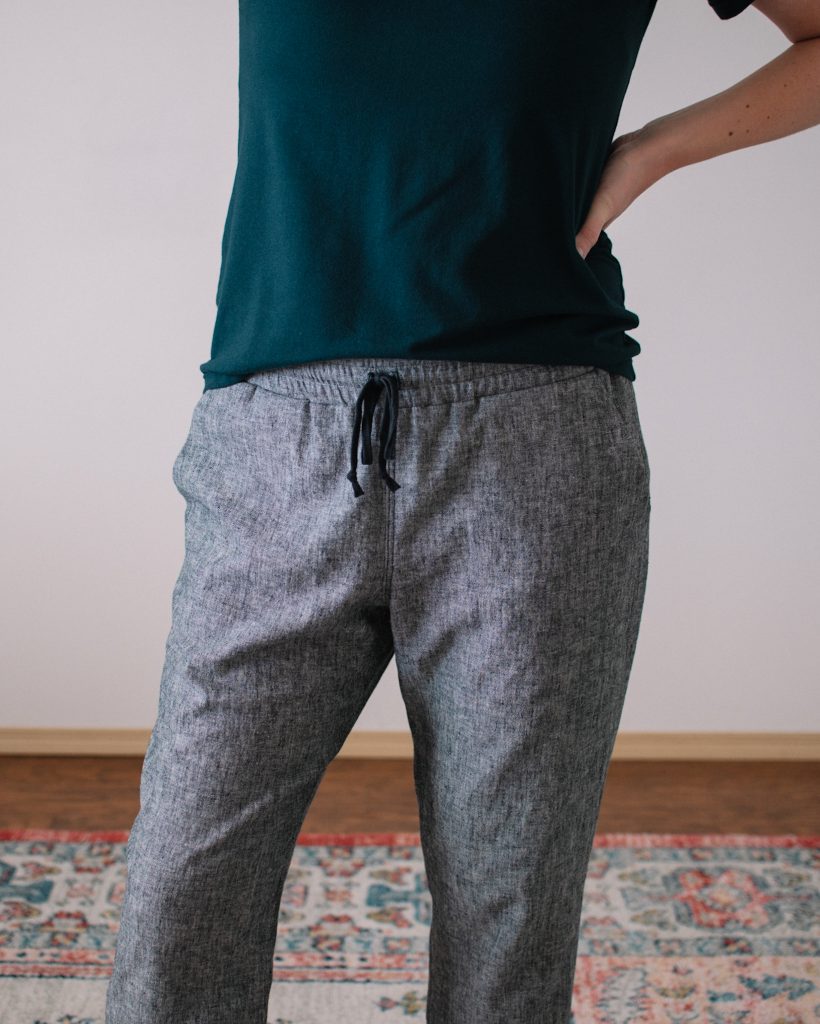
- Back pant leg: Took off 1″ in width from both sides and graded up.*
- Front pant leg: Took off 1/2″ in width from both sides and graded up.*
* This was to make the pant more tapered. It’s important that you take the same amount from both sides so that you don’t throw off the grain of the fabric.
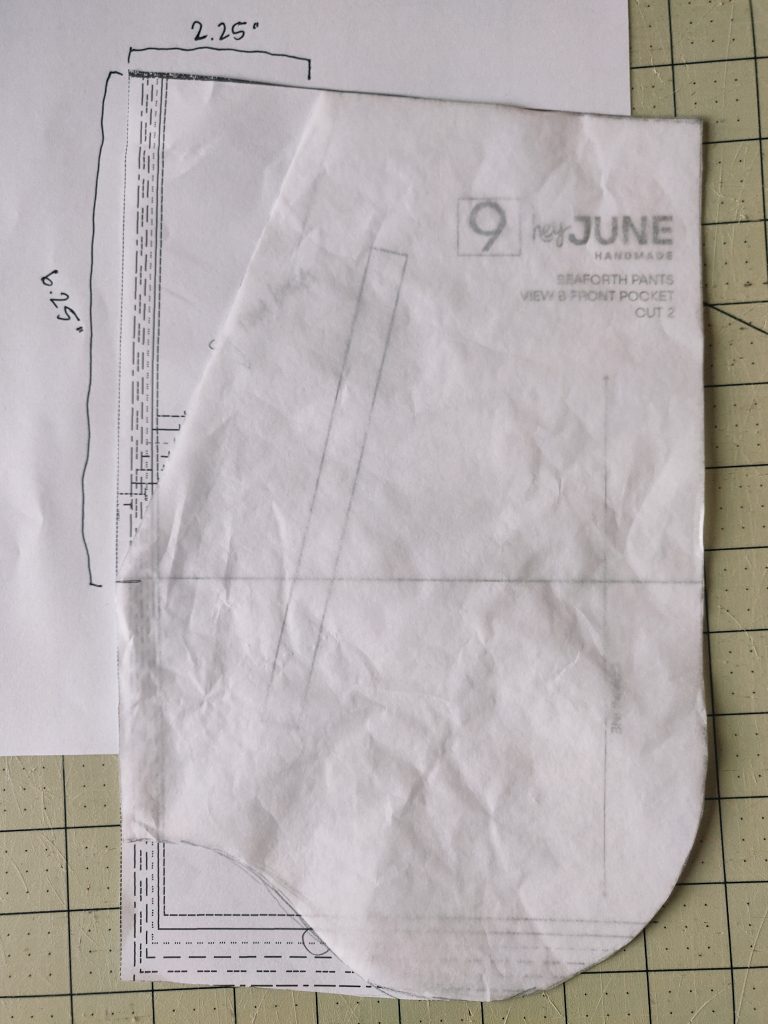
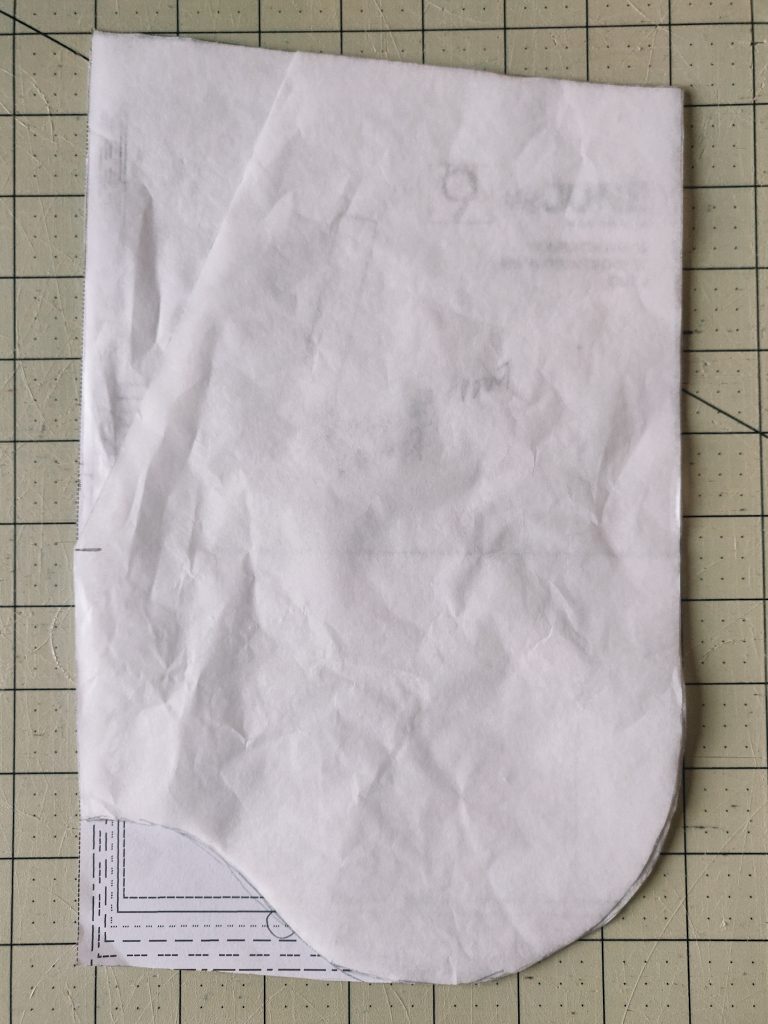
The pockets don’t have to be rounded, I don’t think, but I had seen other pockets like that. So, I literally just drew the curve. No rocket science involved. [Left photo] I used the pocket pattern piece (the printed one in back) to to make a new one. I just went in 2.25″ from the side and down 6.25″from the top, and then I drew a diagonal line connecting the two. Then I modified the front pant pattern piece and cut out the same diagonal line as the front pocket piece I just made (not shown, but you get the idea). [Right photo] Then I made the pocket lining piece (shown behind it) which has the same matching curve but no diagonal cut.
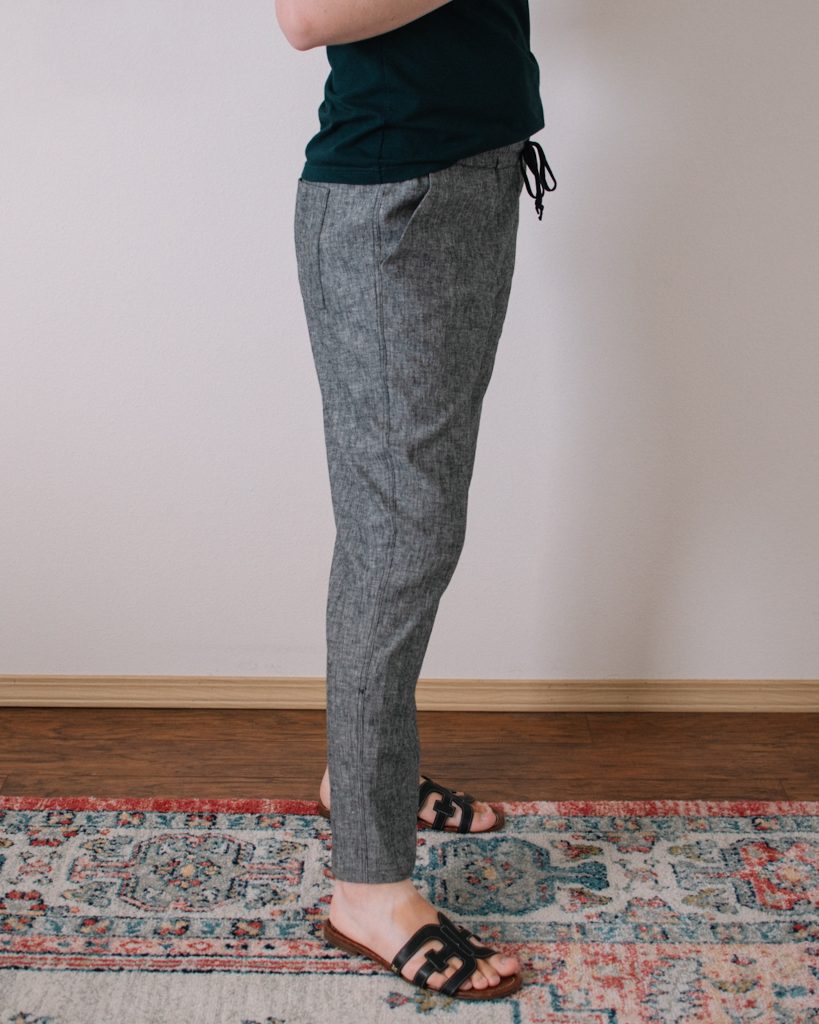
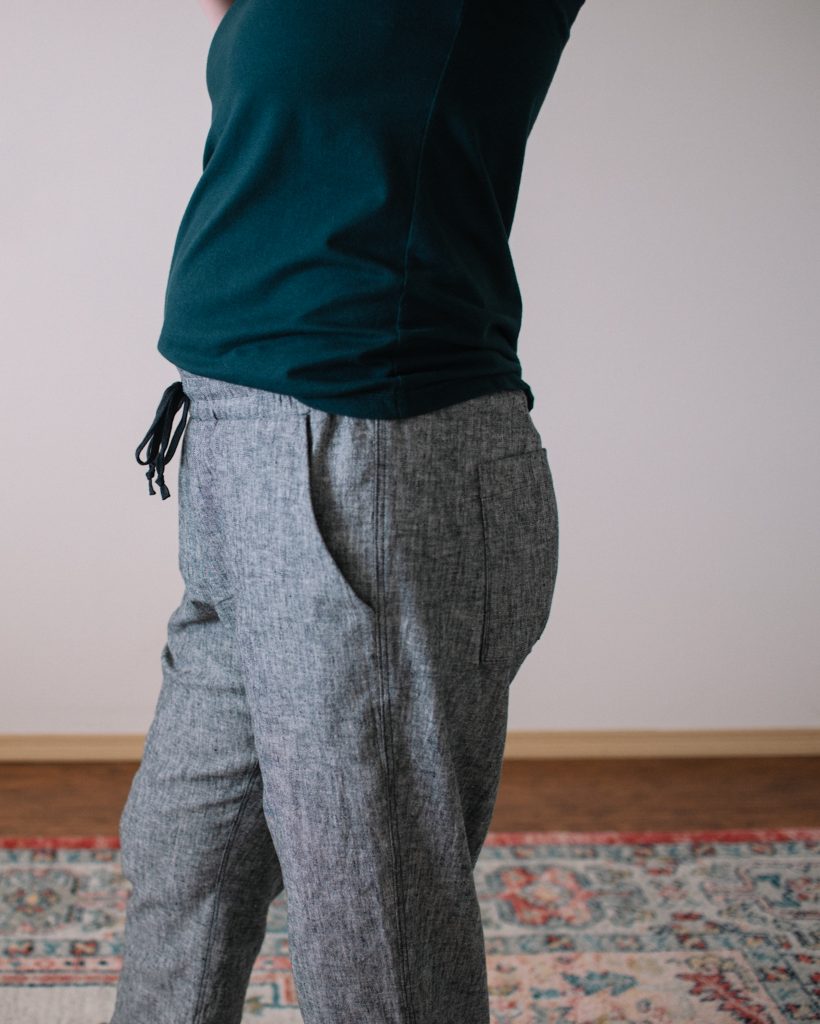
The one other thing that I did differently was to topstitch the side seams (shown above). I was really dumb and did this after I had already sewn the inside seams, then realized that I could have just sewn the side seams – topstitched – then sewed the inner seams – and it’s not necessary to topstitch the inner seam. *face palm* But at least next time I know how to make sewing that part much less difficult.
This fabric is a washed linen chambray blend that I got from Style Maker Fabrics a few years ago. It has a tiny bit of stretch, and is a little bit scratchy, but not enough that I won’t wear them. Style Maker doesn’t have this fabric anymore, but they do have their brussels washer linen that looks the same, and actually feels a lot nicer.
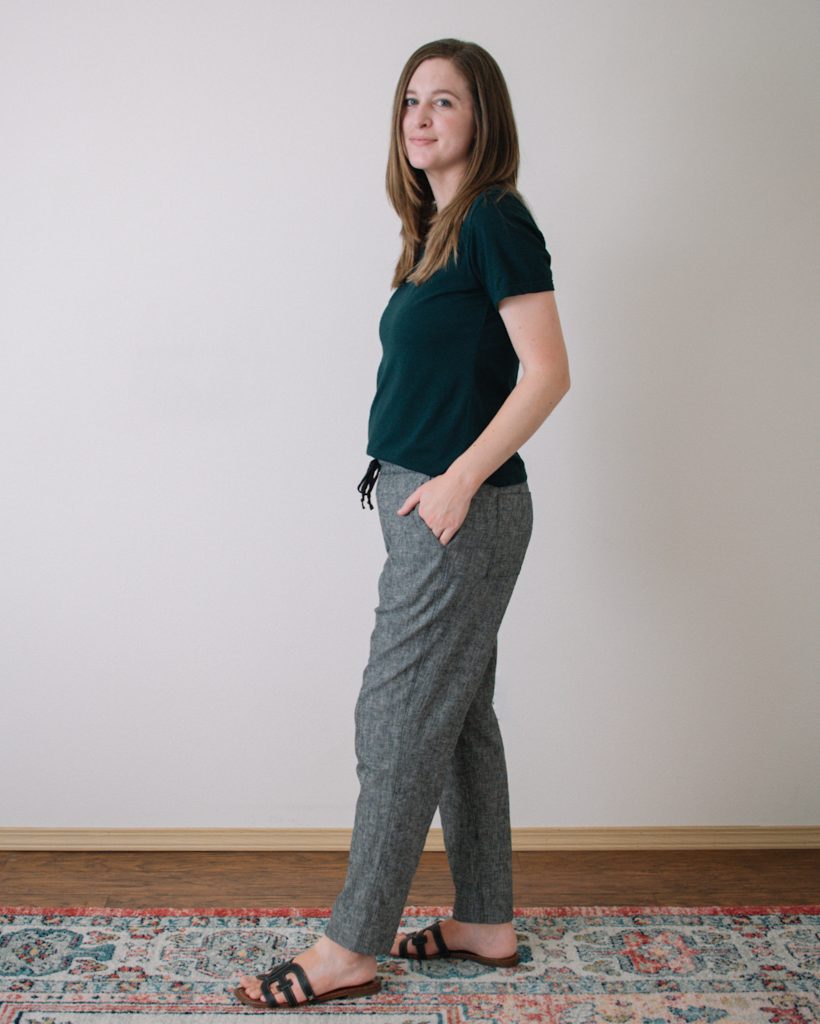
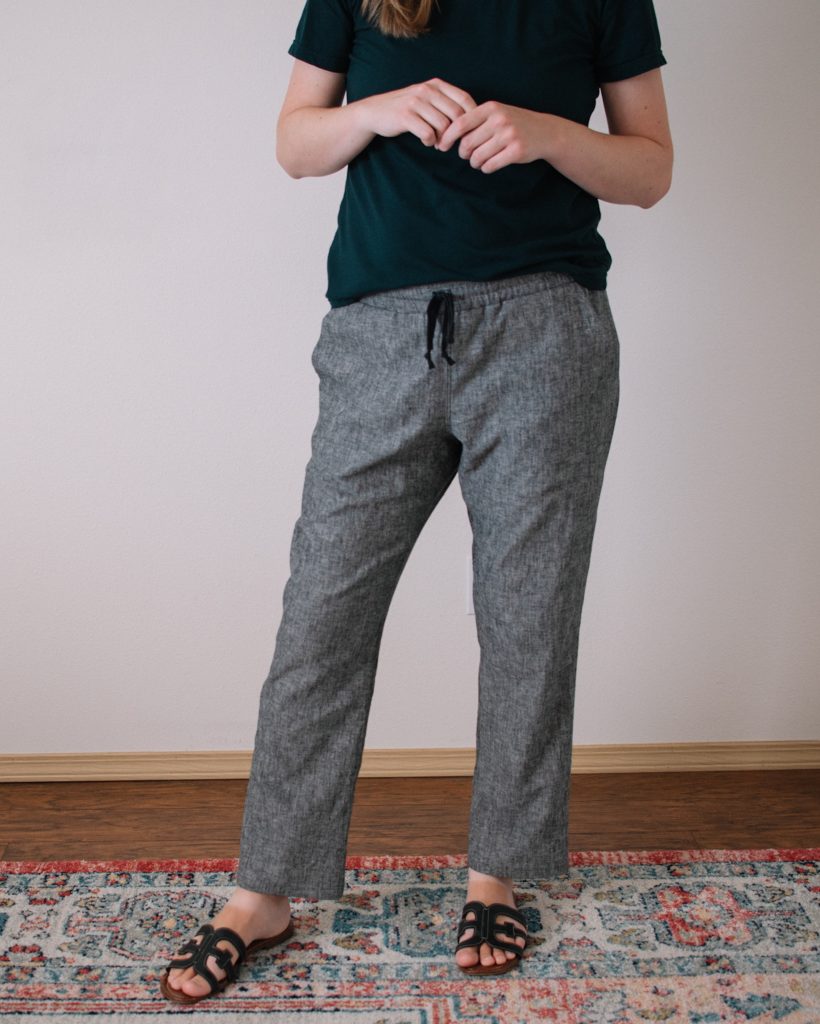

I’m really happy with how these Seaforth Pants turned out. I was worried with how much I was taking out of the width at the bottom that I had totally ruined them, but they actually turned out the way I wanted them! My stitching could improve on the next ones, but these are a good “wearable muslin”, as they say.
Let me know if you have any questions, and happy Seaforth sewing!
Love them and great timing because I have been wanting to make something just like these!! Thank you for all your hints!
I’m so glad you found this helpful, Jan! I hope you learn from my silly mistakes and yours turn out amazing! Good luck!
Tori – These are so cute! Love the changes you made – they’re perfect!
Thank you, Lauri! They really were fairly easy to change and it’s such a versatile pattern!
I love how your pants turned out, Tori! I hope they soften up for you in the wash. The tapered leg modification looks really good— I want to try it on my next pair of Seaforths!
Thank you, Teri! I hope they soften up with a few washes too. You should definitely try the tapered leg mod! I’m still so blown away that I didn’t mess it up. Haha.