
I did it! I sewed a coat with a lining! This feels like a huge milestone and I’m still kind of amazed that it worked. I’ve had this fabric for an entire year and decided to not put off sewing it any longer.
If you’ve been following my blog for a while, you might remember my wool Fulton Sweater Blazer that I made 4 years ago. I turned out really beautiful, but the fit was a little too tight, and the fabric was really itchy. I tried adding a lining to the sleeves, but it still just wasn’t right, and I was always so sad that it didn’t turn out the way I wanted.
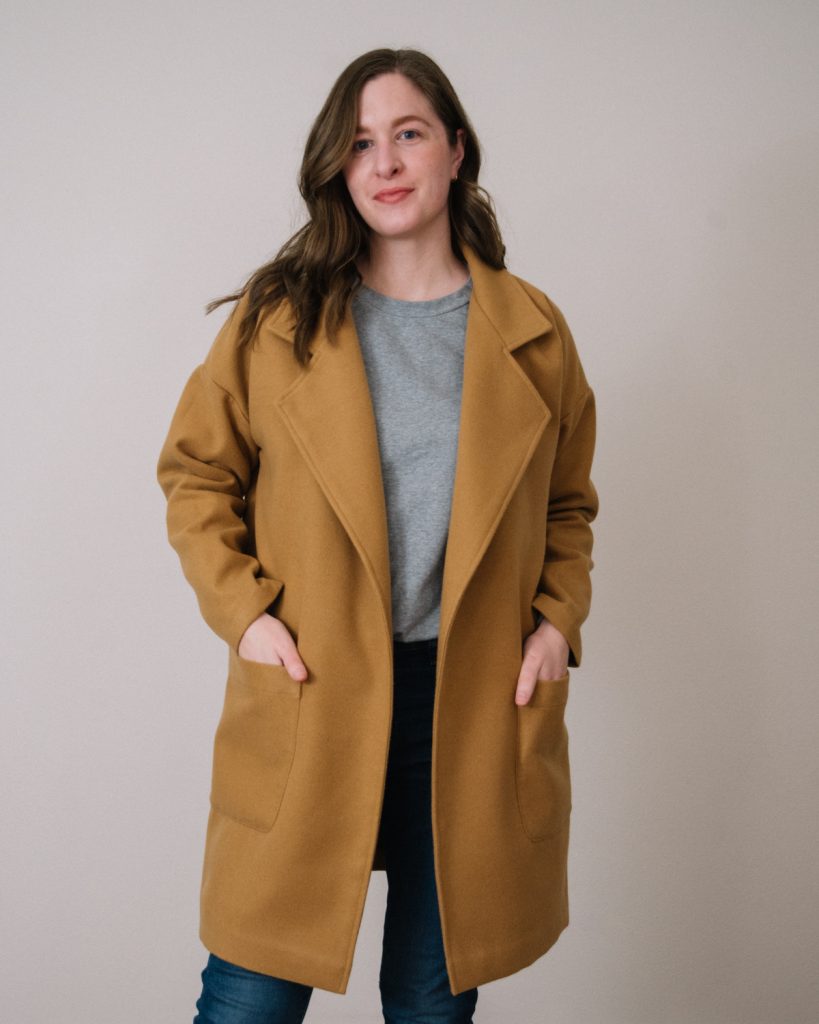
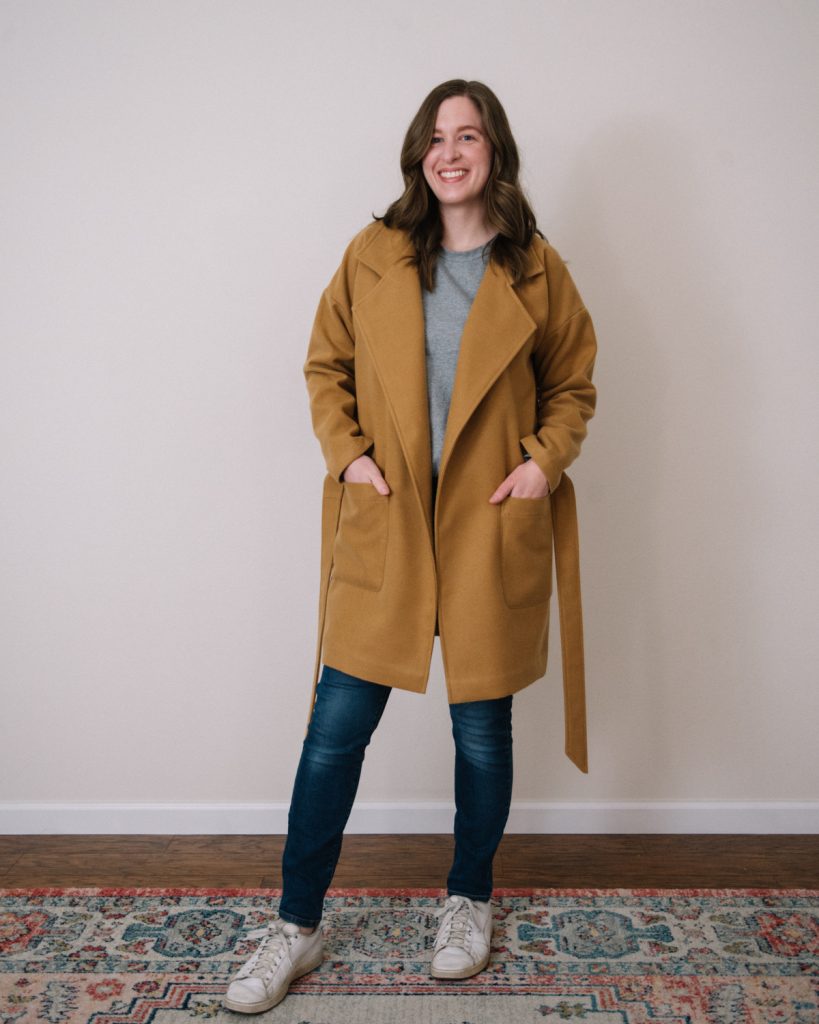
This is the Pona Jacket by Helen’s Closet (up to 58″ hip). I used their tutorial for how to add a lining and how to sew a waist tie and loops. Both tutorials were fantastic, and I didn’t have any issues.
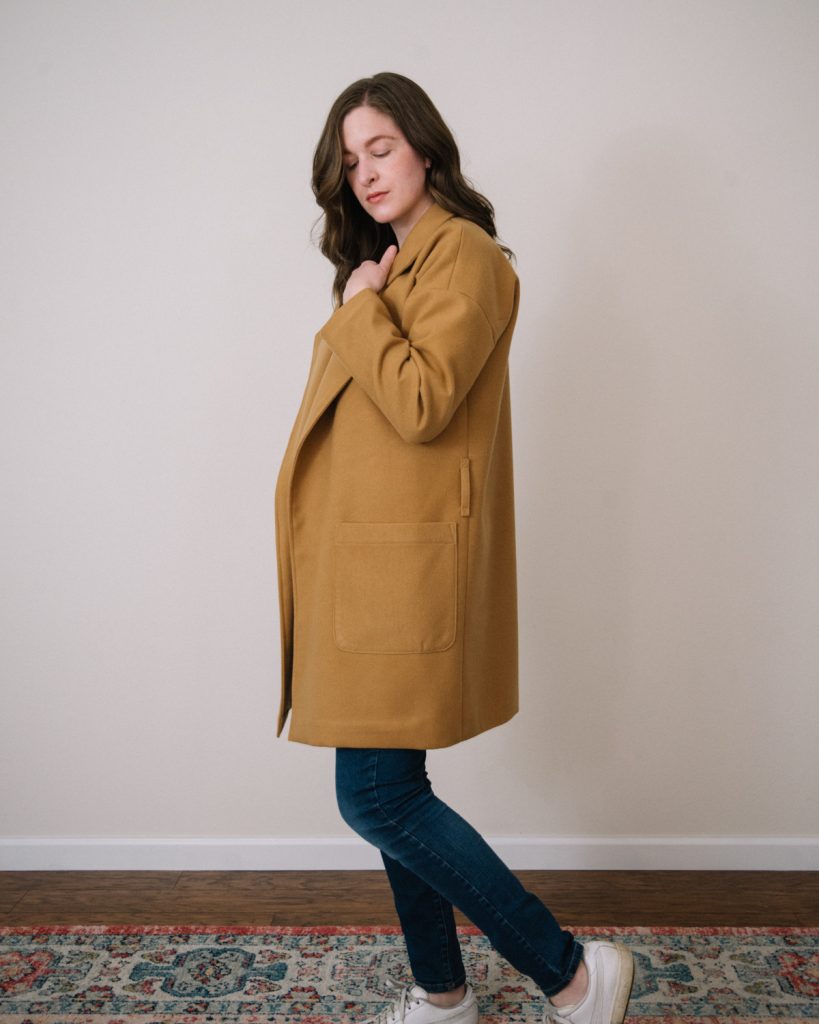
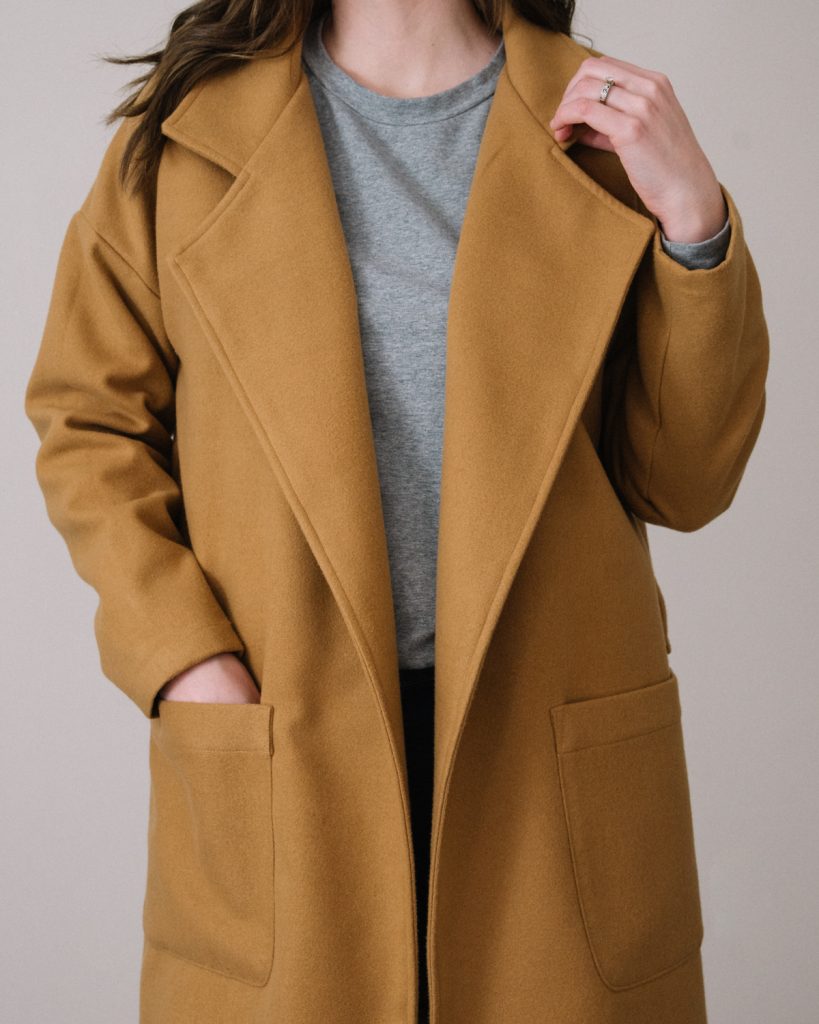
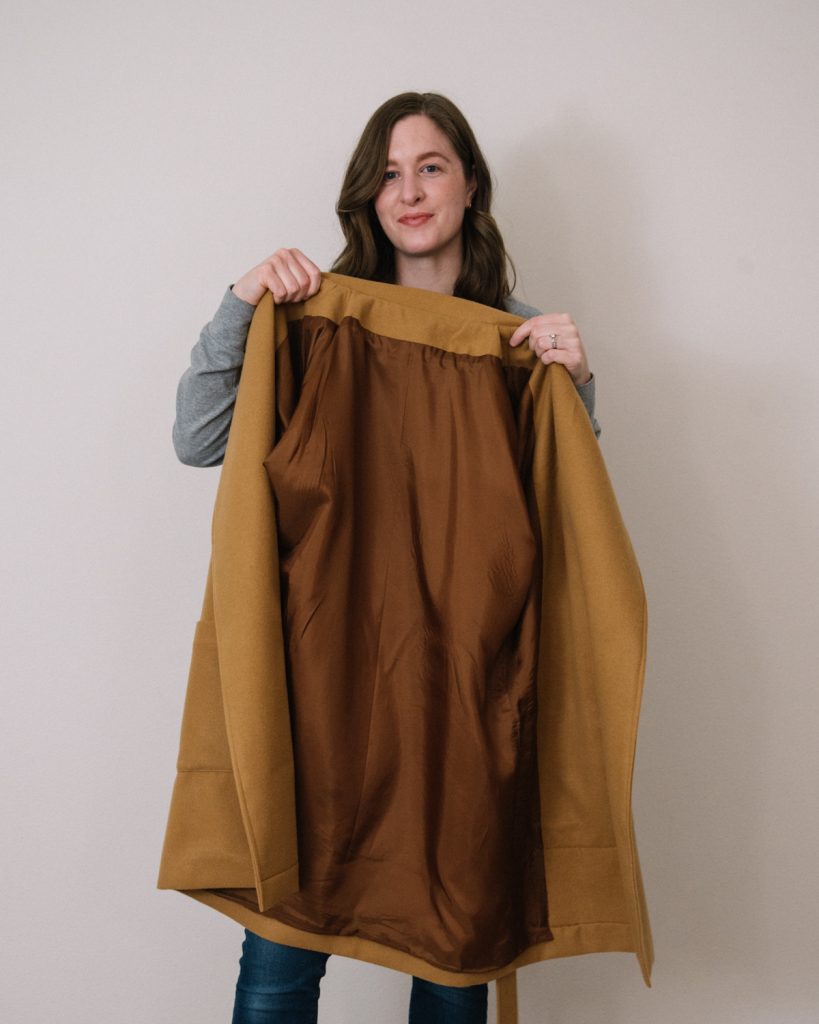
This fabric is a Recycled Flannel Coating in the color Camel from Style Maker Fabrics. It’s extremely soft like a flannel. I know a lot of people really hate polyester, but with my past experience with itchy wool, I decided to try this fabric, and I really like it. It was super easy to sew and pressed really well. I used a wool pressing mat, organza press cloth, and wooden clapper during the whole process. The lining is Bemberg Rayon Lining in the color Chesnut.
Since I wanted this to be longer and more coat-like, I lengthened the bodice pieces by 6″ and the sleeves by 1″. That was the perfect amount for me, and the sleeves ended up being a little bit longer since the lining helped add an extra inch. It says to choose your size based on your high bust measurements, which for me is a 14, and the rest of the measurements were within 1″ of my body measurements. So that’s the size that I went with, and I think it’s perfect!
I sewed most of the jacket together in an afternoon/evening. The one mistake I made was to sew the collar piece in the wrong direction (because I wasn’t paying attention), so that slowed me down for a bit. I had to unpick the topstitching and the seam, then stitch the correct side and topstitch it again. Since I didn’t have to finish any of the seams, that made the jacket construction go really quickly. But that also meant I needed to do a lining so that it didn’t fall apart.
I was leaning towards doing a lining, but the only other jacket lining I’ve done before is the Unfolding Jacket, which is really straight forward, but I was honestly kind of nervous to add one this this jacket. When I tried on my Pona it fit really well, but I was wearing a sweater and hated that the sleeves got all bunched up. I knew a lining would make wearing it more enjoyable, and I really wanted this jacket to turn out well.
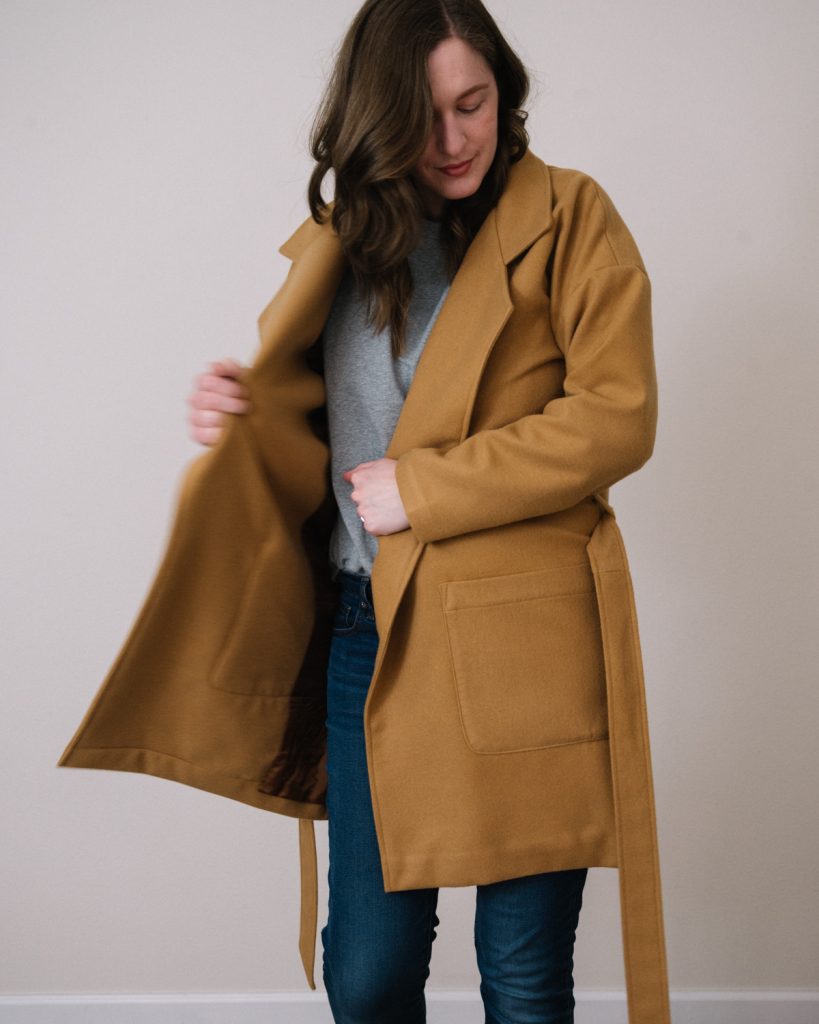
I measured the lining pattern pieces and ordered the amount of fabric I would need. Once it came, I didn’t need to wash it (since I don’t plan on washing this coat), so I went right into cutting and sewing it together the way Helen instructs. I decided to sew the loops for the waist tie on before sewing the lining, because I figured that would be easier and look nicer.
The lining fit to the jacket almost perfectly, I just needed to baste the curve along the edge of the neck facing because it wasn’t fitting very well (I think the curve just added to much length). I was able to ease it in really well, and it worked just fine. Helen has really great instructions and photos of her Pona Jacket lining, so I just went along with it and hoped I was doing it right. The sleeves are what made me really nervous, but it worked! I recorded myself bagging the lining so I could share it in my Instagram stories, and only after watching my own video about 5 times, I finally realized how sewing the sleeves that way works. It was starting to feel like complete magic up until then. Haha.
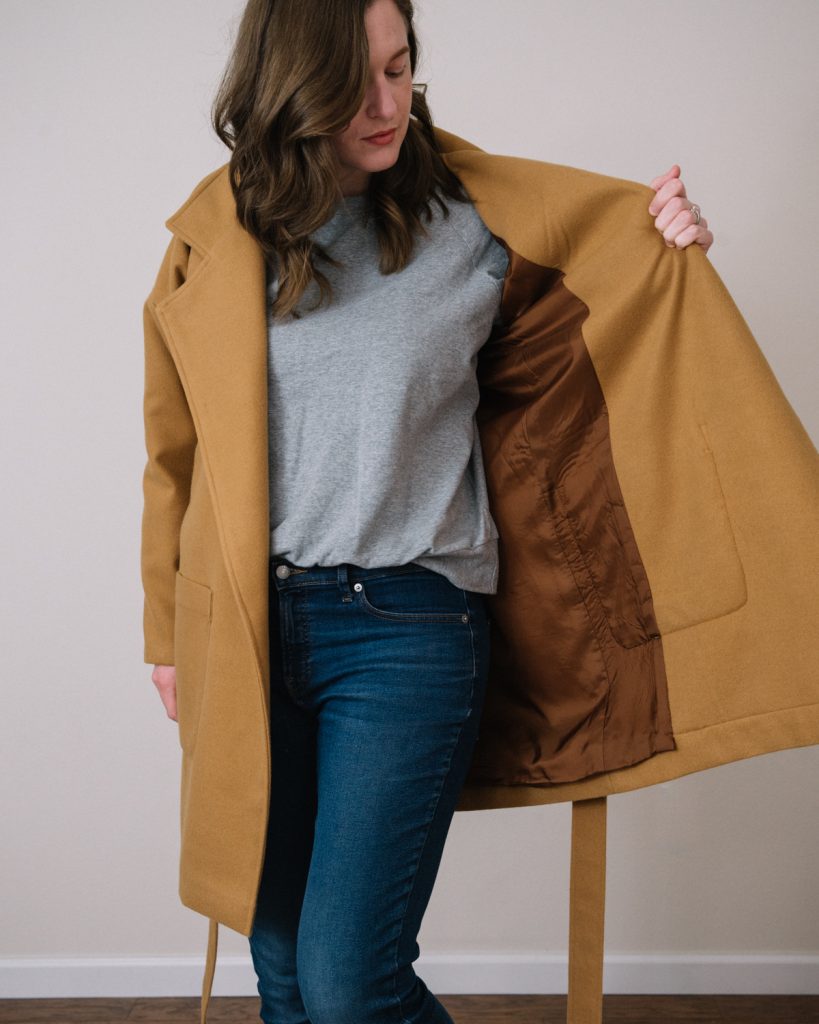
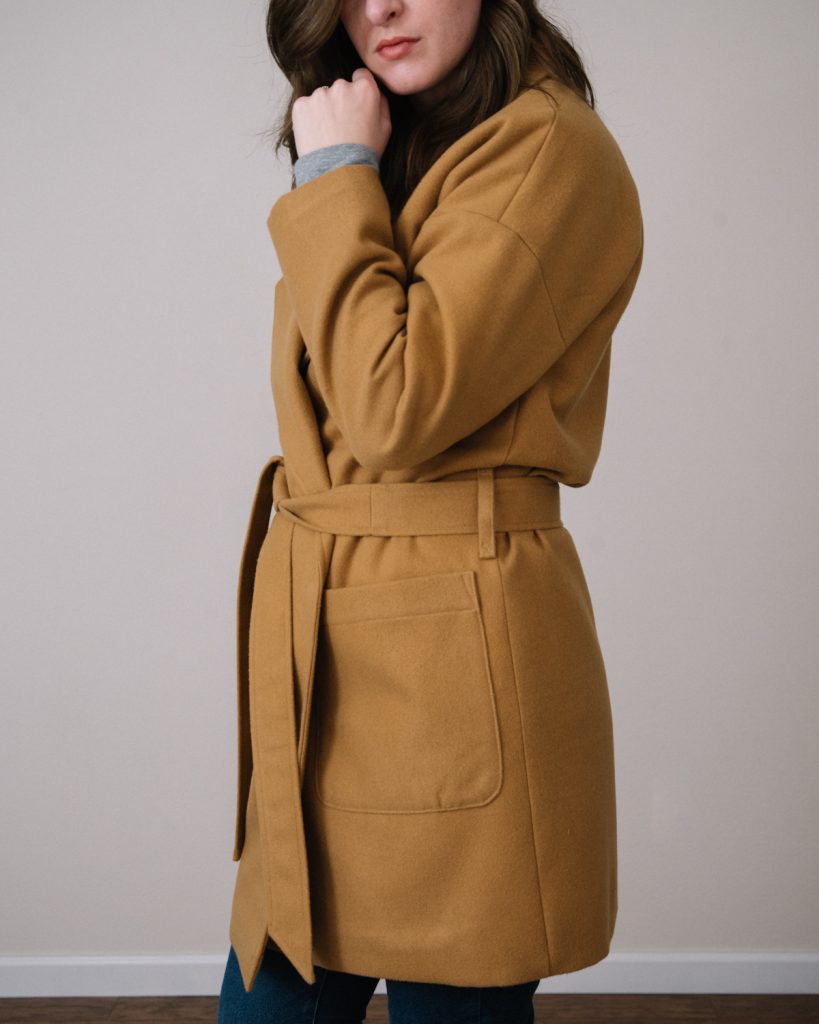
After I bagged the lining, I sewed the pockets on. I decided to round the bottom corners to make them look more like the RTW coat pockets that I’ve seen lately. I think it makes the coat look a little classier than with just square pockets. I basted the seam allowance first and pulled the thread to help the curve fold in easier, then I pressed them really well before pinning them onto the coat. I stitched through both layers of the jacket (coating and lining), the way Helen did in her tutorial. I thought it would help them be sturdier and hold the lining and facing in place.
Once the pockets were finished, I hand sewed the lining sleeve shut (the hole I pulled the jacket through). Then I sewed two holes towards the hem line shut (she explains this in the tutorial). I’ve decided not to topstitch the hem right now, because I think it looks better, but also because I ran out of thread. Haha. I also might have to stitch things in place once I’ve worn it a few times and think of other places that might need secured.
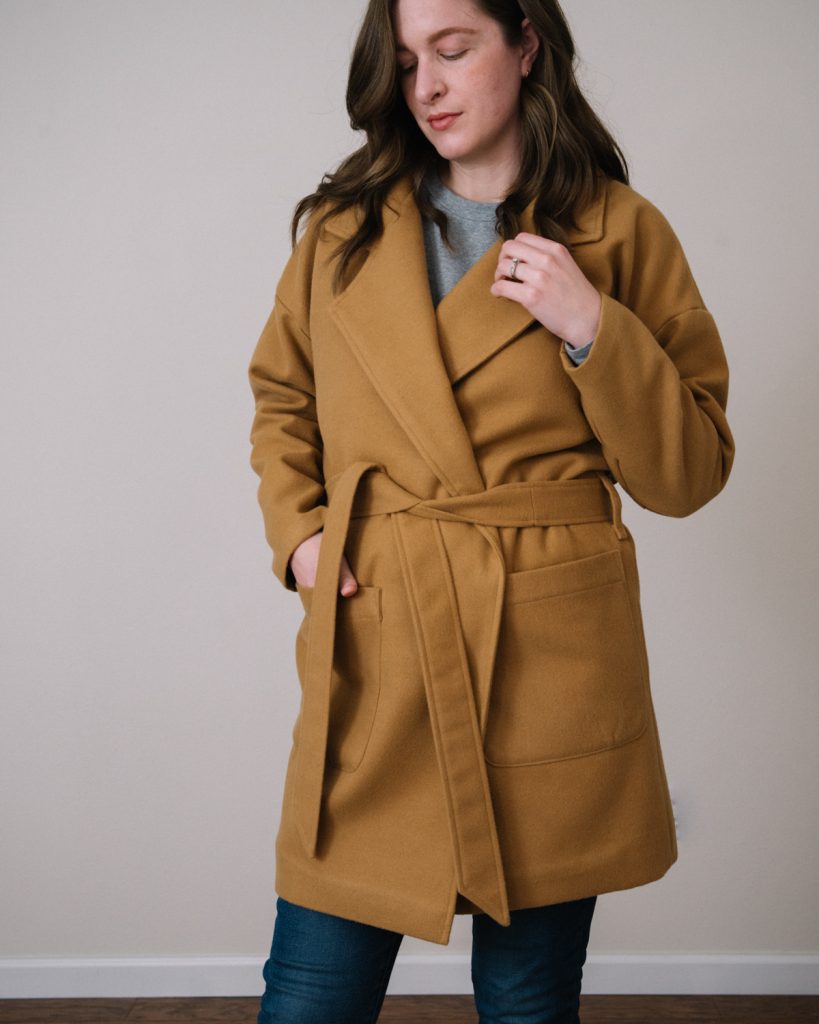
The waist tie was the first thing I sewed before all of this, but it makes more sense to talk about it now. I followed the tutorial exactly the way Helen instructs, but I didn’t have long enough pieces of fabric left, so mine is made out of 3 pieces, as opposed to 2. I made the longest pieces for the ends and then sewed a shorter piece in the middle. I just didn’t want the seam lines to be super obvious, so the shorter piece goes most the way around my waist.
I’m so thrilled with how it came together. I’ve stressed all winter about this fabric, and I didn’t know if I was brave enough to do a lining, especially one that’s not specifically part of the pattern. But it went so well, and I feel like a hole in my wardrobe has finally been filled! A camel/neutral color coat was on my ‘make nine’ list last year, and I didn’t get around to it until now, but now I know I don’t need to stress as much about coats with linings in the future.
If you have any questions or comments, please let me know below, and happy coat/jacket sewing! xoxo
It looks really good – you’re right to be proud of it. Sewing a coat is daunting; I’m in the middle of making one, but I keep putting it off, because I’m not confident that I can do it. So well done!
Thank you, Ann! I am so very proud of it, and I’ve been wearing it for most of today. I’m sending lots of good luck and encouragement your way!! I hope you’re able to finish and enjoy your coat soon too. 💕
Great job!!! The coat looks amazing and it’s really inspiring me to cut into the (intimidating) wool in my stash!
Thanks Rebecca! You can do it!! It was super intimidating for me to cut into this, but it was all worth it! It turned out not being much more complicated than sewing a shirt with this kind of collar/lapel. The lining was something new for me, but the instructions were super helpful.
Thanks for sharing!! I made an unlined Pona last year and lost it in an airport. I was CRUSHED!! I intended to make another immediately but then saw Helen’s post about a lining. I bought the lining and some yummy wide wake corduroy but haven’t been able to take the plunge. The lining seemed hard. You are going to be my inspiration!!
Oh my gosh, I would be SO crushed if I lost mine too! I can honestly say that it wasn’t very complicated at all! The tutorial instructions were really good, and the two times that I’ve done lining haven’t really been that difficult. I hope you get the confidence and motivation to sew it up soon! Corduroy sounds like it would be amazing. 😍