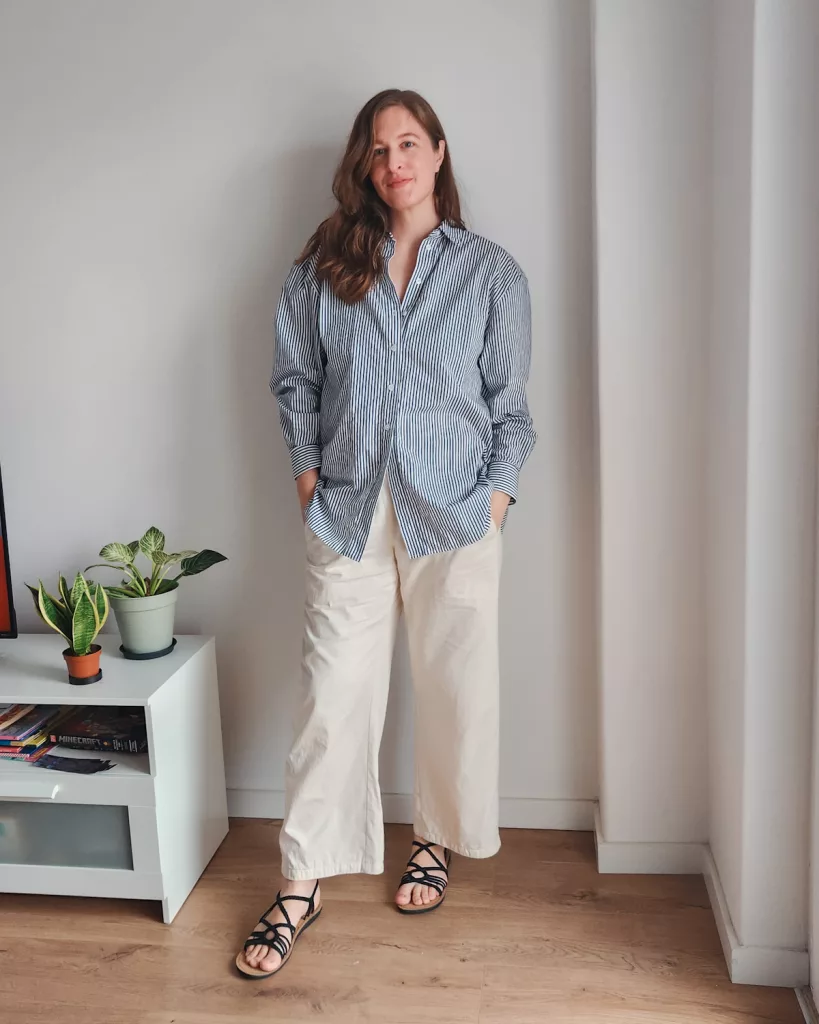

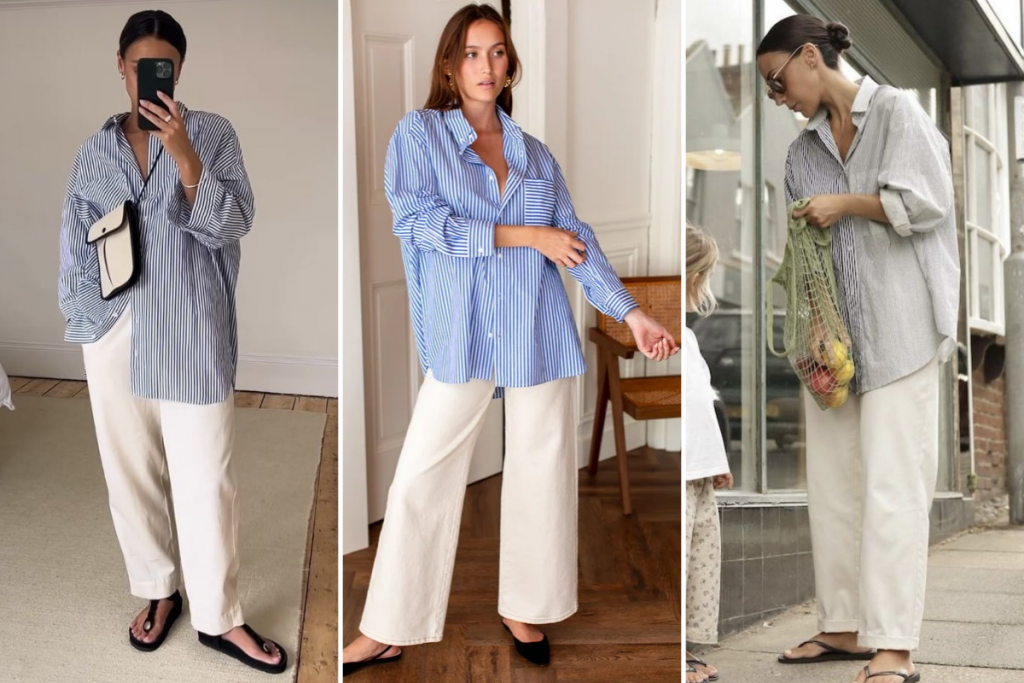
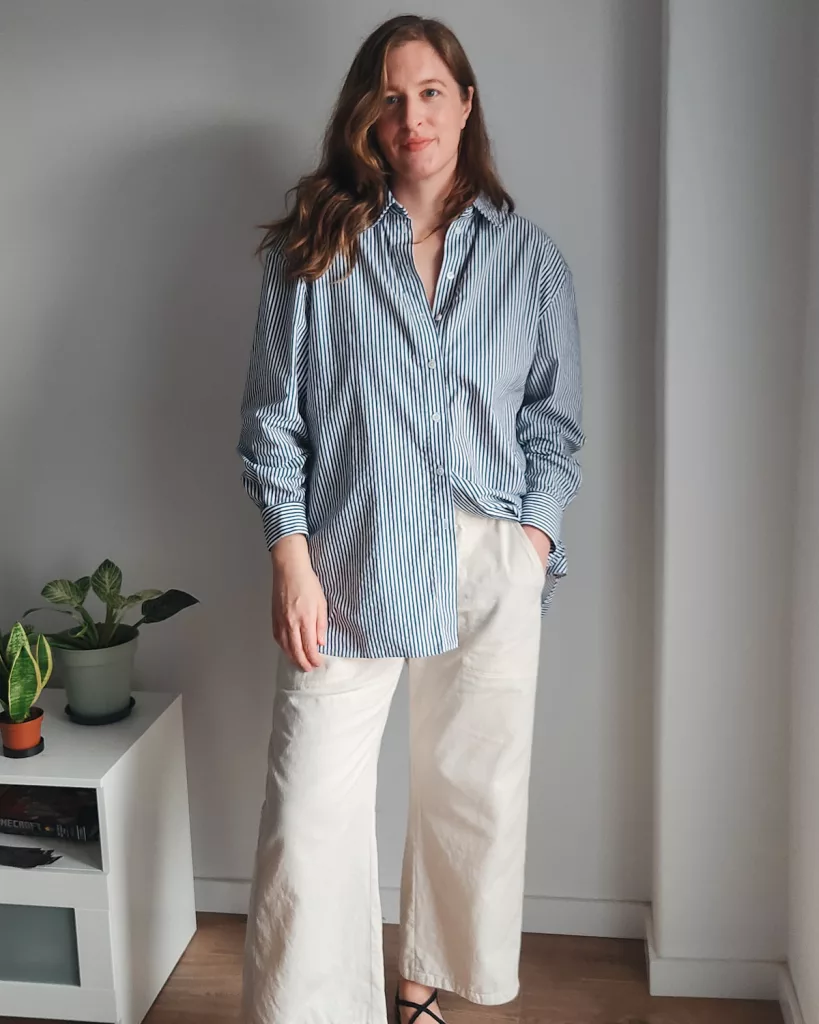
I’m so excited to share today’s makes. I have not been able to get this look out of my head, and I kept pinning outfits just like it. It feels good to finally make it and wear it! Below are a few photos from my Pinterest boards.
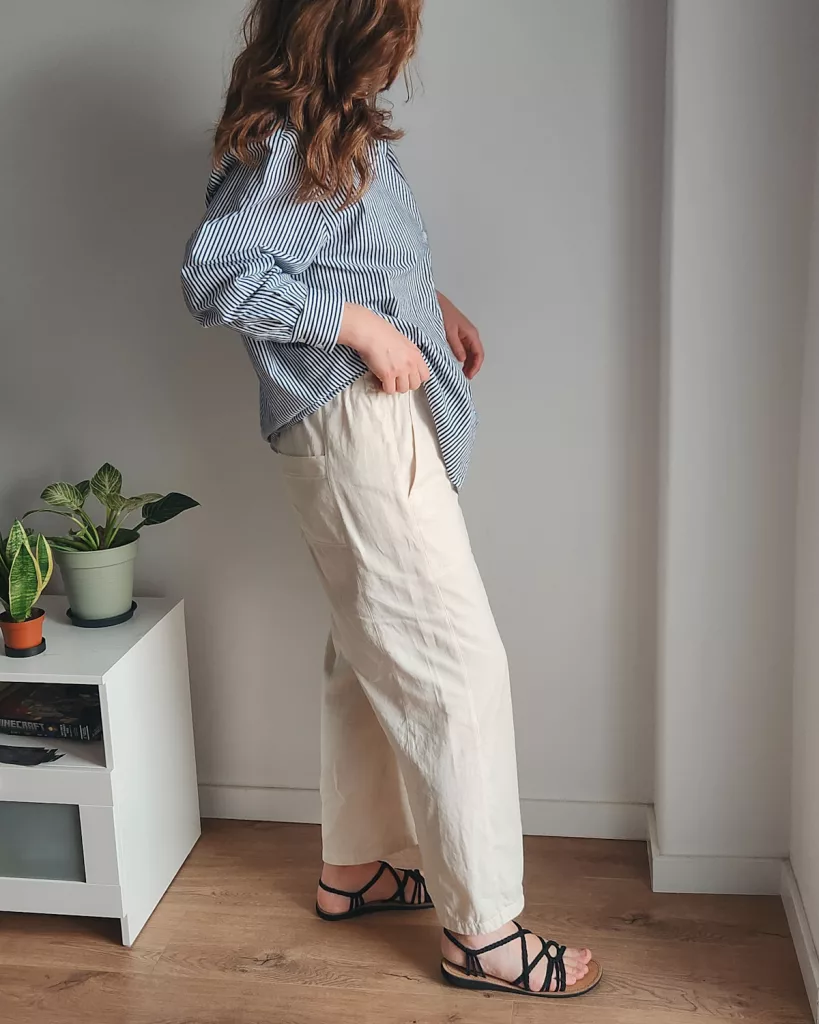
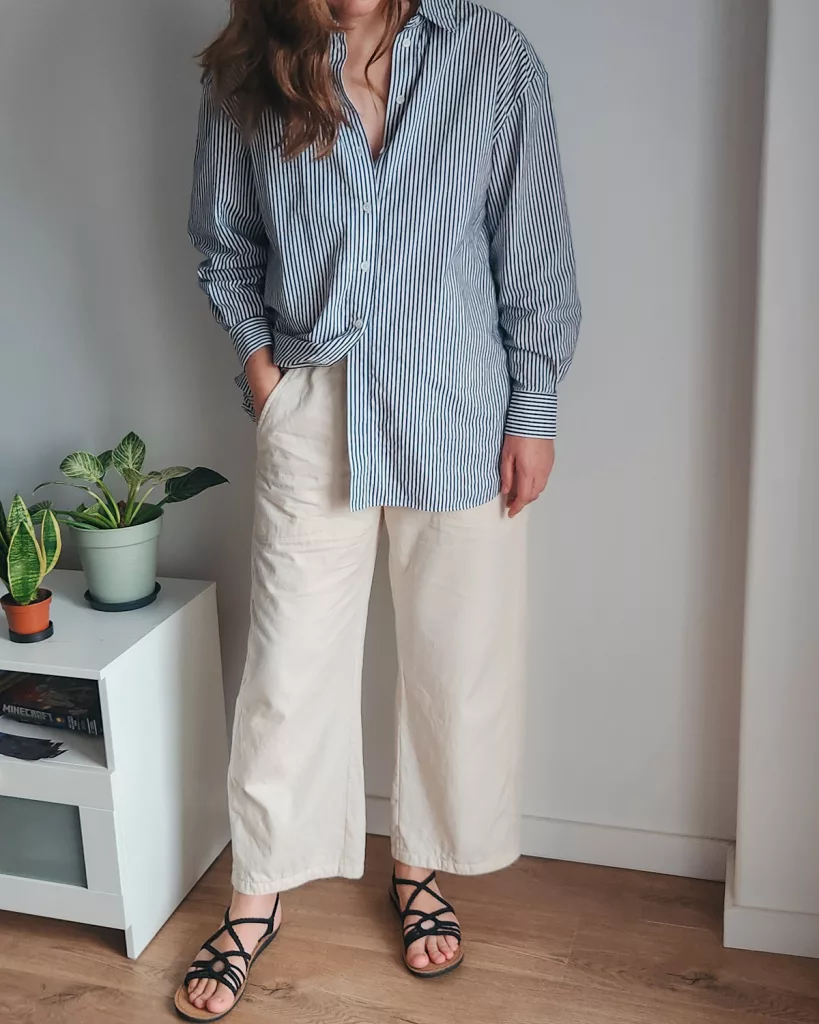
I love the look and feel of this outfit. The oversized blue and white button up shirt and wide leg slacks still look a little dressed up and chic, but I’m not restricted in any way. I can easily layer it with a white tank under my striped shirt and it still looks great.
This was my first time making this blouse. I can’t stop making striped shirts, even though they tend to make me go a little cross-eyed. It’s worth it, I think.
This is my 7th (!!) time making these slacks. Although lighter color pants make me nervous, my first pair of Free Range Slacks (FRS) were the same color, and they’re still going strong! So, I felt better about going ahead with these. I’m a bit like a broken record, but I just love the FRS, and I haven’t been interested in finding a different pattern, so I’m stuck on these for now.
Viki Sews – Cynthia Blouse


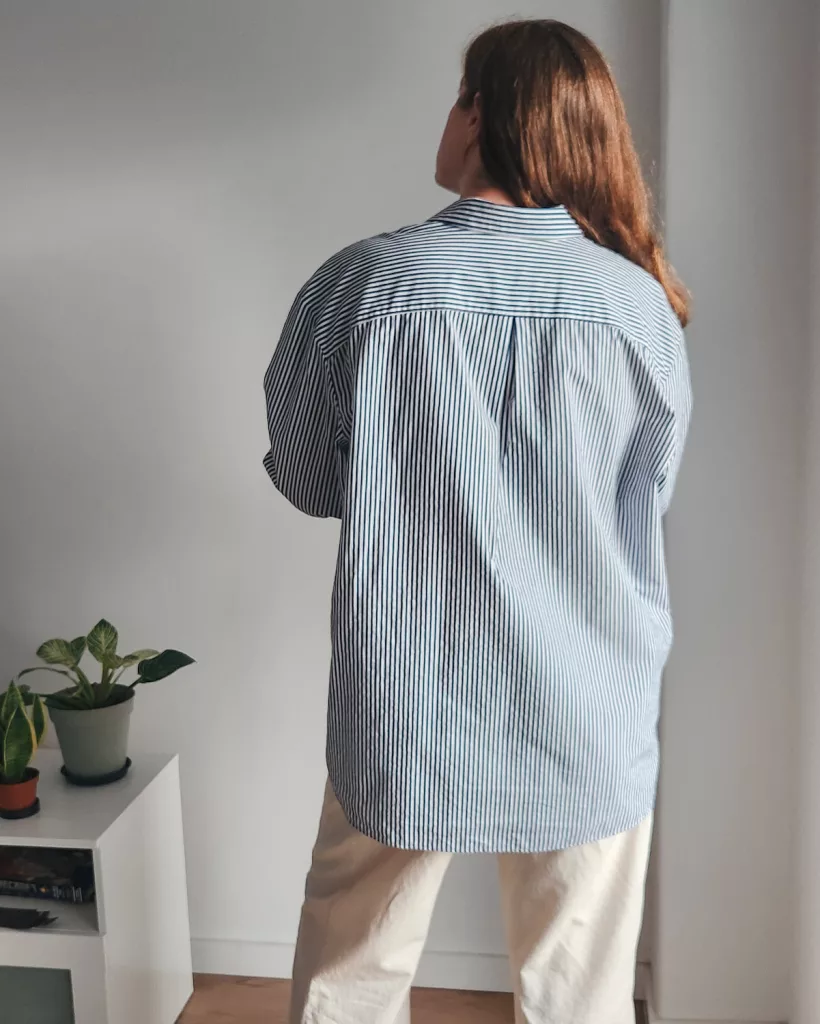
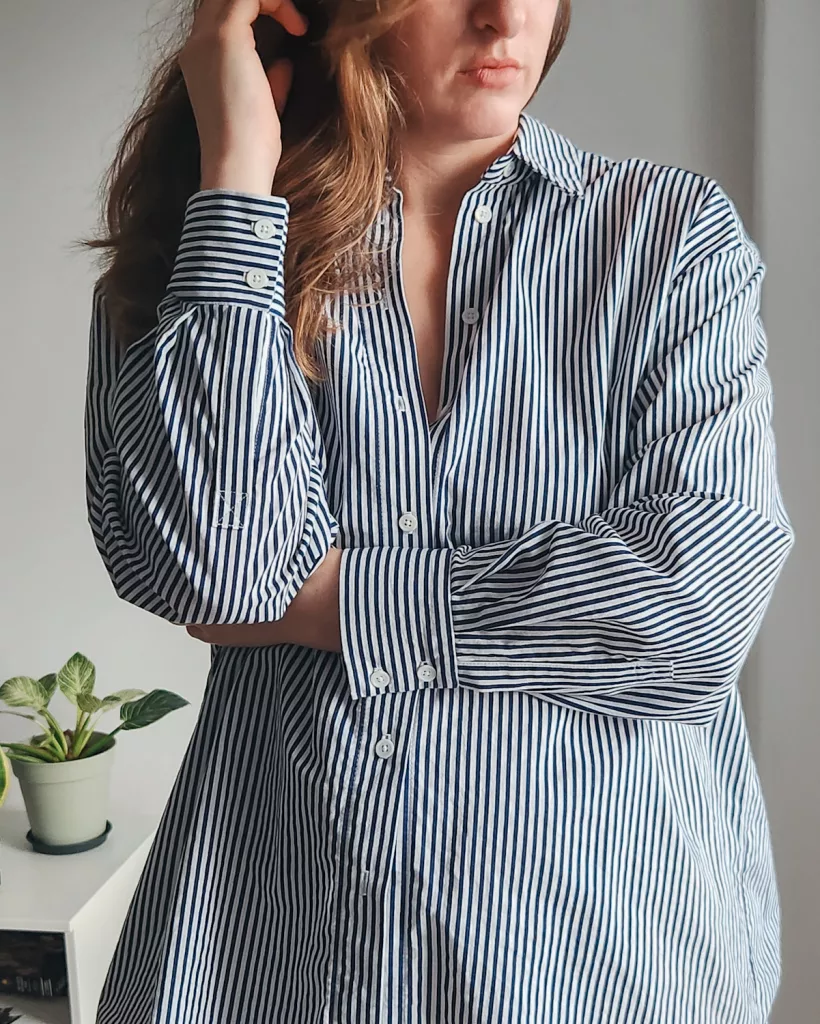
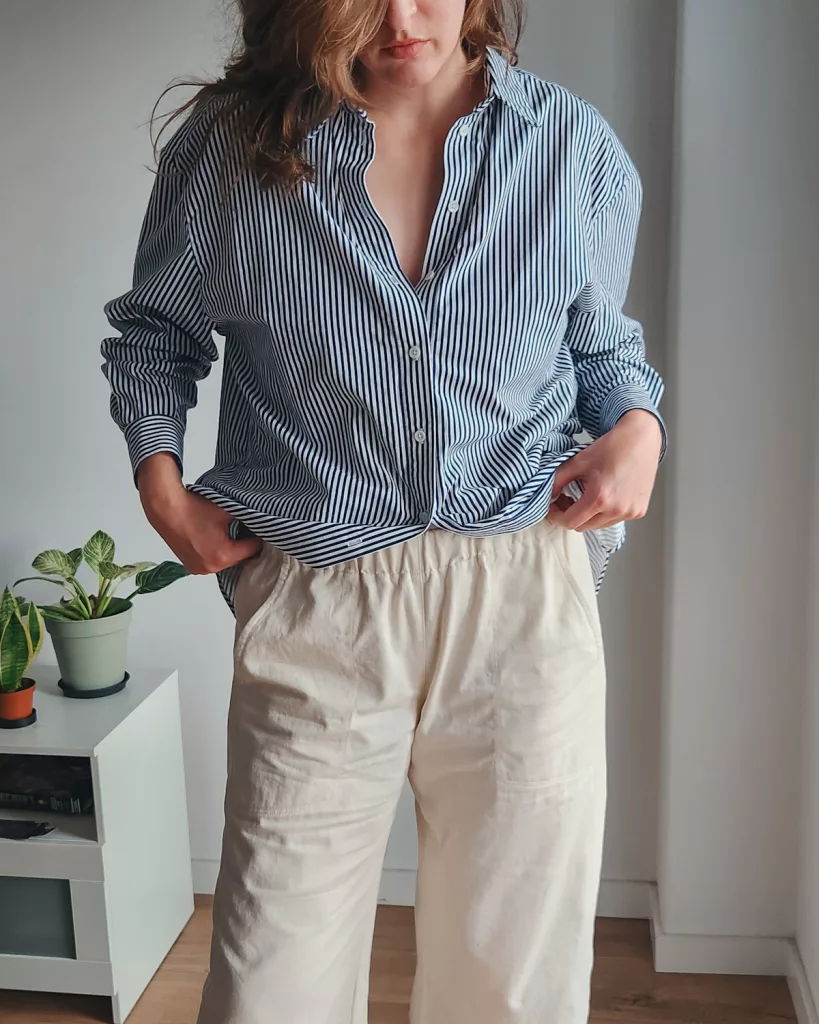
I’ve been so on the fence about making the Cynthia Blouse by Viki Sews (sizes up to 116cm bust/122cm hips) for… I want to say, years? I see some, and they look so good, but then others can look way too big. I feel like I’m someone who embraces oversized pretty well, though. So, after messaging a few people about what sizes they chose and how they felt about the pattern, I decided to go for it. Especially when this outfit really needs a good, oversized shirt.
My bust measurement is around 38/39 inches, and the Viki Sews website says to choose a size based on your bust measurement. So I went with the size 44 which matches up with 39 inches, but I could have picked the 42 and been fine.
When it came to choosing the length, I went with 170-176, even though I fit into the 178-184 category. I’m really happy with the length, since it matches the proportions of my inspiration images. I think that it might be the the length that makes this shirt look too big on some people. But I think the reason is because in the instructions, they have to do the side seams and hem as one of the first steps (instead of hemming at the end), which is really surprising to me.
That’s one of the things I didn’t really like about the instructions—their order of operations. I know I can do it any way that I want to, but I wanted to mostly follow the instructions this time. I’ll definitely be changing the order in the future.
If you’re curious what my preferred order is, I really like when patterns start with doing the sleeve plackets and cuffs. I find it a huge relief to get those out of the way. Then I can move on to the front plackets, shoulder seams/yoke, collar, sleeves, and hem last. It’s fine to deviate a little bit, but I really didn’t like leaving the sleeve placket and cuffs until the end.
They also didn’t explain the burrito method well at all. Luckily, I’ve done this plenty of times to know what to do, but if you’re new to sewing shirts, you may want to look up a YouTube tutorial or pull up a different button up shirt pattern that explains/shows it better.
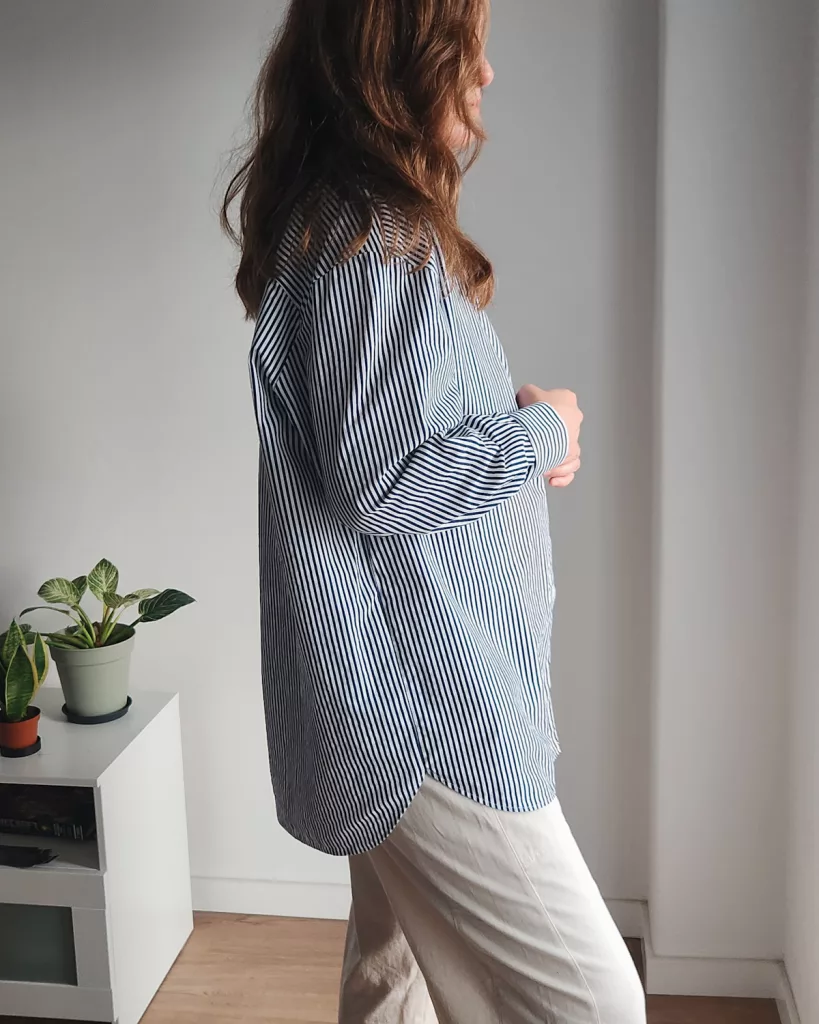
It was nice that I could just cut out my pattern pieces without having to do any adjustments, but I’ll be sure to add about ~1-2″ of length to the sleeves in the future for a little bit more mobility in the elbow area. This shirt still works great as an extra layer or with the sleeves rolled up though.
This is a nice crisp striped cotton from Divazus (warning: just linking so you know which one). I would have loved this fabric so much more if the dye didn’t bleed so badly. When I was ironing/steaming certain areas, the blue would bleed onto the white. It’s most noticeable on the collar where I was pressing a lot, but you can’t really see it in the photos.
Then, when I was finished making it and starting on my slacks, I didn’t realize it, but there was still blue on my iron! So, I looked up a few tutorials on how to clean my iron before I continued. I’ll have to be sure to wash it by itself in the future, but I just thought that was a bummer since it’s such a nice stripe width and color.
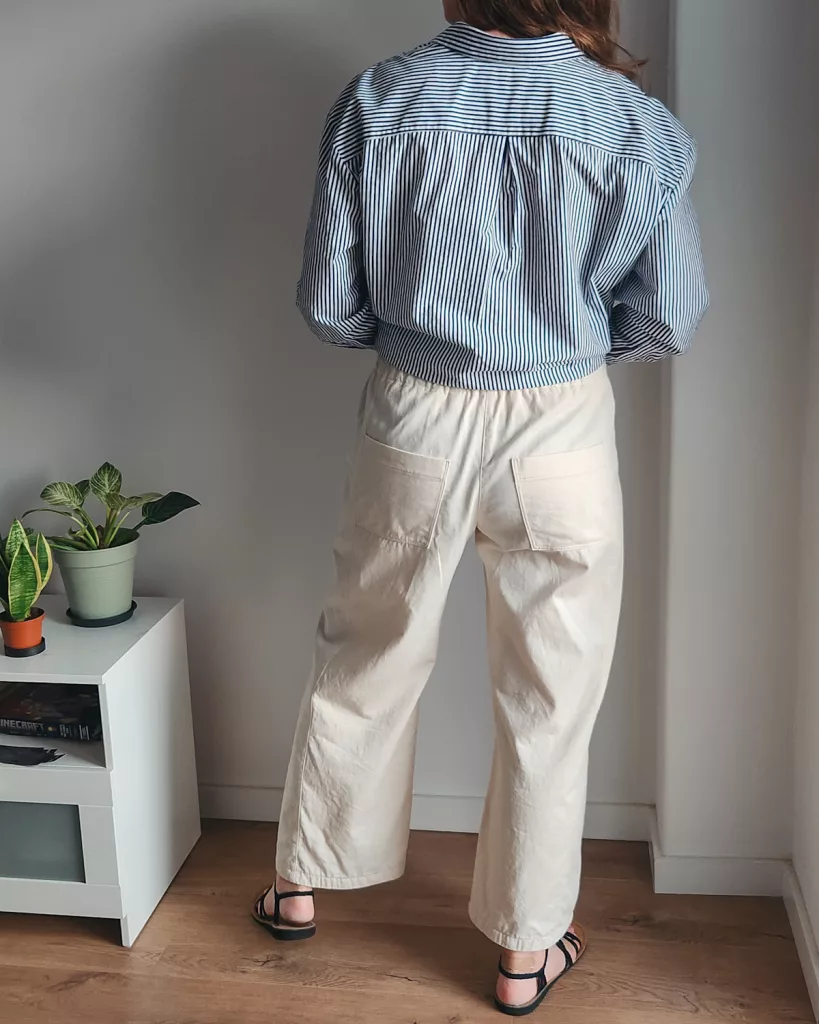
Sew House Seven – Wide Leg Free Range Slacks
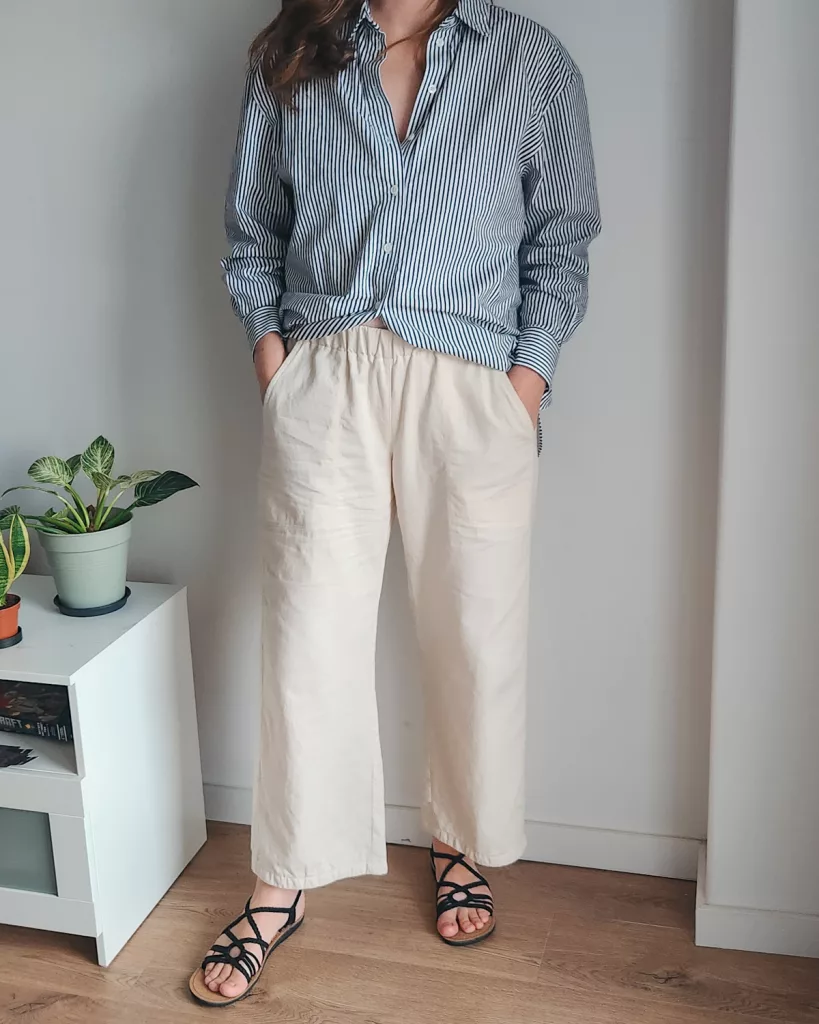
Since this my 7th time making the FRS and my 2nd time making the wide leg version, I don’t have as much to say, but I can say that I LOVE these.
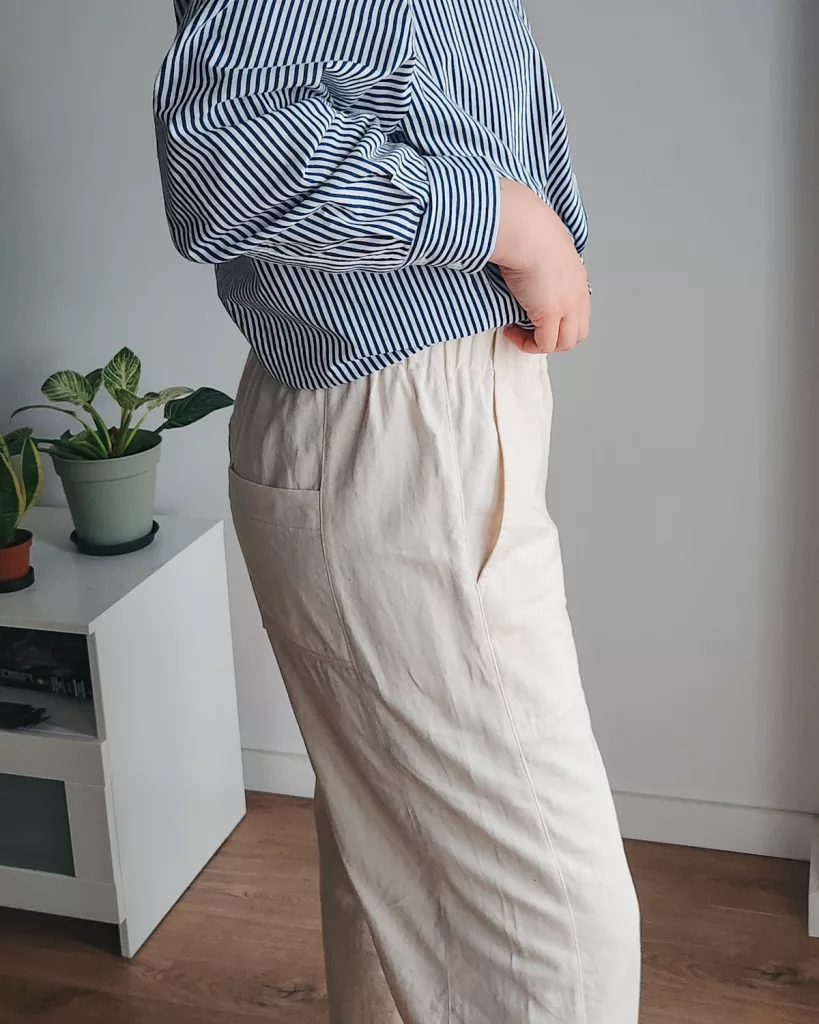
I did my usual mid-rise adjustment (taking 2″ off of the rise), and shortened the pockets at the shorten/lengthen line by 1.5″.
The wide leg version is a cropped view, and I added 3″ to my first ones, but this time I went an inch longer and added 4″. I also didn’t want to lose length when I hemmed them, so I did my usual trick of using bias binding. I cut 2″ wide strips of this fabric and used a 1/2″ seam allowances to sew it on, under stitched, and then folded it to have a 1″ hem.
I’ve made this pattern so many times that I’m in a bad habit of not looking at the instructions (that is bad, because they’re great instructions). And when I was sewing the side panels, I used a 3/8″ SA instead of a 5/8″ like I was supposed to. So, the legs are 1/2″ wider than they should be, which I’m not really upset about! I might actually make the same mistake in the future. Then, to adjust the waistband, I just used a 3/8″ SA as well and that fixed the problem of the waistband potentially not being wide enough to fit.
I am a much bigger fan of this thin organic cotton denim from Divazus. It’s the same fabric that I used for my Tether Pouch a few months ago. It’s about 6oz, so it worked really nice for these, and it didn’t get too bulky anywhere. I also use Gutterman Mara 70 thread as an alternative to topstitching thread and it looks really nice without the stress of it getting stuck in your needle.
I loved this fabric so much that I’m tempted to buy more to make a pair of shorts for next summer. I recently bought The Xanele Shorts by French Navy, and I’m looking forward to making those eventually.
This was kind of long blog post, but I hope you found something helpful. I love these kinds of makes where I get to recreate something and share it with you.
Thank you so much for reading my blog today. Leave any questions or comments below, and happy sewing! xoxo
Feel free to subscribe if you would like to be notified of new blog posts, or you can also find me on Instagram and Pinterest.
This page contains affiliate links. For more information see our Affiliate Links disclosure.
You have become so accomplished! And yet you are always looking for things you can do differently. I love your adventurous spirit!
Thanks Grandma! It’s nice to know enough of what I’m doing to deviate a little bit or easily fix mistakes that I make along the way. 🙂
Love the pants. I have the pattern but have yet to make it up. I’m curious as to your inseam if you added four inches and they’re still ankle length.
Thank you, Stephaney! I just measured the inseam on these pants and it’s 28.5. I checked the finished garment measurements on the pattern, and it says that the largest size (20) is supposed to be 27.75 long, but I just measured the pattern piece and it’s only 27″ — and that’s not even hemmed. So, they must have something off on their calculations. The wide leg version is very short though, so just be sure to measure before getting started.