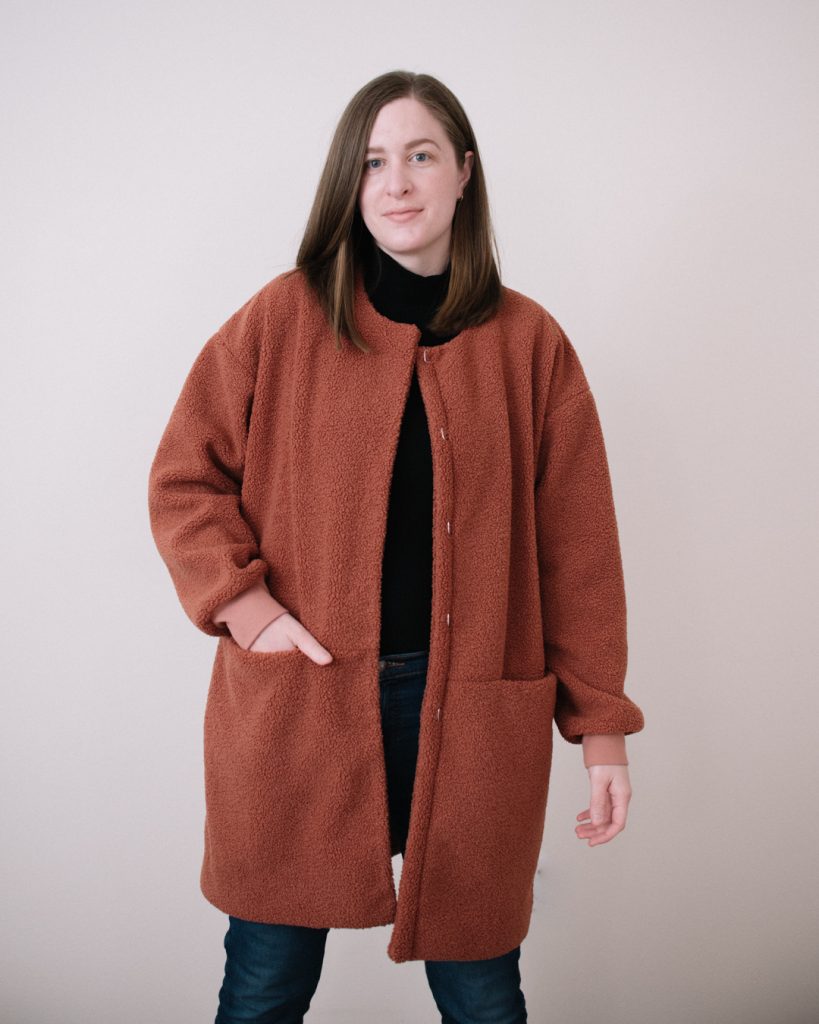
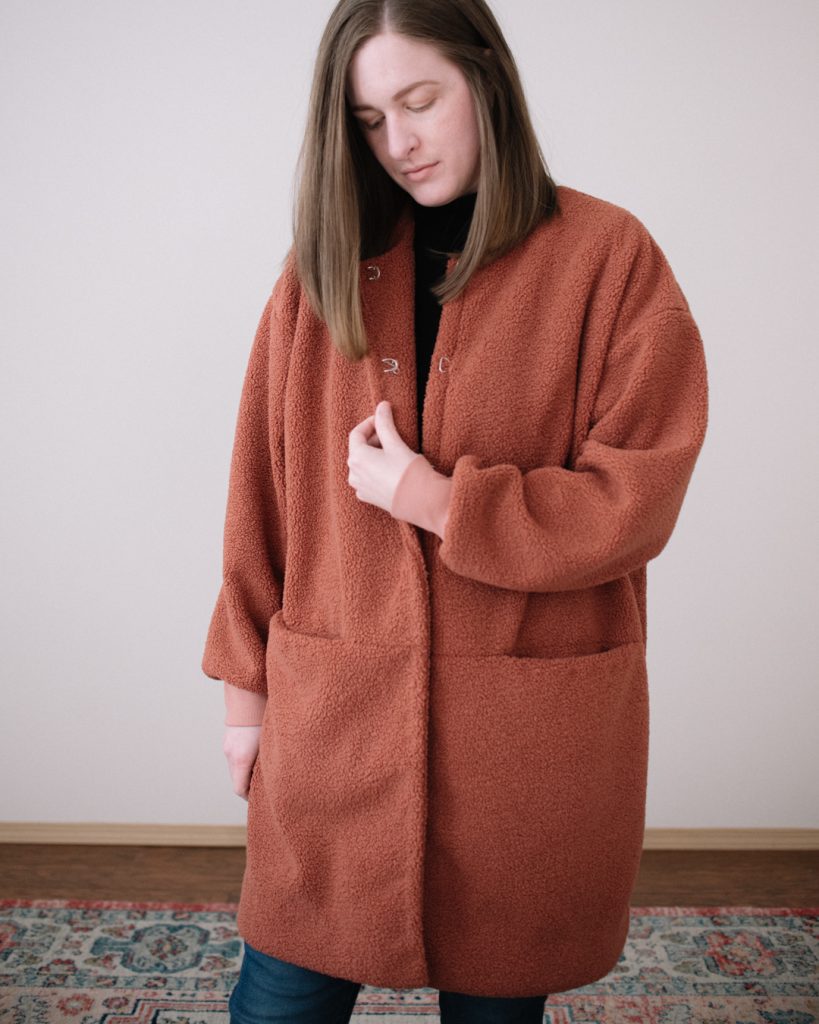

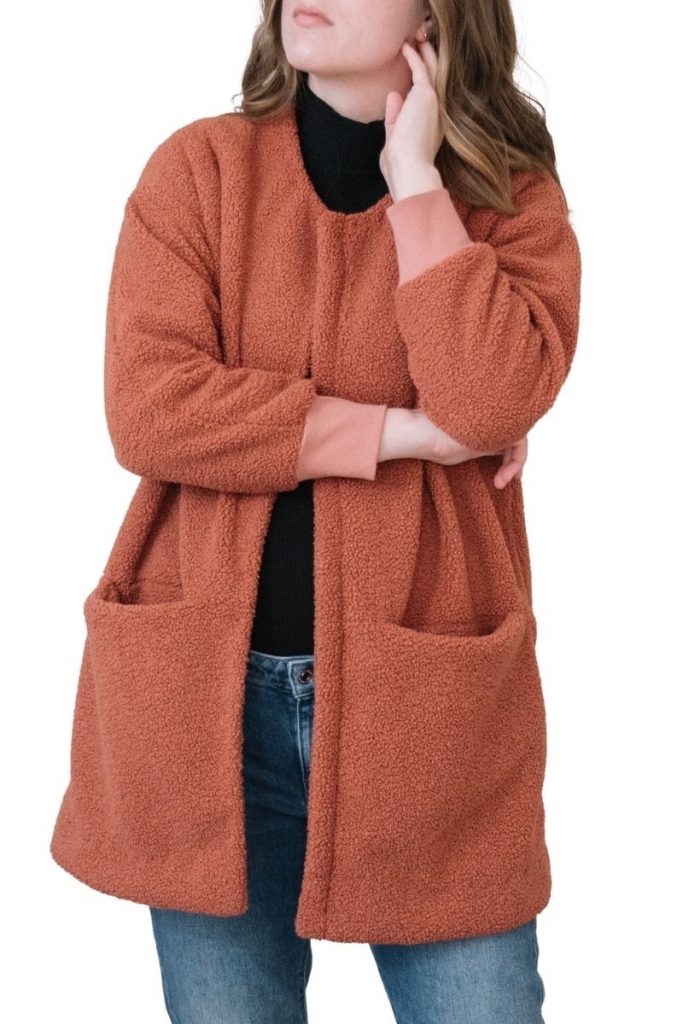
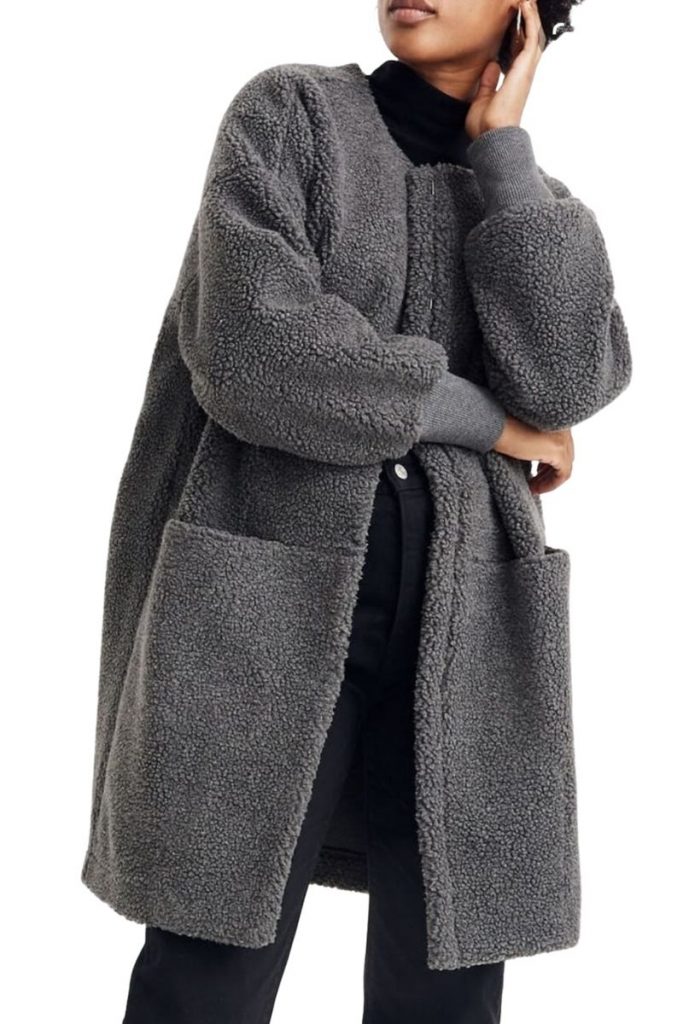
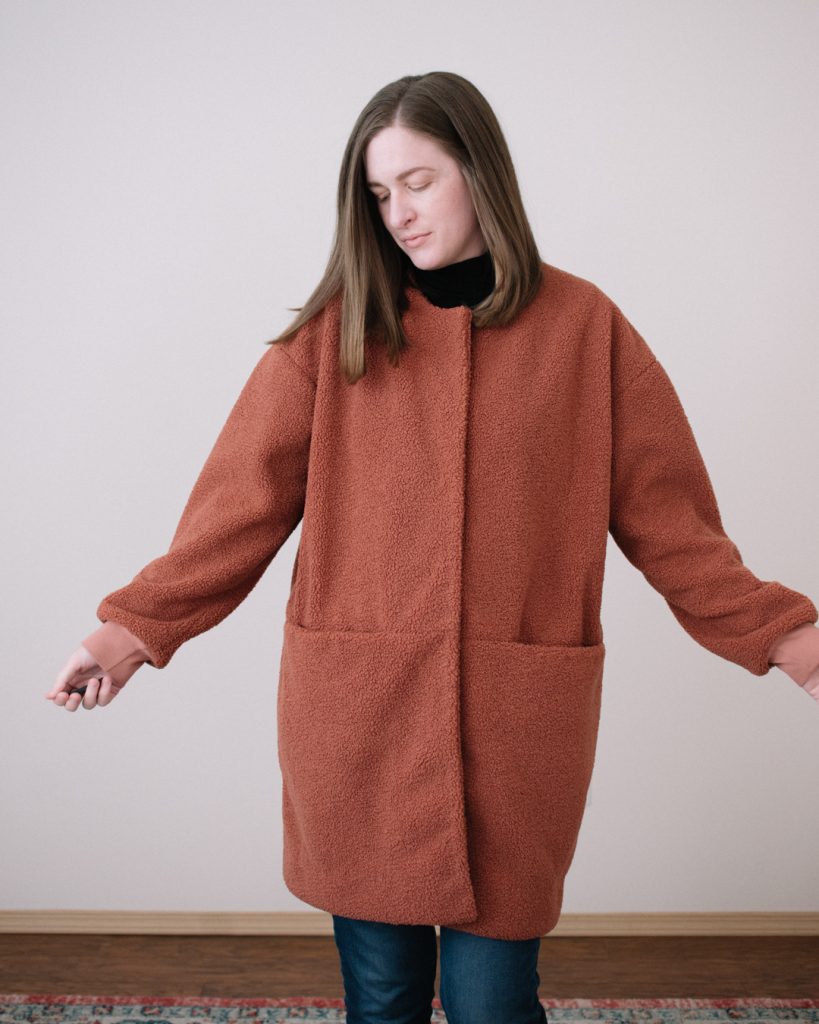
Hi friends! Does this look familiar? If it does, it’s because I made a VERY similar one two months ago and was a bit disappointed with how it turned out. This is my second, much more successful attempt at making the sherpa teddy coat that Madewell came out with in 2018. Below you can see my Madewell inspiration in the middle, my first attempt on the left, and my second attempt on the right.

Let’s go over what I didn’t like about the first one really quickly.
-The shoulders and back were too tight to be comfortable. The sherpa fleece added too much bulk, and I should have sized up. I made a size 8/10. (I had the size 8/10 cut out for my past measurements, that put me at a size 10, but now I’m at a size 12, and I should have re-measured.)
-I forgot to adjust the bottom-half of the front pieces and had to cut the top fronts to match — This made the front not come across far enough, and the placket actually adds 1″ more to the left side making the front pieces different widths.
-I made the sleeves about 3″ too short by accident out of laziness. (I made this jacket before and couldn’t remember if I lengthened the sleeves, so I just assumed I had. …I hadn’t.) I also forgot that I only cut one sleeve, and when I was finished cutting, I didn’t have enough fabric leftover, so the right sleeve is pieced.
-Because of all of my cutting errors, I was super frustrated, and I zipped through making it, so I skipped adding the front hook and eyes.
SO, I was happy that it would have worked if I hadn’t messed up so much, but I had a very strong determination to get it right. Enter: Second & Final Attempt.
I decided to document all of my adjustments and making process on Instagram because people were interested, and now it’s easier for me to remember everything that I did. There are a LOT of pictures from my Instagram stories with text on them. I will still re-write what they say, but I don’t have a photo without the text on them. Sorry about that.
This is the Esme Cardigan by Named. I reprinted the pattern to make the size 12/14. This fabric is the Reversible Sherpa Fleece in the color Rose from Style Maker. After everything was cut out*, I calculated and used 2.25 yard of the 3 yards I had. (I had 26 full inches left over.)
*I used a 3/8″ seam allowance for all seams.
PATTERN ALTERATIONS
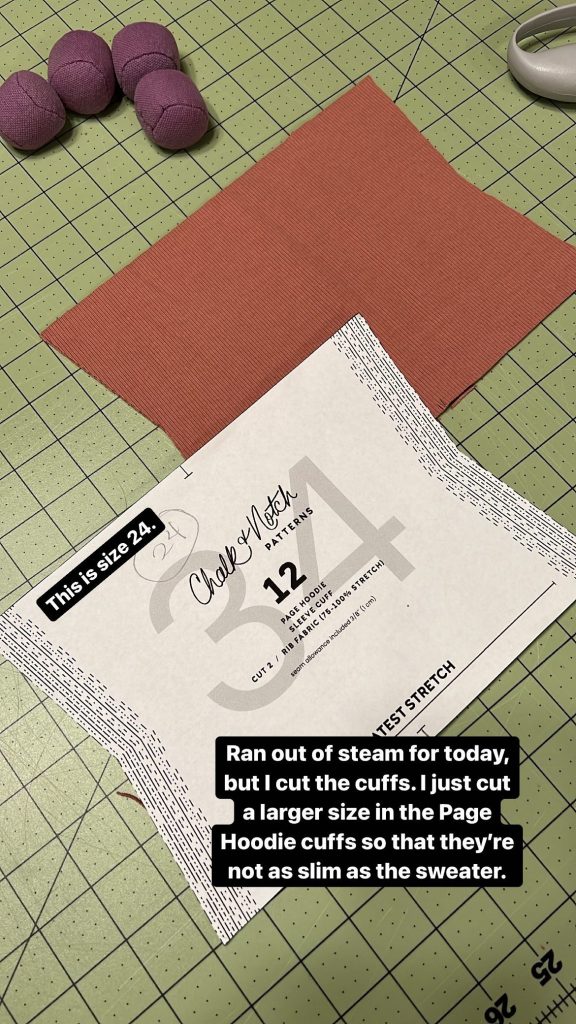
The cuffs were perfect last time, so I did those exactly the same. I used ribbing and cut the size 24 cuff from the Page Hoodie Pattern by Chalk and Notch. I just wanted a larger size than my actual size and already had the size 24 cuff cut out.
I made sure to not screw up the sleeve this time! An awesome sewist messaged me and said I could get more of a balloon sleeve if I widened the sleeve at the bottom and sent this tutorial from Helen’s Closet. I widened the bottom by 1″ on both sides, then made the corners 90 degrees and curved the line back into the original hem.
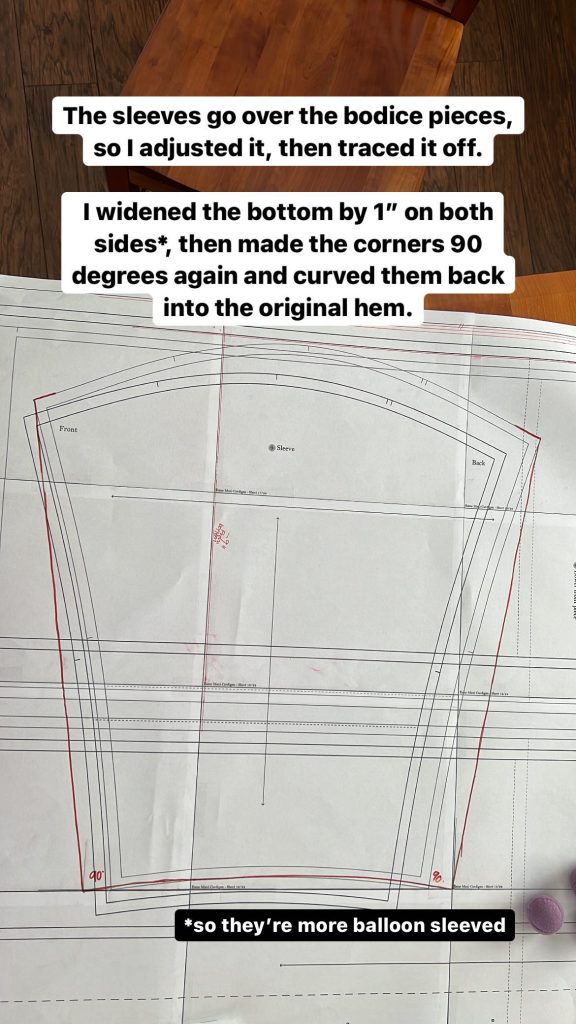
The sleeve piece is layered over the bodice pieces, so I traced this off when I was finished.
One thing that I did differently this time that helped SO much was to make the adjustments to the pattern pieces before cutting them out. This kept them in alignment, and it made it so much easier to draw the lines. It’s hard to see in these photos, but I’m making the size with gray lines. (The 8/10 and 12/14 are both together in the print file.) They also include the seam allowance lines, so that makes the lines at the center front a little bit confusing. But just zoom in if you need to. The dark red lines below are my final lines.
The first line I drew was straight up from the front center. The second line is 3/8″ to the left of that line, and it’s for the left front piece. The third line is 1 3/8″ to the left of the center front line, and that is for the right front piece.
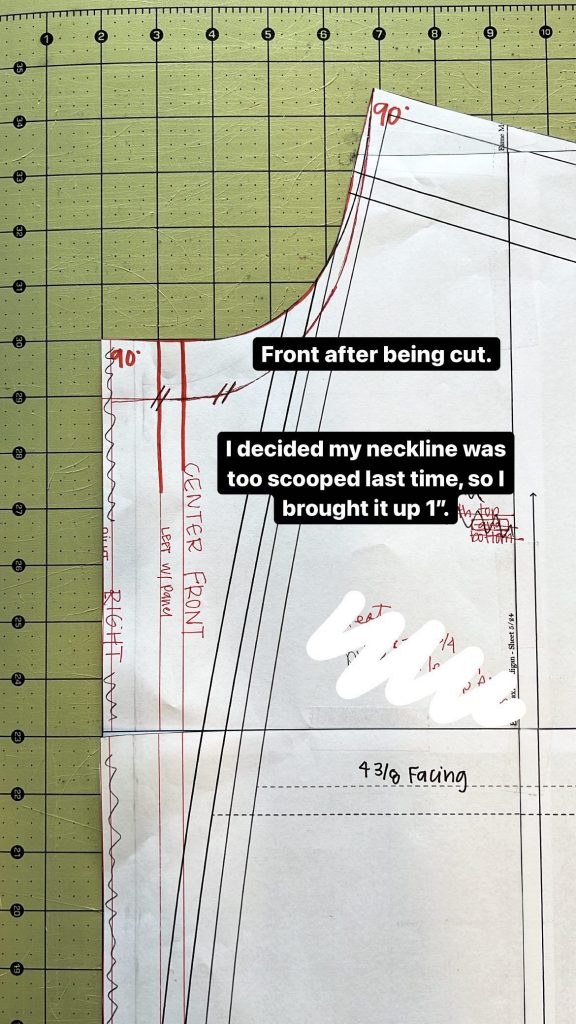
I drew the neckline next. The lighter red line that I have slashed out is my old neckline from my other coat. I decided that I scooped it a bit too much, so I took it up 1″ and redrew the curve back up to the shoulder seam.
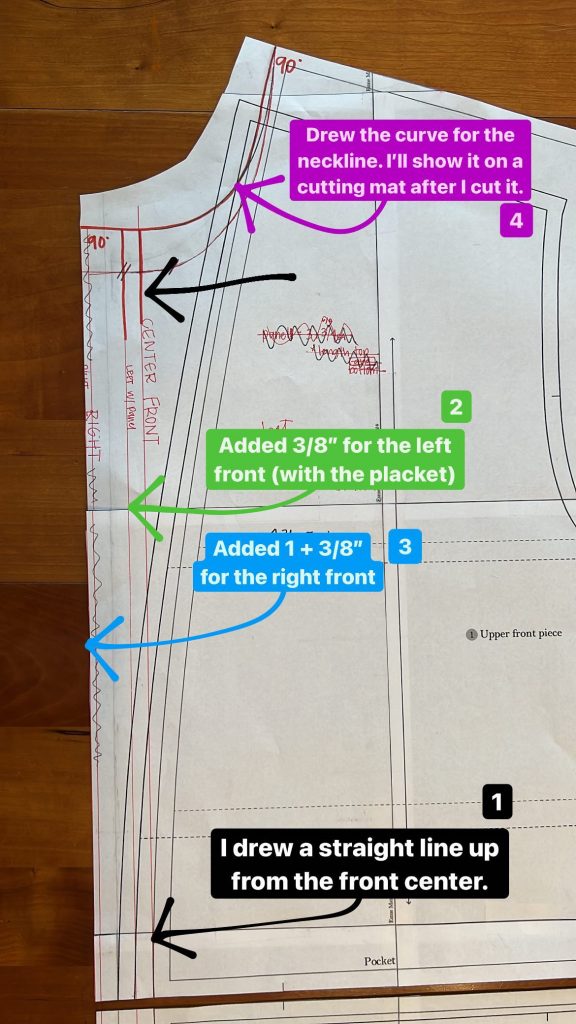
BEFORE I cut out the pattern pieces, I continued the front 3 lines down to the bottom front piece. They are in perfect alignment when printed, so it was super easy. (I forgot that last time and it really messed everything up.)
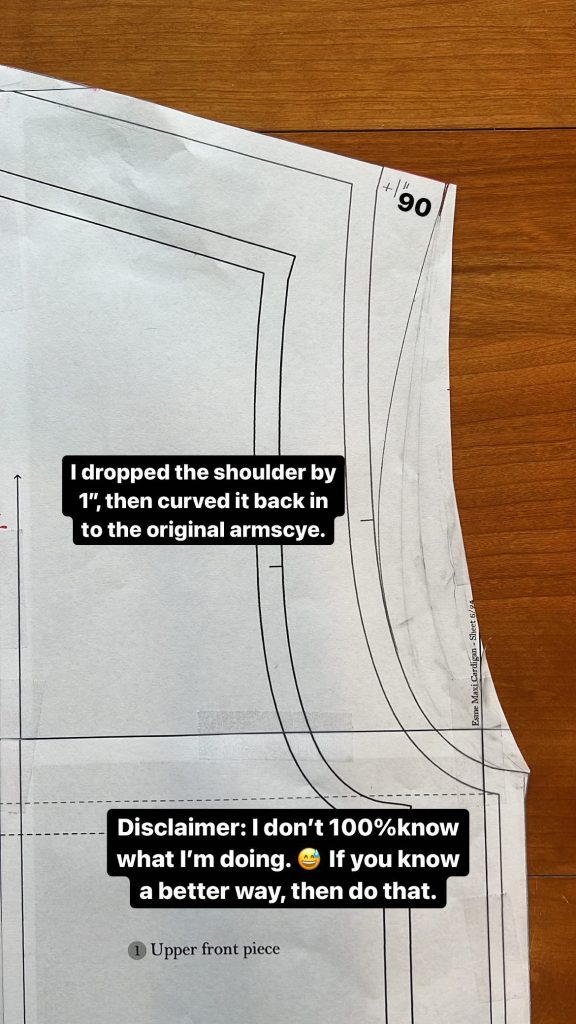
Next, I increased the drop of the shoulder by adding 1″ to the shoulder seam and curving it back into the armscye. Then I repeated the same thing on the back piece.
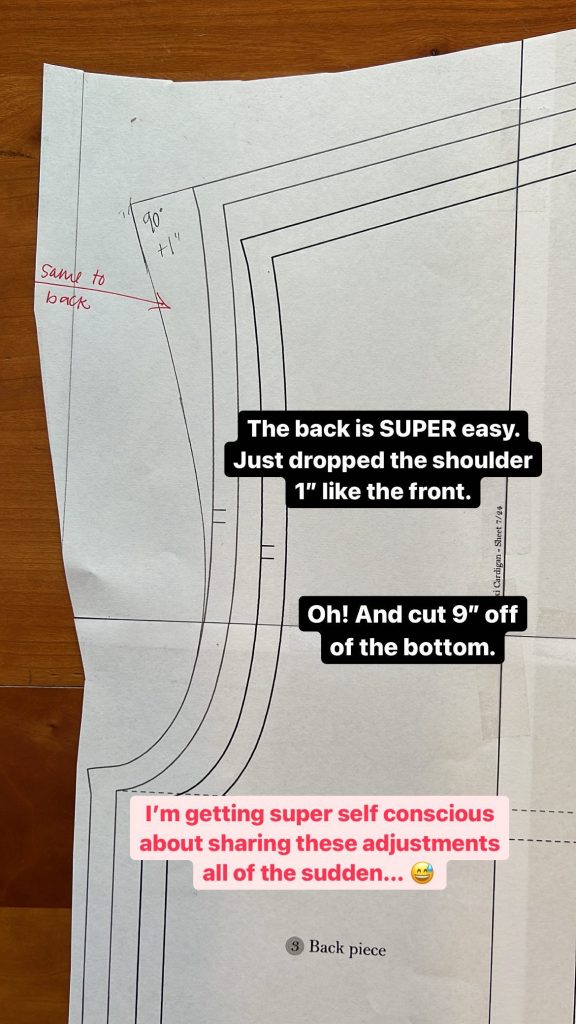
After that, all of the adjustments were finished, so I cut the pattern pieces out. For my other Esme Coat, I cut 11″ off the bottom/hem, but that was too much, so this time I only cut off 9″. I did the same to the back piece and shortened it by 9″.
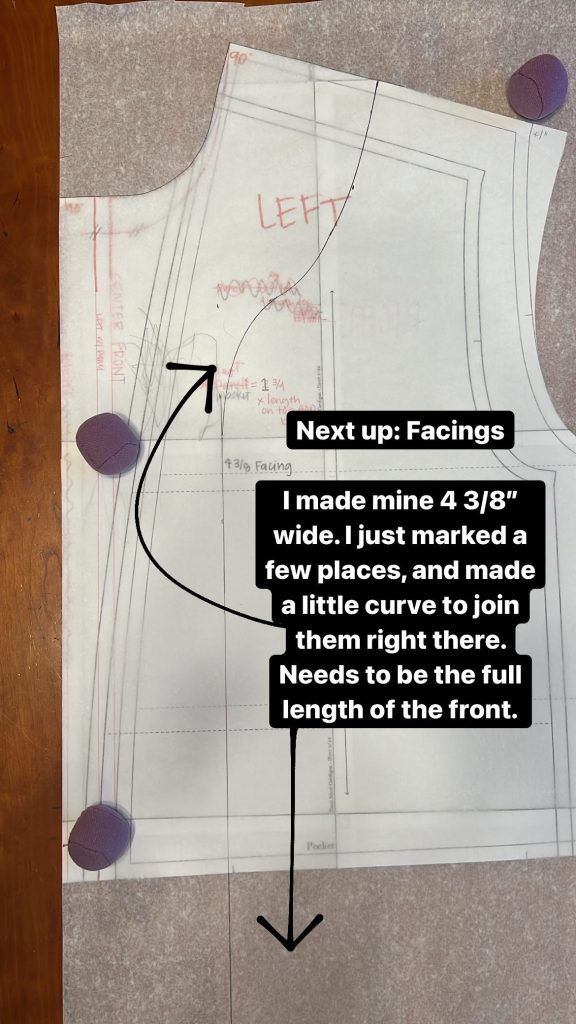
Next was the facings. I made my facings 4 3/8″ wide. I made a bunch of marks 4 3/8″ away from the neckline and the front line, then made a little curve to join them together smoothly (shown below). The front facing needs to be the full length of the front (mine was about 36″ long).
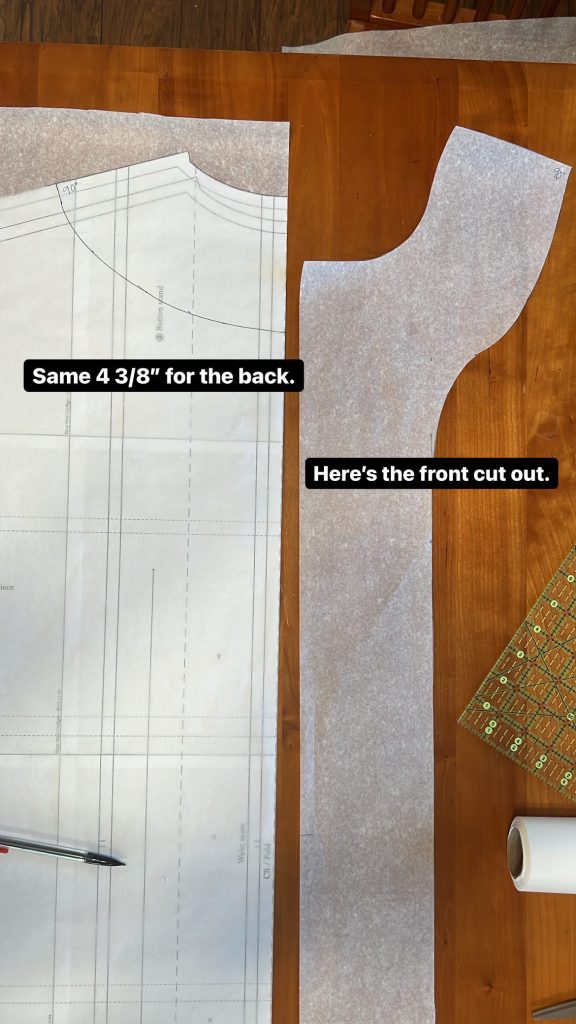
I did the same from the back piece only it was easier since it’s just along the neckline. In the photo below you can see what my front facing looks like cut out.
The last piece was the left front placket, but I didn’t cut a pattern piece for it. I just needed it to be a long rectangle 1 3/4″ wide and the length of the full length of the front (mine was 36″). That’s all of the pattern pieces!
CUTTING
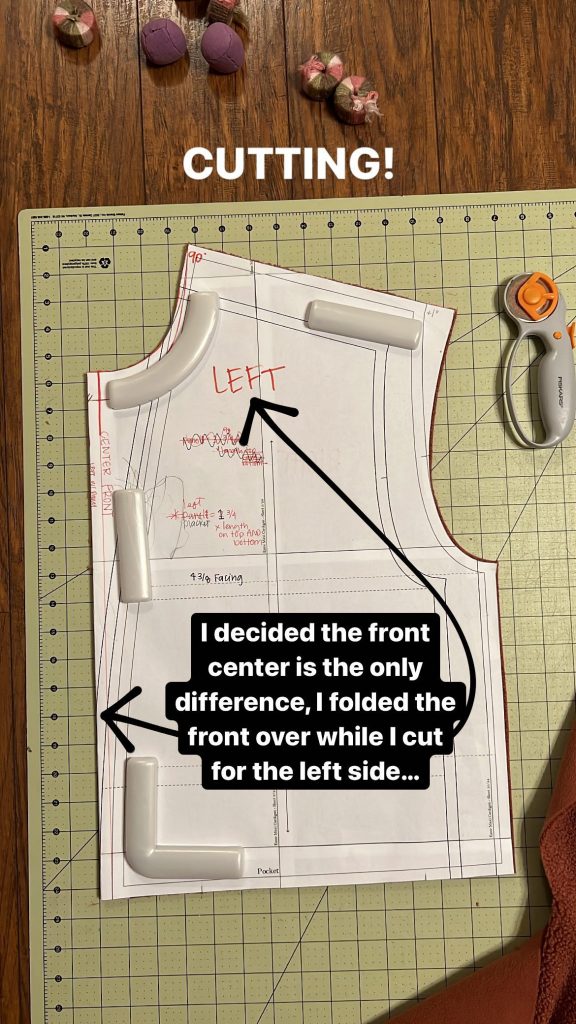
To make cutting the front left easier without having to make a whole new pattern piece, I just folded along the line I drew for the left side — And made sure I was cutting with the right side of the fabric facing up.
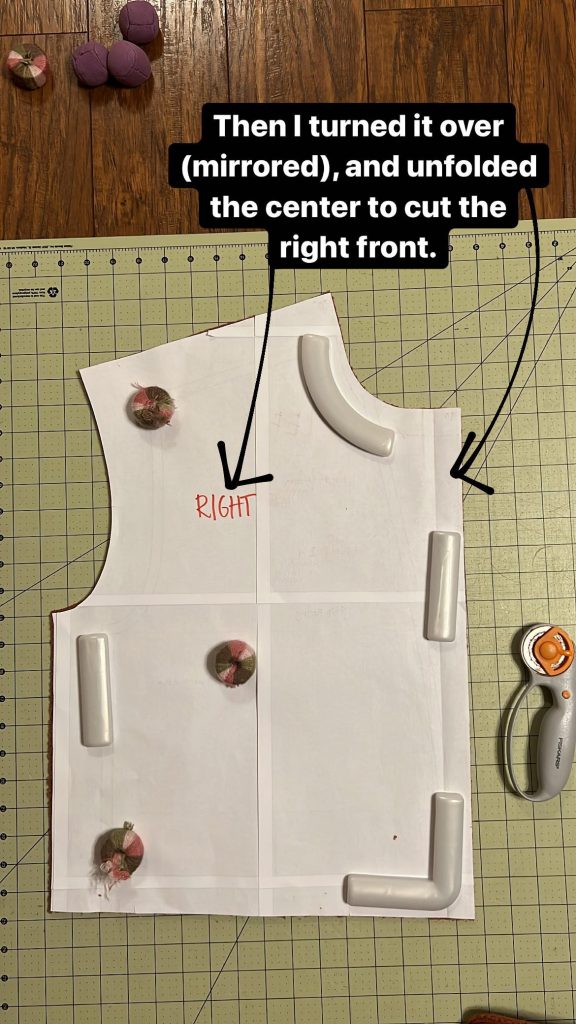
Then I turned the pattern piece over (mirrored), unfolded the center front, and cut the right pattern piece with the right side of the fabric facing up. I wrote a big “RIGHT” and “LEFT” so that I paid attention while cutting. These pattern weights are awesome and so handy.
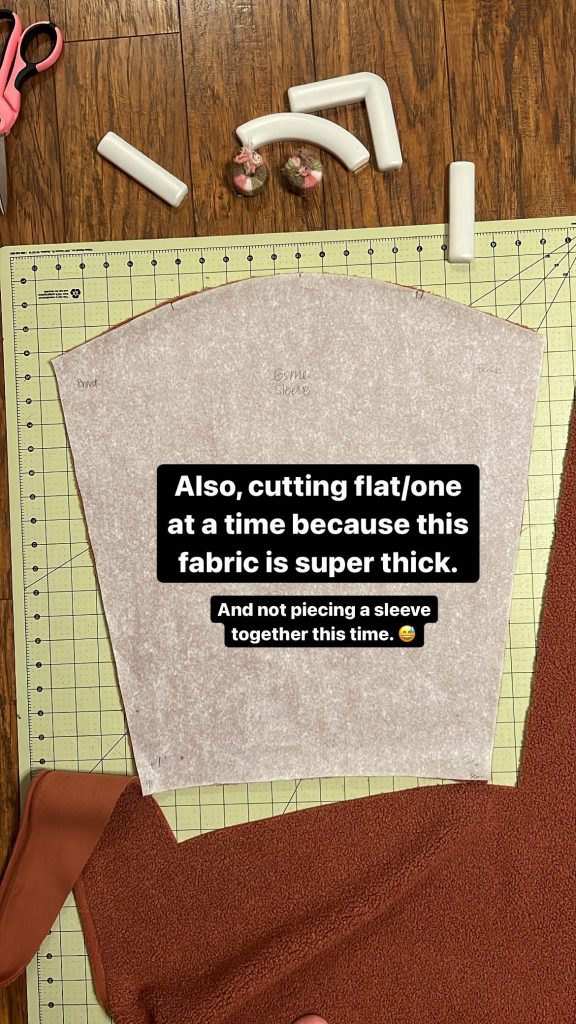
I cut everything in the flat (one layer at a time) because this fabric is super thick. And I made sure to cut both sleeves this time! I also had a pair of scissors handy to snip the notches, because it was difficult to see how much I was cutting with my rotary cutter.
When I was finished I had: 2 top fronts, 2 bottom fronts, 1 back, 2 sleeves, 3 facing pieces (2 front + 1 back), 1 placket, 4 pockets, and 2 cuffs. (I did not use the neckband or the cuffs from the Esme patterns)

SEWING IT TOGETHER
PREP: I serged the outside border of every pattern piece. You 100% don’t have to do that with this fabric, but it got rid of the edge fuzz and made it easier for me to line up the seams. I also changed my stitch length to 3.5mm for this thick fabric.
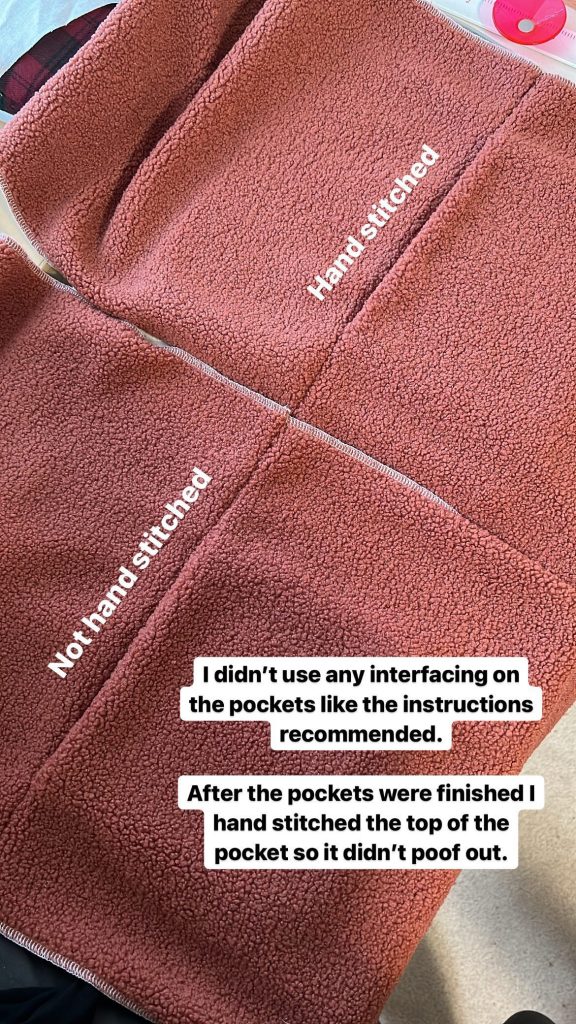
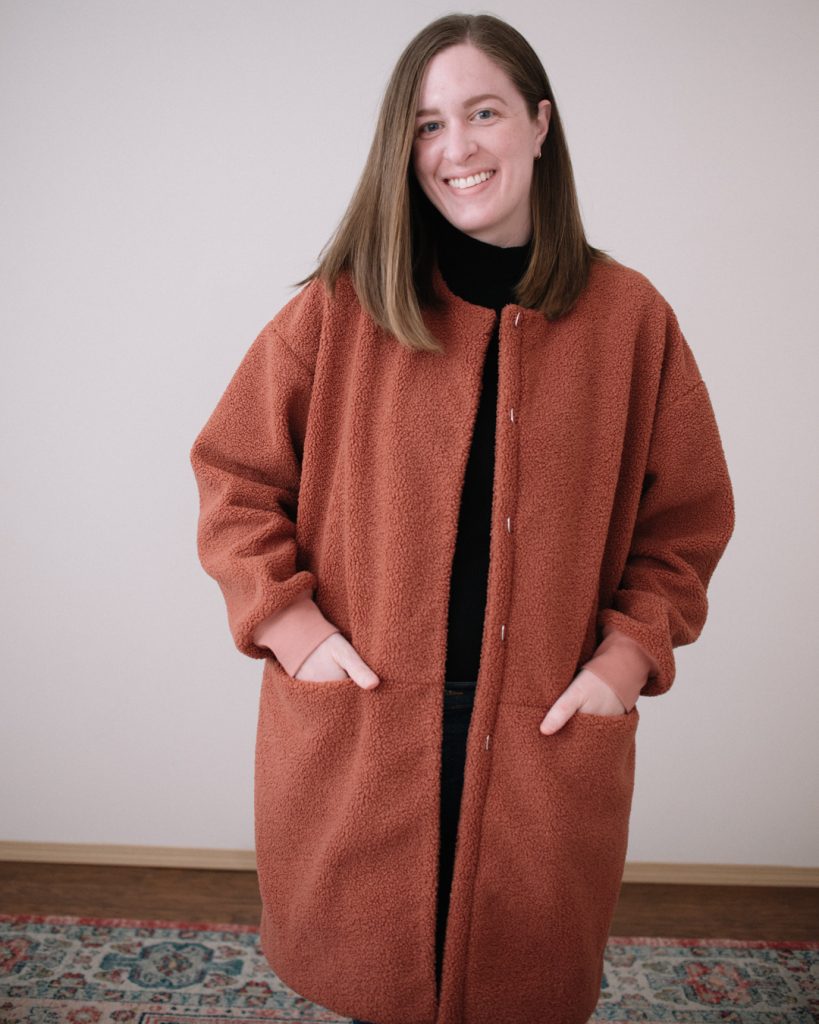
First, I sewed the pockets. I didn’t use any interfacing like the pattern instructions suggest because it ends up showing, but this fabric is pretty stable, so I didn’t worry about it. The pocket poofs out a bit at the top, so I just did a simple line of stitching to hold the layers together and stabilize it more.
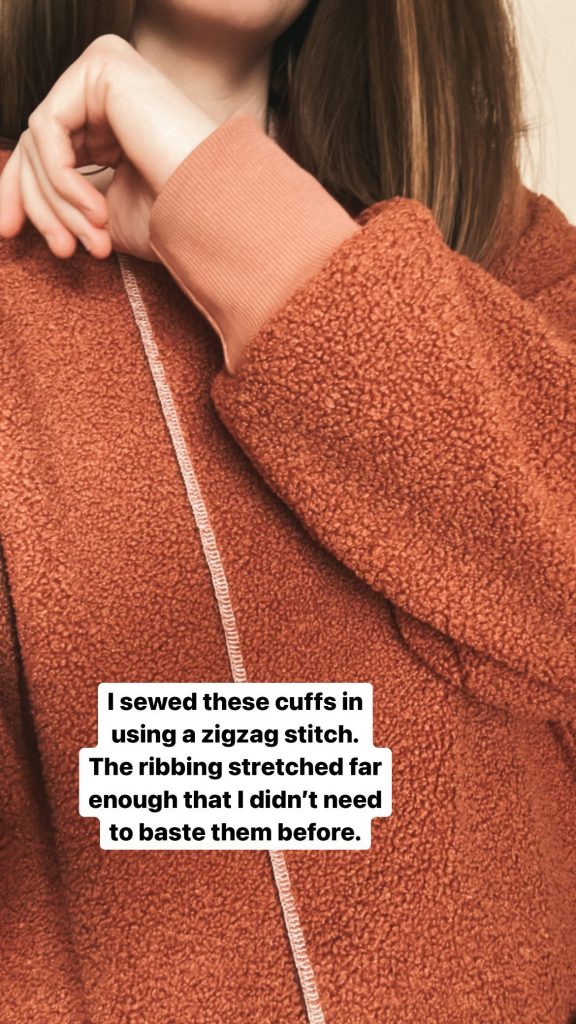
I didn’t have my hook and eyes yet, so I sewed the shoulders, side seams, pockets, and cuffs next. The cuffs I sewed on with a zigzag stitch. I think I did this on my last coat the baste it in, but then I didn’t feel the need to serge on top of that. Even though I added 2″ in width to the bottom of the sleeve, I didn’t need to gather the fabric because the ribbing was stretchy enough.
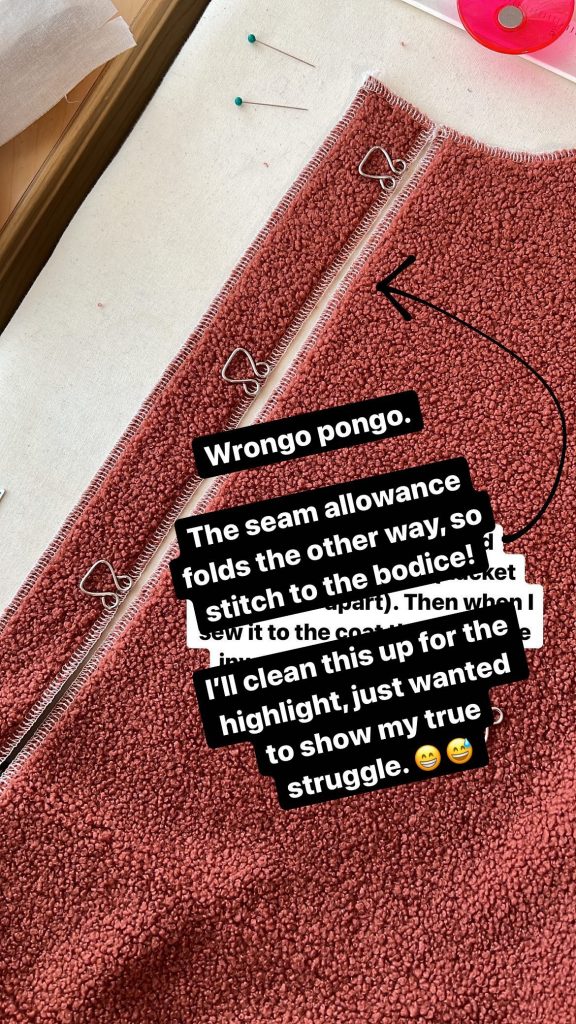
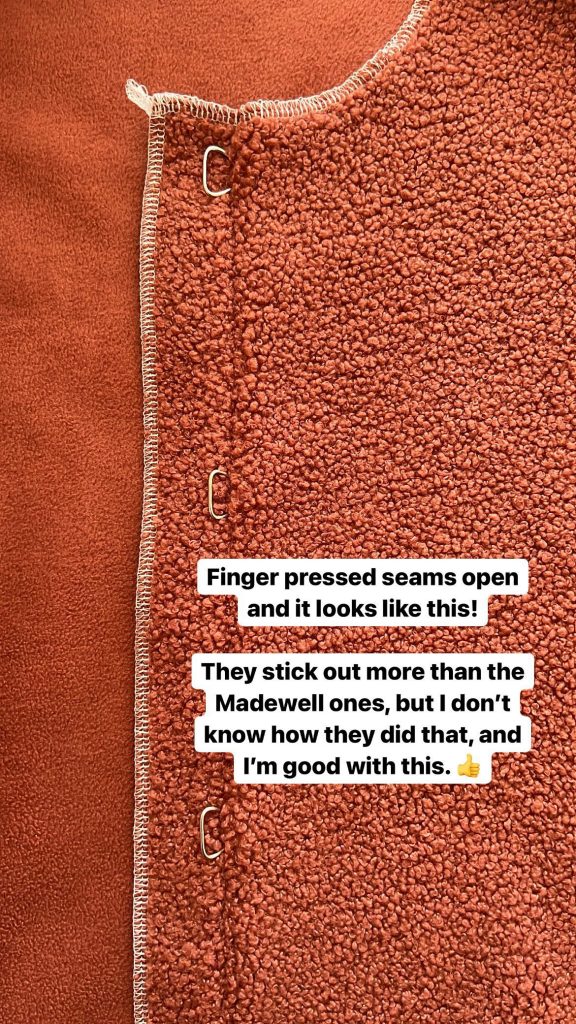
Then my hook and eyes got delivered, and I could finish the placket and facing! I tested out sewing them to the placket first to see if they would face the right way, and that was WRONG. Once the seam gets sewn, the SA gets finger pressed open to the other side, so the eyes need to be sewn to the bodice.
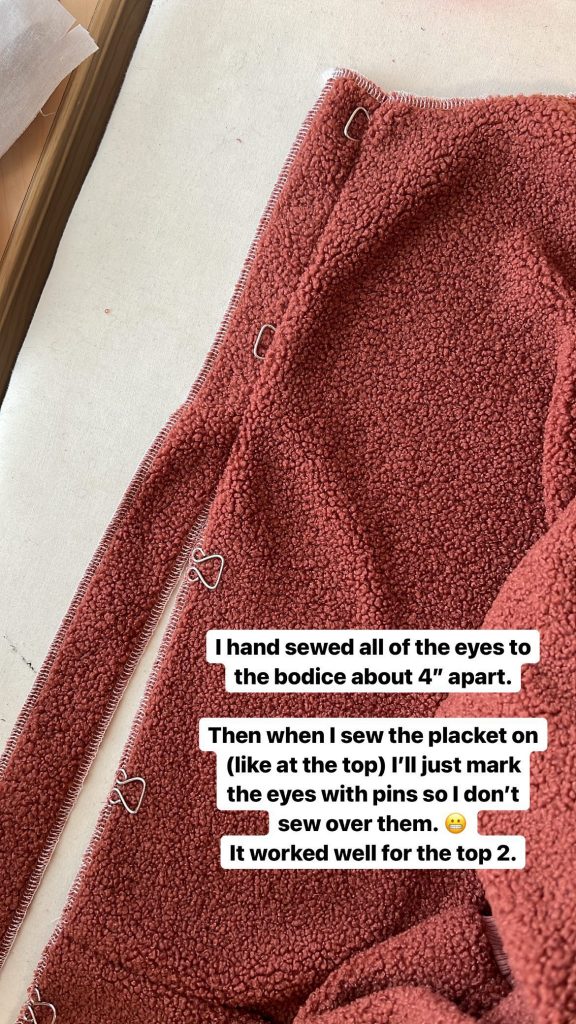
I hand sewed all of the eyes to the bodice about 4″ apart (I watched this video to learn how). Then when I was sewing the placket, I just marked the top and bottom of the eye with pins so that I didn’t sew over them. I went back and handstitched the eyes more securely when I was finished with my coat because they were getting pulled out a little by the hooks. But that was an easy fix. I originally sewed all 6 on, but the bottom one kept coming undone, so I just took it out.
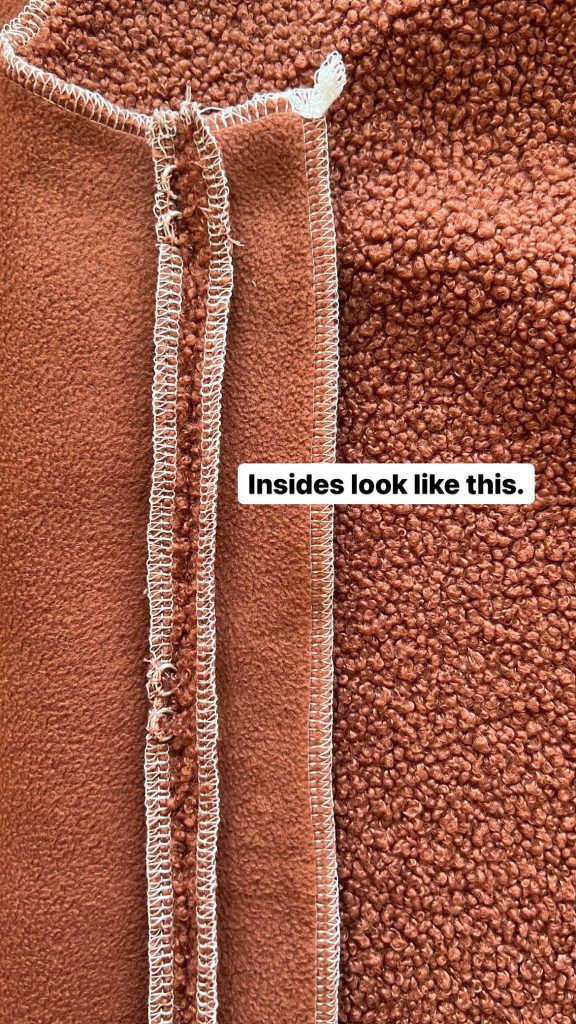
Below you can see what the eyes look like from the inside, so that they lay towards the placket on the outside.
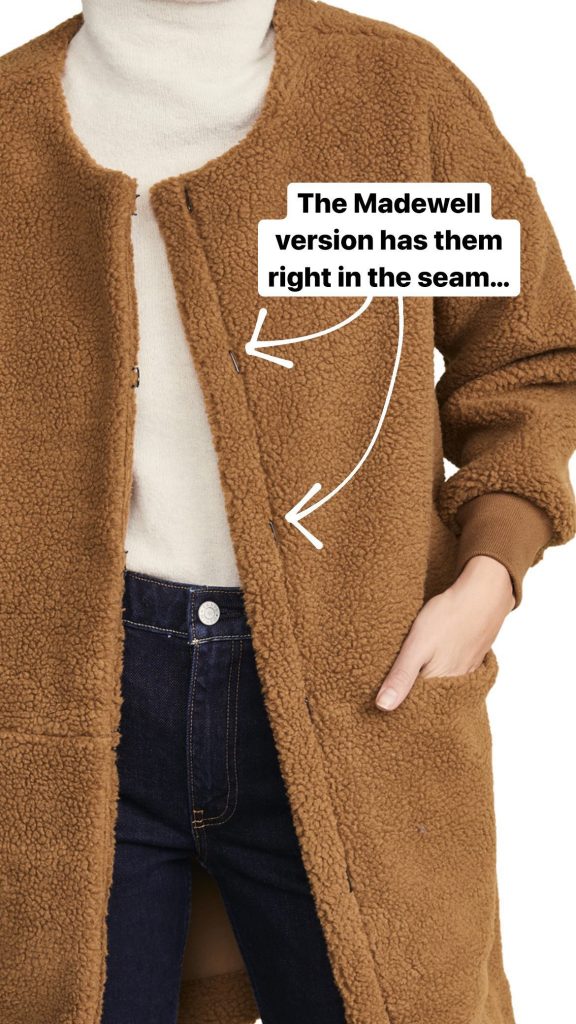
Below is another photo of my RTW inspiration and what their hook and eyes looked like. Theirs stuck out less, but I don’t know how they did that, and I was fine with how mine looked.
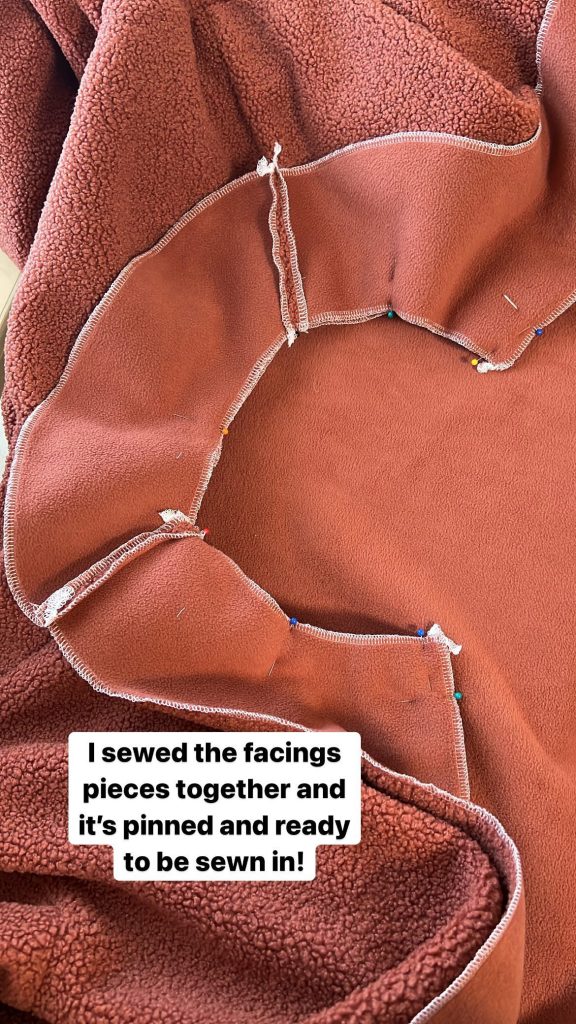
Next step was to sew the facing! I sewed the facing pieces together, and then lined it up on the coat and it matched up nicely. I started at the center back and sewed one side, and then went back to the center back and sewed the other side.
After sewing the facing, I sewed the bottom front facings right sides together and sewed 2″ up from the bottom because I wanted a 2″ hem. Next, I watched this video on how to trim the bulk of the fabric, otherwise you have two little pillows and it’s not cute. Haha. Then I turned everything out to the right side.
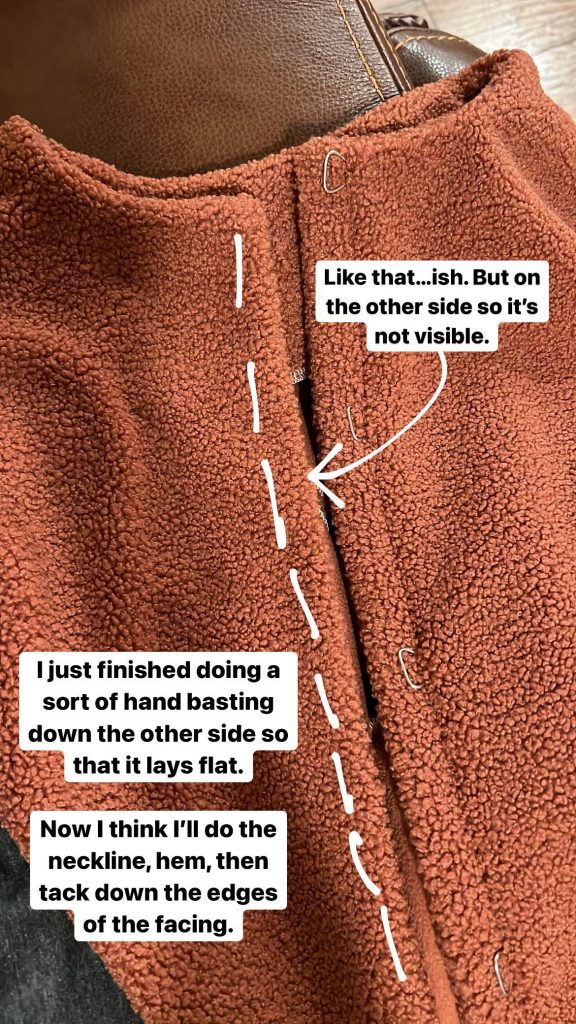
Then I was able to stitch in the ditch of the placket to hold that side together nicely. For the right side, I hand sewed the other side, along with the neckline, and the hem. If you need a refresher on hand stitching, I love this video and keep going back to it. I highly recommend using a wax or conditioner for your thread. It really makes things SO much easier. I’ve been using this one.

The last step I didn’t get a picture of, but I just sewed the hooks on. I lined the right side up with the left and marked with a pin where I thought the right spot would be and went for it! This fabric is so thick, so I didn’t stress about it as long as the placket wasn’t showing, and everything was straight.
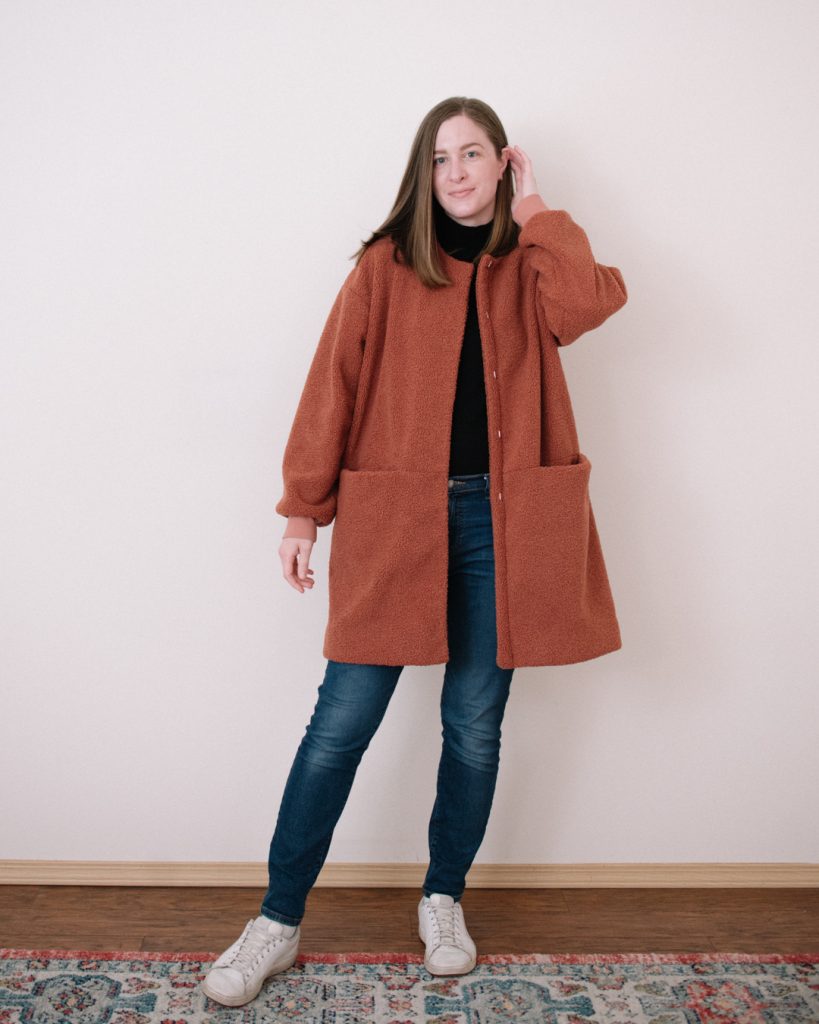
The good news is that I am completely in love with it and have worn it so much in the past week since I finished it (and a little bit when it wasn’t even finished. Haha!) If you want to read my other blog post you can do that right here.
I hope this is a helpful resource and I would LOVE to see your Coat or Cardigan this inspires you to make it! Shoot me a message or tag me on Instagram so that I can ogle over yours too. 😉
As always, let me know if you have any questions and happy teddy coat making!
This post contains affiliate links. For more information see our Affiliate Links disclosure.
Wow! To do it twice! But I can see how you corrected problems and the outcome is beautiful! Good for you to be determined in your work. Sometimes working through trials teaches us more than if we had breezed through the project easily. Love you! Grandma Frame 💕
Thank you, Grandma!💕 It was definitely a test of my will power, but I really wanted that to be a coat I could wear a lot and I didn’t see that with my last one. I’m SO happy that I have this coat now, and know I’ll wear and have it for a very long time!
Your coat is gorgeous! Thanks for sharing your process, including the challenges you faced and overcame! Also, I appreciated all your pattern adjustment pictures – I am sure they will give confidence to others to give it a go – many are quite nervous to change a pattern and your explanations and methods show it is both do-able and yields a great result.
Thank you, Jo! 💕 It was definitely a learning process making these two coats and I’m glad you enjoyed seeing the process! I completely understand how changing a pattern can feel daunting, but it IS very do-able!
Tori,
So for me to make your version, do I purchase and print the pattern from Esme and then incorporate your edits to the pattern, or is there a way to print yours? It is just beautiful!
Hi Maureen,
You would have to print the pattern and make your own edits. I don’t have a way to digitize mine, unfortunately. I’m so glad you like it! 🥰 It’s one of my favorites for sure!