This might be a longer post, but I’m hoping that it’s a really helpful one. I am SO excited to finally share my Sienna Maker Jacket (pattern by Closet Core – PDF / Printed)! I started this jacket at a retreat that I went to back in October, but my stay was cut a day short, so I didn’t quite finish. Then we immediately left on a trip, and by the time we got back, I had lost all momentum on it. Thankfully it only sat on my ironing board for 3ish months before I got around to finishing it, and I’m so happy that I get to wear it now!
The jacket retreat that I went to was taught by Karen Dolen (the jacket & coat making maven) at Makers Hideaway in Stanwood, WA. The hideaway is a maker retreat center owned by Michelle and Sharon of Style Maker Fabrics. Classes are taught there, but you can also book a trip with friends! An added bonus is that their fabric store is located in the garage space of the Hideaway. What more could you want for a retreat?!
I work for Style Maker to help manage their Instagram account, so I was given a discounted rate to attend in exchange for working and sharing content on Style Maker’s Instagram account during the retreat. You can click here to see all of the stories that I shared about the experience.
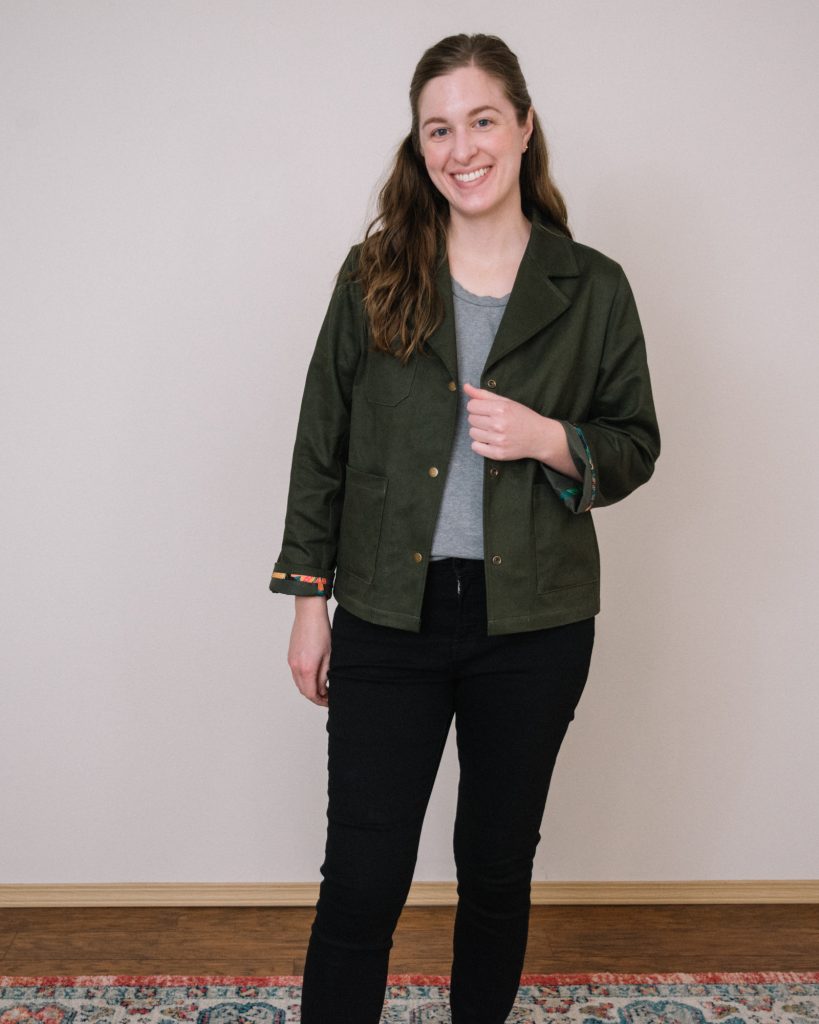
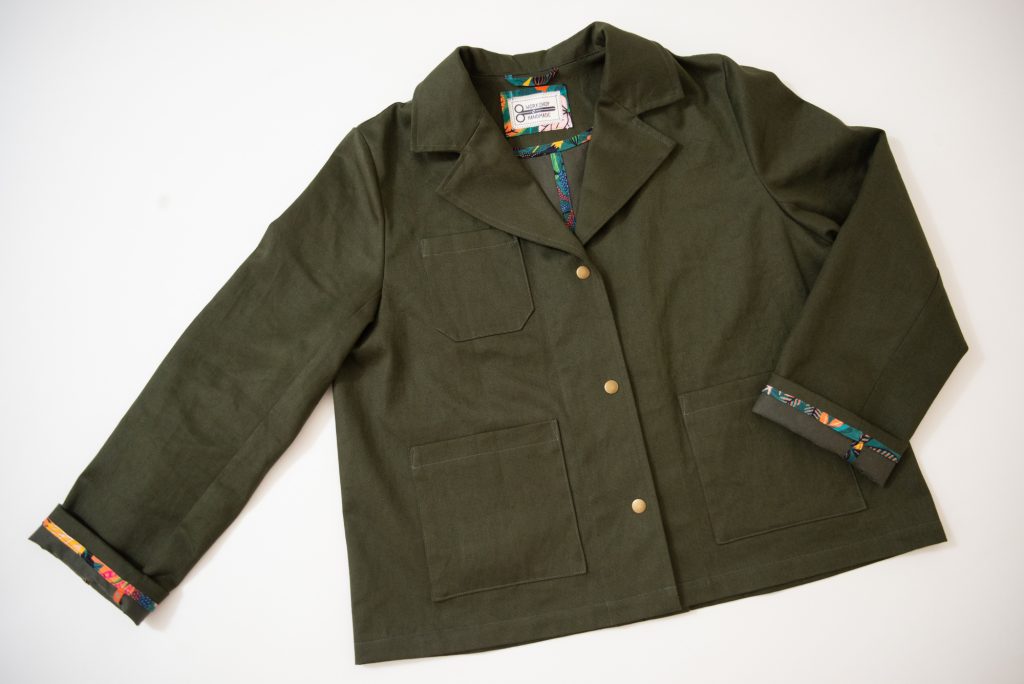
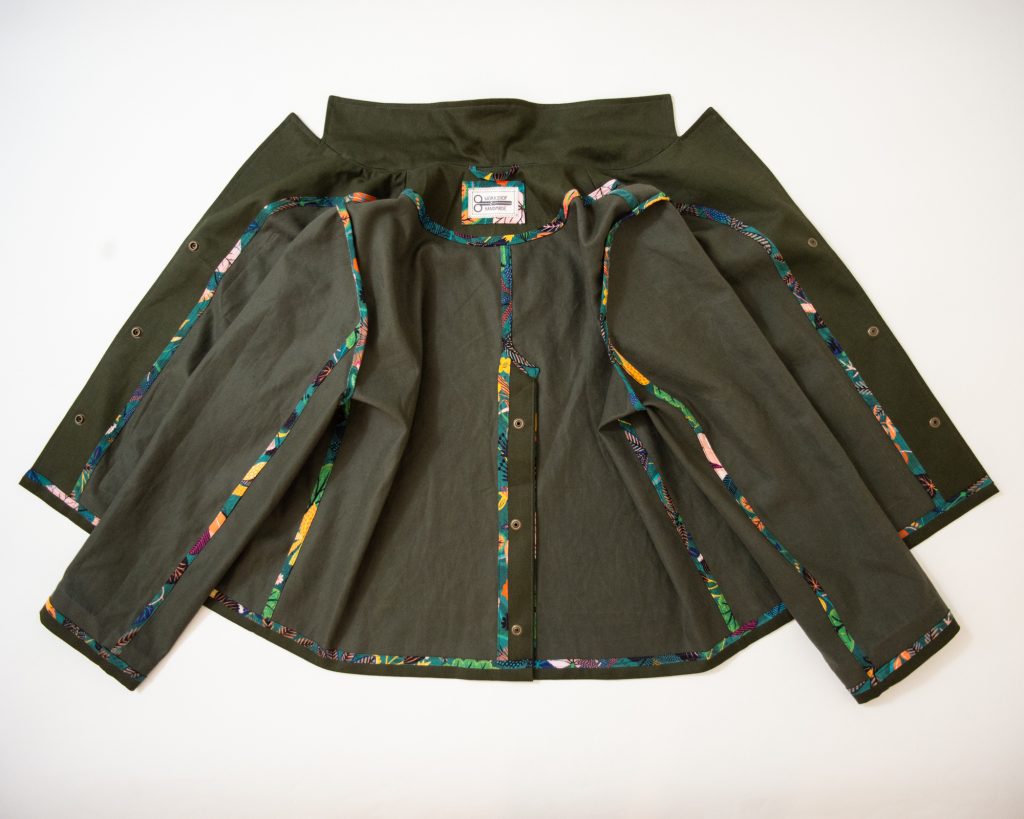
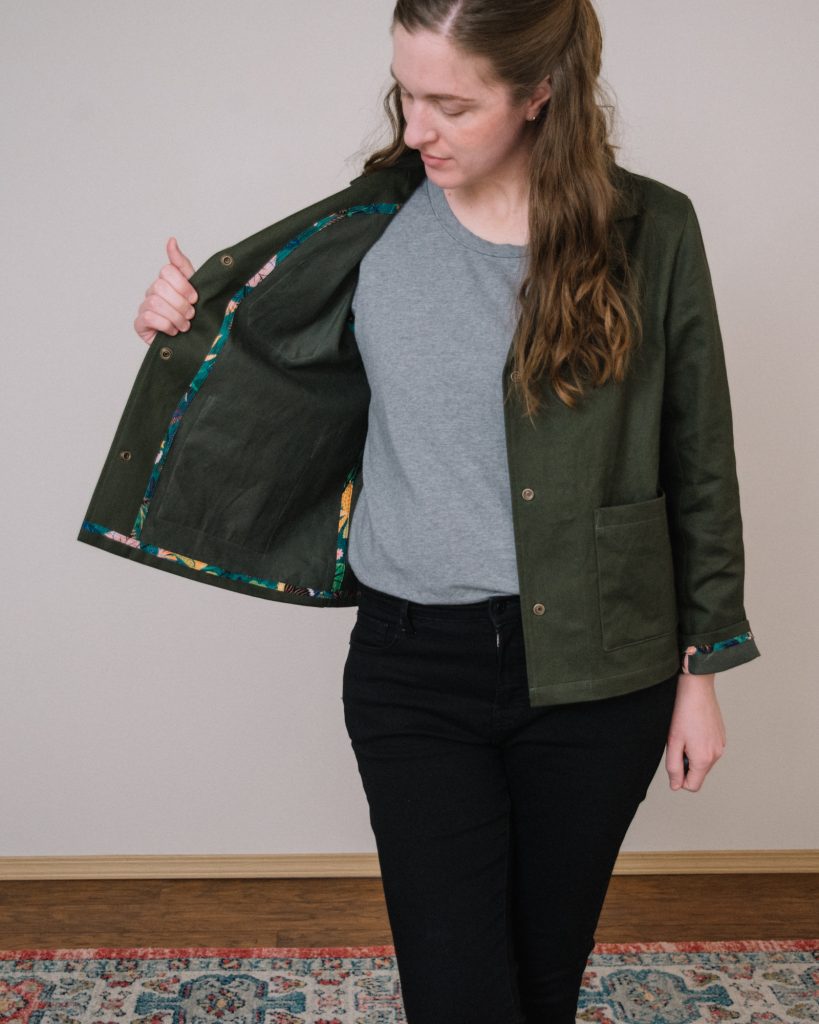
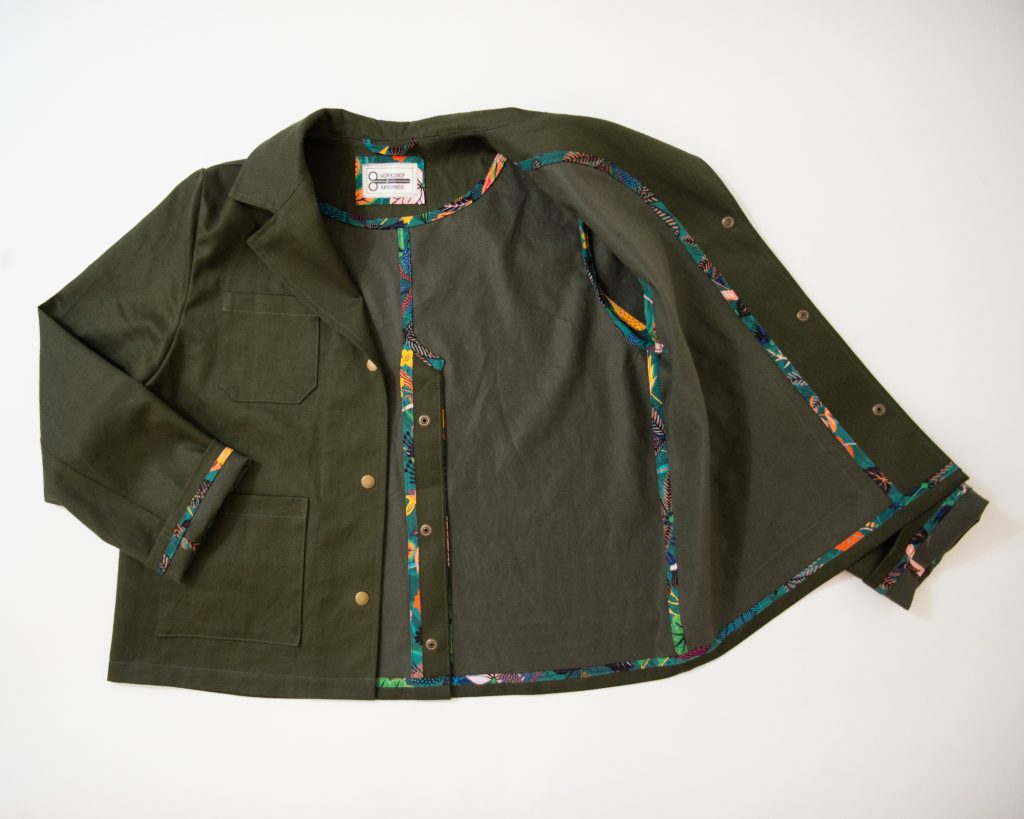
First off, I chose this All Weather Hemp Cotton Twill (color: olive) as the main fabric for my jacket. The fabric that I used for my bias bindings and pocket lining (you can’t see, but they are lined!) was this Gardenia Rayon. I also used this woven interfacing and these metal snaps (color: antique gold). Style Maker has Gutterman thread to match any of your projects. You can even order it with your fabric and they’ll match it for you! So even though I went through my first spool of thread while I was there, Michelle just brought more down to me! It was truly the BEST. So just know that if you make this jacket with bias binding, you will most likely need 2 spools of thread.
One of the major pluses of coming to Karen’s class was that she made a muslin for every size, 0-20, for us to try on. Karen and I are also similar in size, so I was able to try on her finished Sienna Jackets too. I am between a size 12 and 14 (my measurements: B38 W33 H42), and after trying on both sizes, I decided to make the size 12 with a broad back adjustment (something I haven’t done before). Karen had a book called ‘The Fitting Book’ that showed a couple of different ways to do the broad back adjustment. I basically drew a vertical line 2-3 inches in from the shoulder, and horizontal line 2-3 inches down from the armscye, then cut both lines — but I left a little bit to pivot at the shoulder. I pivoted about an inch out towards the side seam, taped it, and then adjusted the side seam. I do think it helped with the tightness across my shoulder blades, and it was an easy adjustment to make.
Another adjustment I made was to lengthen the bodice pieces and facings by 1″. The instructions have you fold under 5/8″ twice to hem, but since I was using the binding, I just sewed it on with a 1/4″ SA and then hemmed up 7/8″. So that ended up adding some extra length. I didn’t lengthen the sleeves at all but hemmed them the same way, which had the same effect.
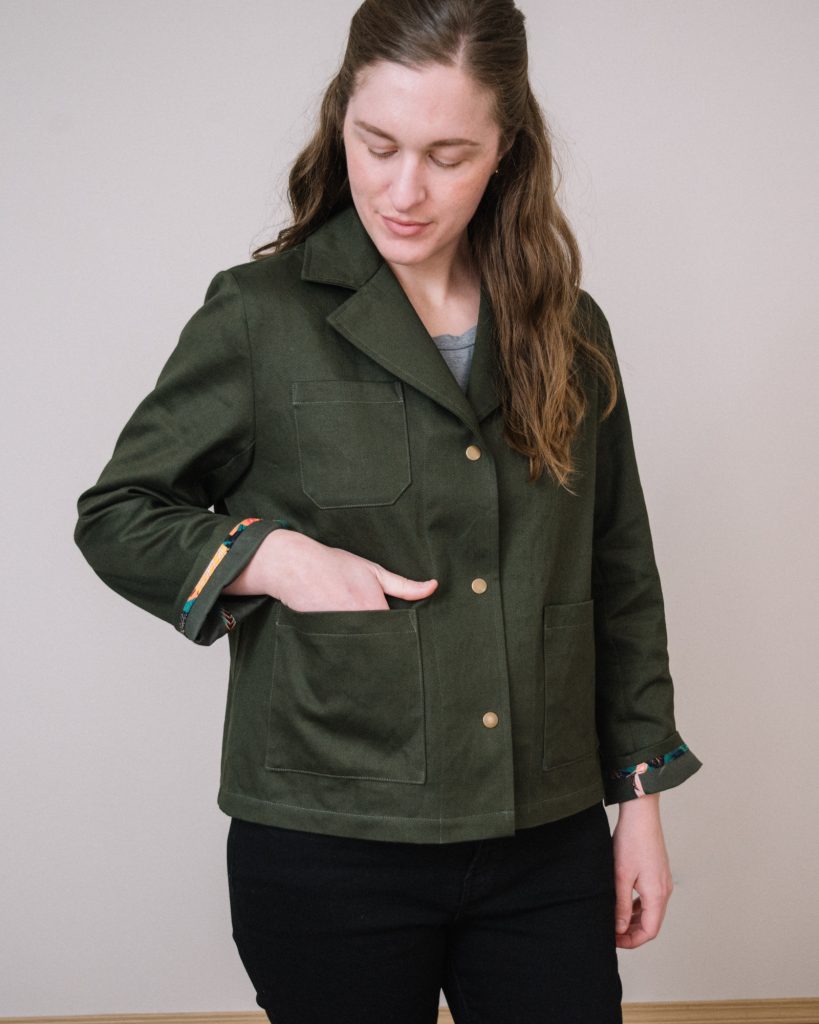
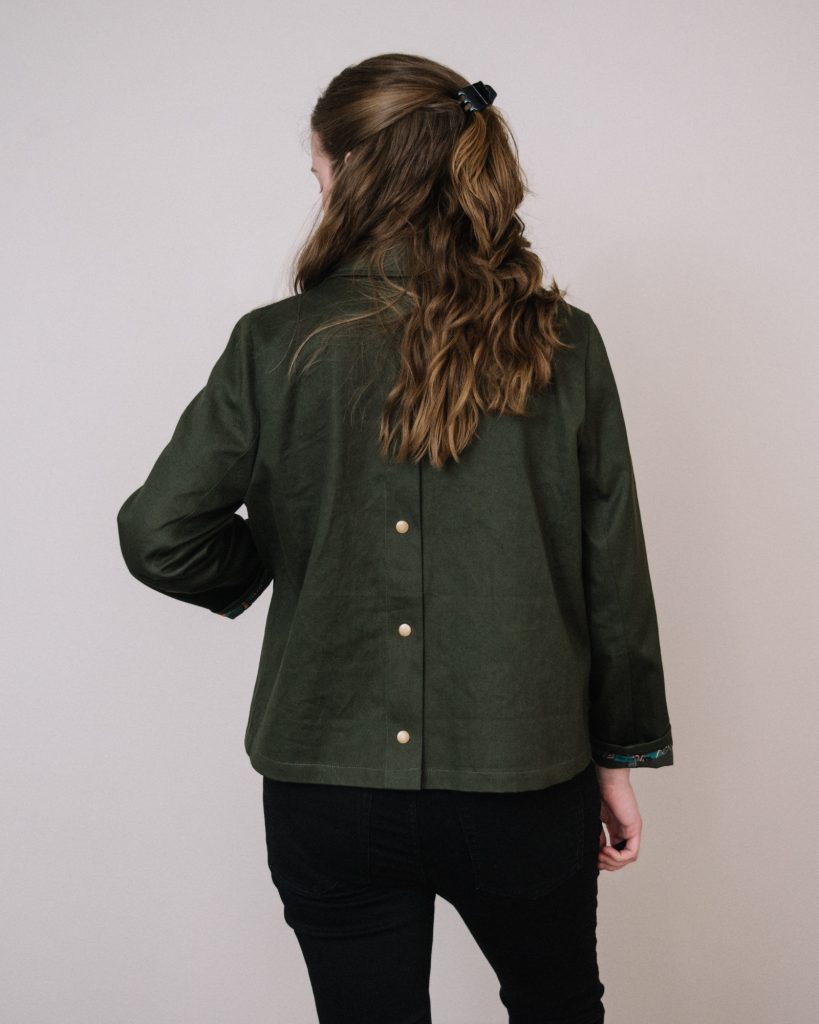
I made view C with view A/B sleeves. I decided that I wanted my jacket to snap the opposite way that the pattern suggests, so that is opposite on mine. And since I did that, I also moved the small pocket to the other side. I think Karen had us to that at the beginning, and I’m glad I did that!
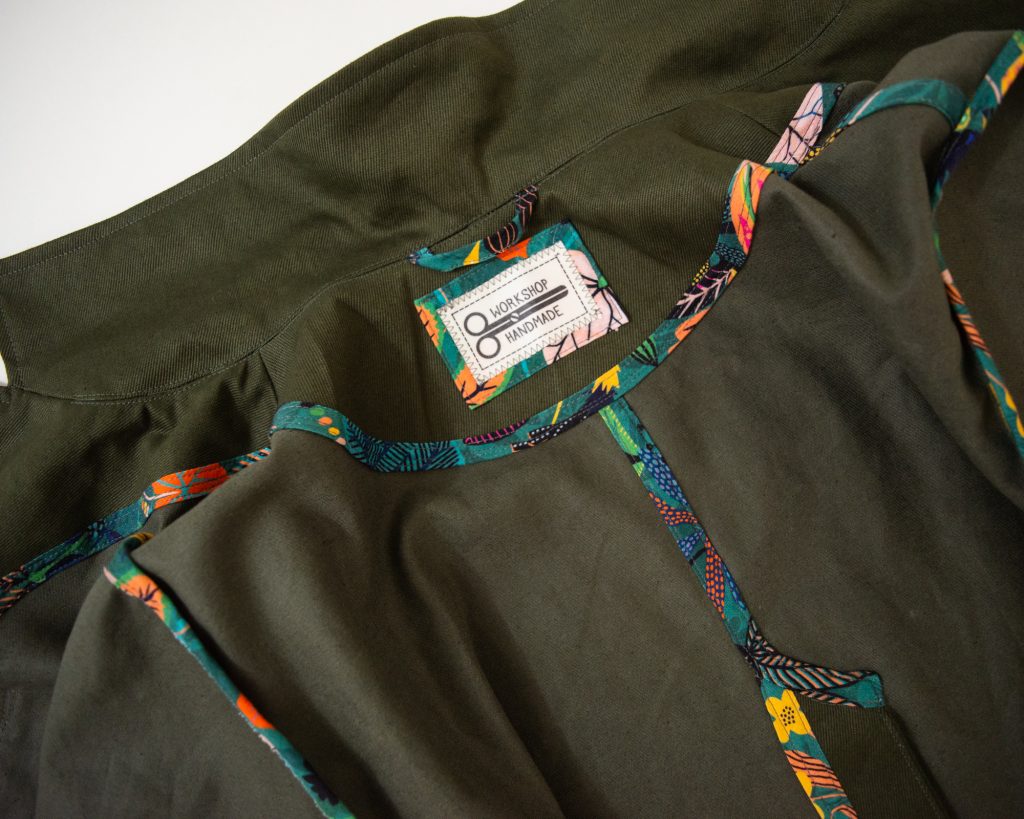
Karen is truly a wealth of sewing knowledge, and I’ve learned so much from her over the past few years since we met. She had so many great tips during the retreat, but there were a few that really stood out to me. First, she taught us how to make continuous bias binding. I’d seen this on YouTube but had never actually tried it. She walked us through it, and it really came in handy when we were doing all of the inside binding. She also taught us how to do her binding finishes, which are kind of a cross between a Hong Kong seam and a flat felled seam. The result is very clever and beautiful.
The last thing I’ll share that she taught is that you should always press your seams, but you should also press your seams open before pressing them to the side. This made so much sense and would make things like French seams go so much smoother. The pressing tools that we used were a game changer. I thankfully have a great iron already, but I’ve learned from Karen in the past that a wood clapper makes a huge difference. We also used a wool pressing mat, and it works really get both sides hot and pressed so nicely. It doesn’t smell amazing, but you learn to live with it. Haha. I ended up buying one in December, and I was so glad to have it when I was finishing my jacket.
When I left the retreat, I was only about 2/3 the way through with my jacket. I still needed to sew the lapel and facings to the jacket, sew my sleeves, hem, and add my snaps. Sewing the lapel was a little tricky compared to other shirts I’ve sewn with this type of collar, but hopefully mine holds up with the topstitching.
I was most nervous about the snaps, but the set comes with the tools to install them. I did a test one first and it went smoothly, so I just went for it! I used my garage floor so that I had a solid surface, plus it was quieter because my baby was napping. Haha. There are a few that look questionable on the inside, but from the outside they look fine and are fully functional. I’ll have to do some research to make sure I do them better in the future.
Karen made us all tags that said, “Workshop Handmade” and showed us how she sews them to the garments that she makes. It’s so cute, right? She plans on doing more retreats at Makers Hideaway later this year, so be sure to sign up for the Style Maker newsletter to get notified when more dates are open.
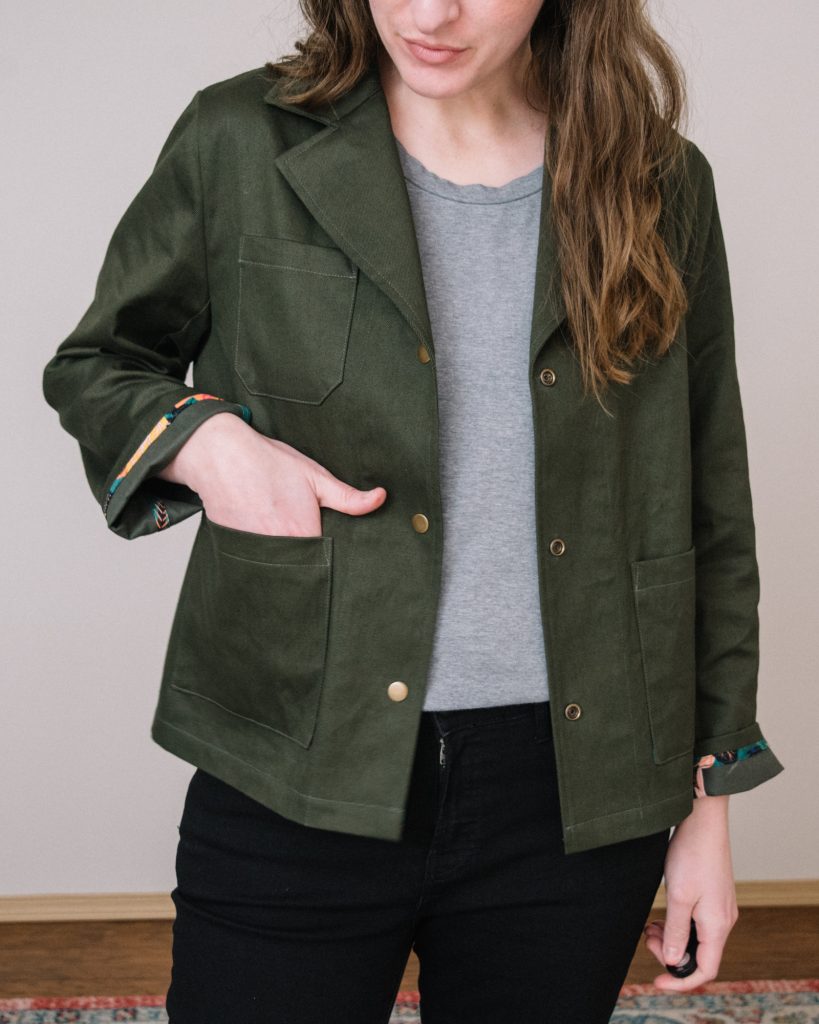

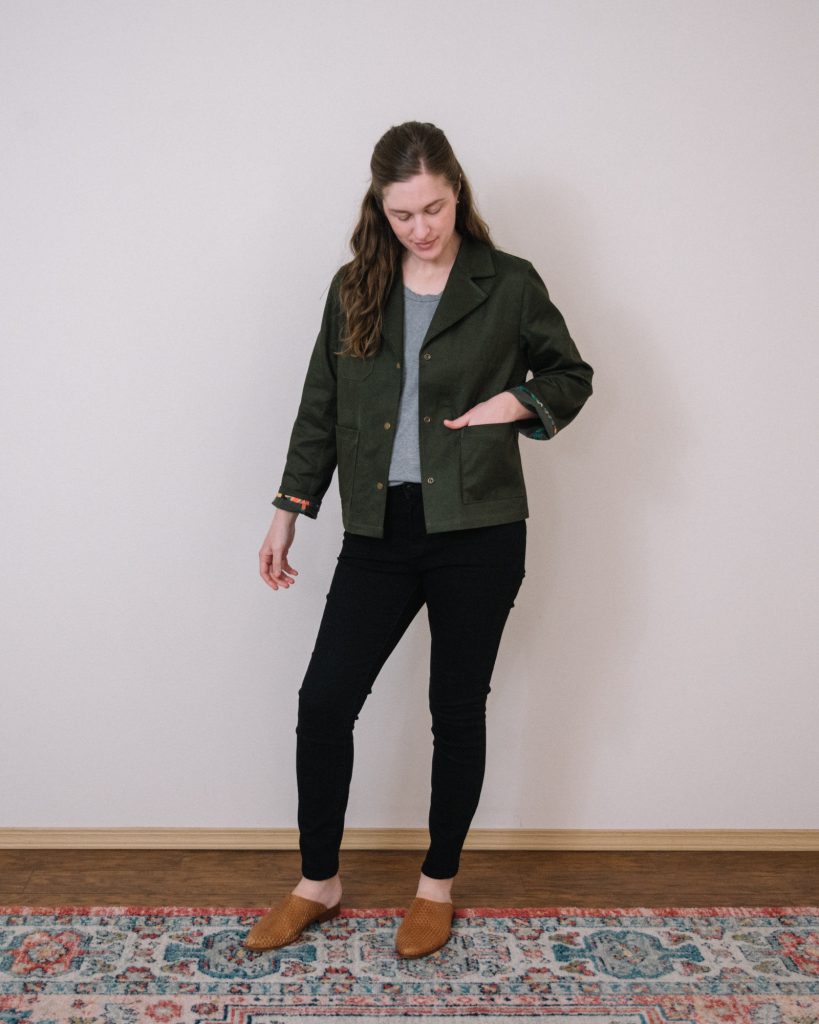
I was a little unsure how I was going to style and wear this jacket, but I LOVE that it goes with so many things in my closet! This olive color really was a good choice for me. I love that the fit is loose enough that I can comfortably wear a sweater under it. It’s even cute with dresses and it’s going to be a nice layer during the spring too. Plus, it kind of has green moto jacket vibes and I’ve been wanting a moto jacket for a long time, so I’m glad to have this jacket to fill that craving for a while.
If you have any questions about the retreat or the jacket, let me know in the comments! Happy jacket making, friends! xo
Hi Tori!
Super jacket! I’m very interested in the binding method that you used. Does Karen Dolen (or anyone else that you know of) have directions for the technique that you used?
I second that! I’d love to hear how to do them!
Hi Lauren! I just responded to Lodi with the binding info, so hopefully you were notified too. Let me know if you have any questions!
Hi Lodi! Thank you! It really is just a cross between a Hong Kong seam and a flat felled seam. I learned how to do Hong Kong seams through videos on Youtube, and there are some really helpful ones! Once the bias is sewn to the seam, I just pressed and under-stitched. Then once the bias fabric is pressed and tucked under nicely, you just topstitch like it’s a flat felled seam. There were a couple of seams that didn’t get flat felled, like the armscye, but I think most of the others are stitched down in place. I hope that helps!
So many cute details in this jacket. It looks so good on you. Good instructions! 💕
Thanks Grandma! 💕 I’m so glad you enjoyed the post. It was a pretty involved project, but very worth it!
Loved your post, Tori. What a great summation of the class. I have been so pleased to see the finished versions from others who didn’t quite finish. They all looked so good! If you’re like me you will want to make more in the future out of different fabric types and prints. It really is a versatile pattern and I know you will find lots of ways to style it.
Thanks Karen! You really did such a great job with the class! I would love to make a longer one with black fabric for a more casual twist on a blazer. My lifestyle doesn’t quite justify having a blazer, but something like this would work!
Having made a toile of the Sienna jacket, I really want to bind the seams of my actual garment but couldn’t work out how the Hong Kong binding worked with the topstitching to create a neat and pleasing finish. I would love to hear about the method you used, it sounds ideal.
Hi Andrea! I made my Sienna about 4 years ago, so it’s a little bit hard for me to remember exactly. I just went to look at it, and it looks like the binding was sewn with the garment seam, then it was pressed and under stitched to the seam allowance, then it was folded under the SA, and that’s when the flat felled seam happened to stitch it all down. The long seam of the sleeve isn’t flat felled, it’s just folded under, stitched again to the SA, and then the SA is press down so that you don’t see the raw edge of the fabric. It’s so hard to explain in text, but I hope you have good luck finding a method that works well for you! xx